These Exploding box step by step instructions will help you to make an exploding box. This stylish box will become an original gift for your friends and family and will impress them favorably! It’s step by step instructions, so it’s very easy to understand it.
We all love to wish each other well on different occasions and to find novel ways to wish well and merry. We always try to keep you updated with the recent trends in making cards and other gifting options. You should always try to go beyond what is expected from you when wishing someone great. On the occasions of birthdays, anniversaries one can always go for the simple handmade cards like always but it is better to experiment. We have brought to you this exploding box step by step instructions to make for a great gifting option this season. Let us have a look at this exploding box tutorial.
Required Material for making Exploding box
Color cardstock, Color paper, Scrapbook paper, Ruler, Pencil, Brush, Scissors, Craft knife, Wooden board, White glue, Stationery glue, Multipurpose glue, Hot glue gun, Empty ball point pen, Decorative clothes pins, Parchment paper, Permanent marker, Nail polish, Glitter, Star stickers, Tags and other embellishments, Foam plastic ball, Felt, Ribbons.
You can also add material to decorate this exploding box craft on your own. It will look pretty.
Exploding box step by step instructions
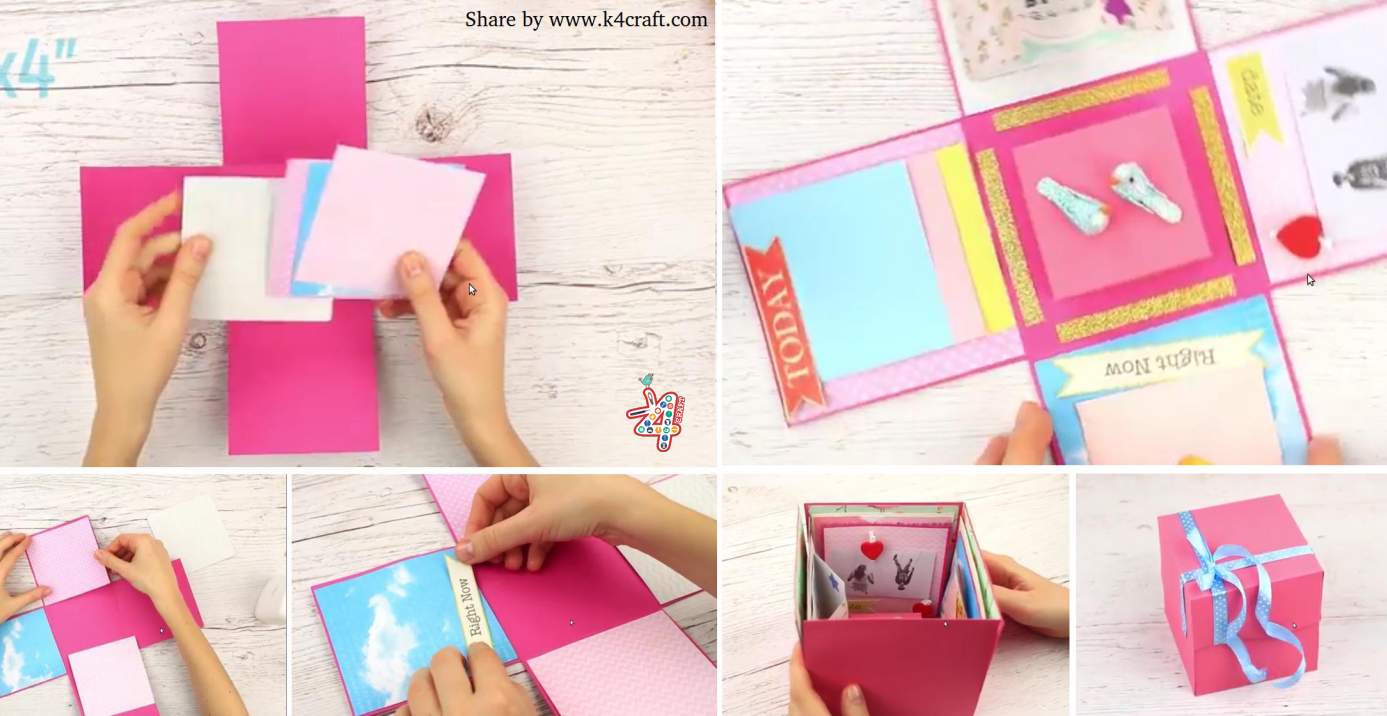
Step 1: The basic structure
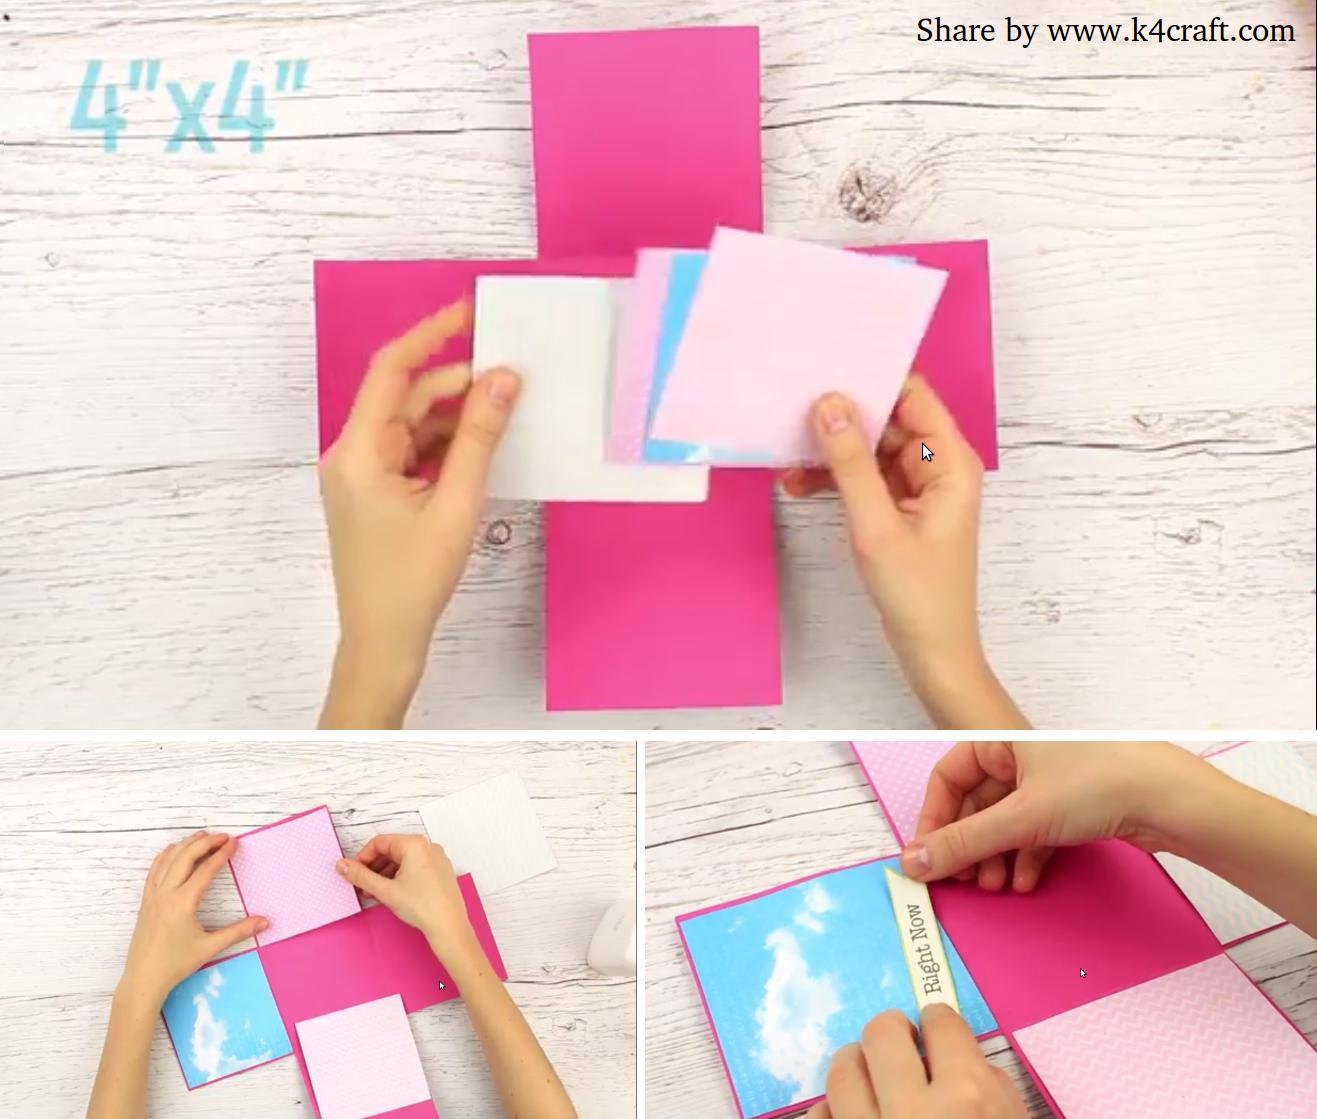
This step involves planning and execution. This step is easy. You must start by taking a reference of the measurements of the final box to start your box making procedure. Take colored square pieces of the size 4″ x 4″. Stick these square pieces on a template of box making shape. To make a box you require a shape with a central square piece and squares on all the four sides. Stick the colorful squares on all the side squares of the box making template to make the inner portion of the walls of the box. Repeat the steps with other sized box templates as well.

Step 2: The message envelopes
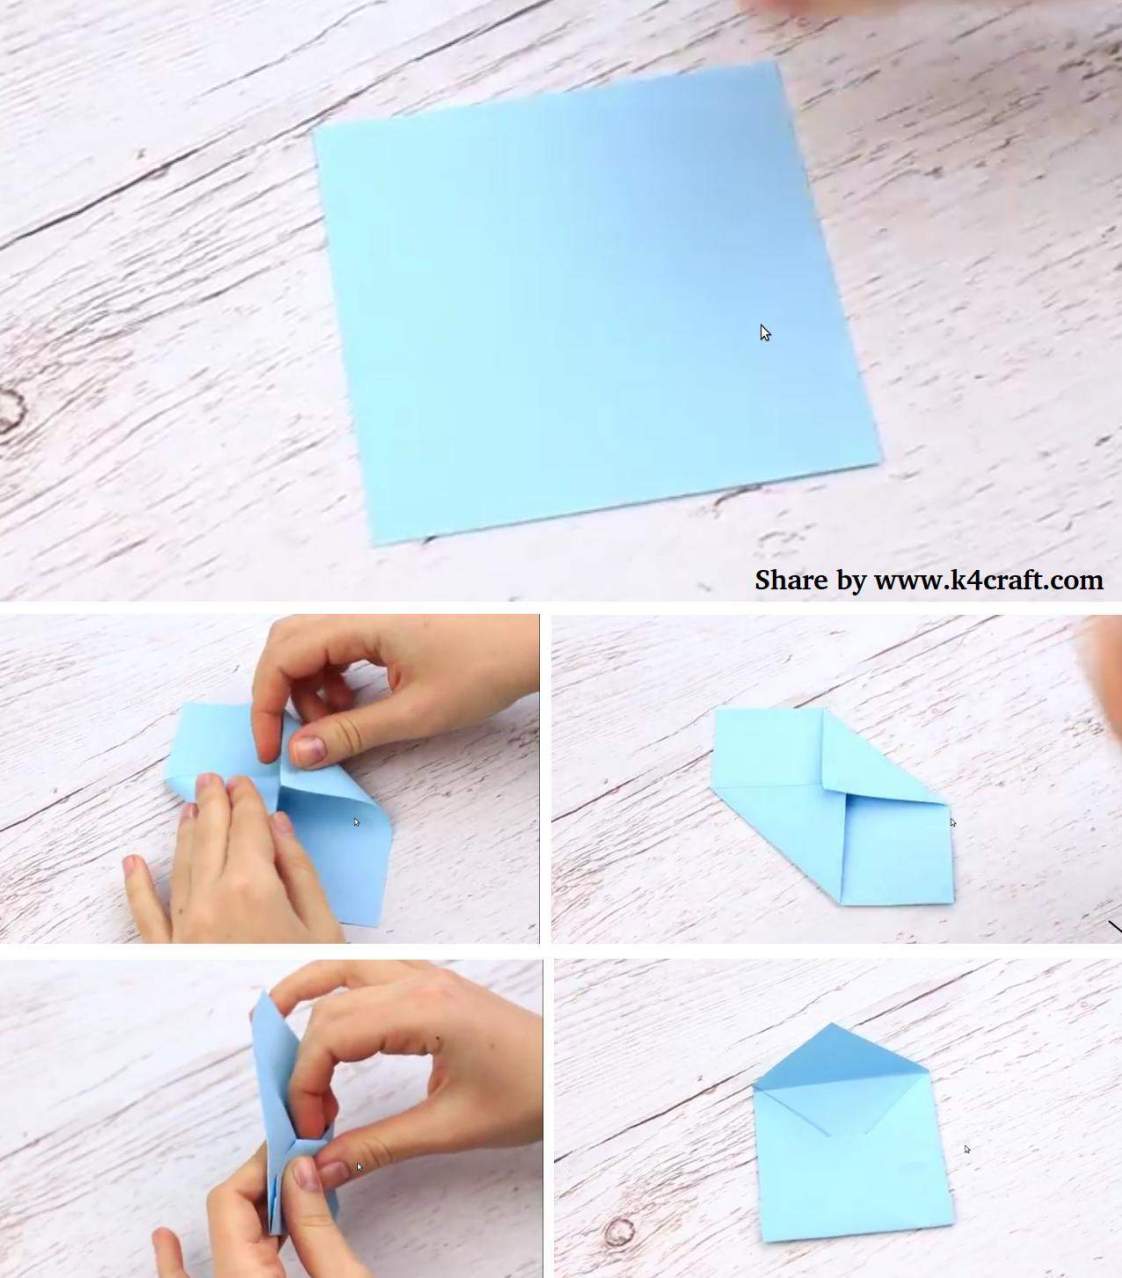
We will be making these small sized envelopes to put in our messages and well wishes for our loved ones. You can make these small sized envelopes using some square pieces of colored paper. These small envelopes can be made with paper folding techniques. First of all fold the two opposite corners of the square sheet of paper and make them meet each other in the middle. Now take the lower edge of the square sheet. Fold the corner edge of the lower fold on the meeting of the meeting of the side folds. The upper corner of the square piece of the sheet can be used to close the message envelop. This looks pretty and sweet.
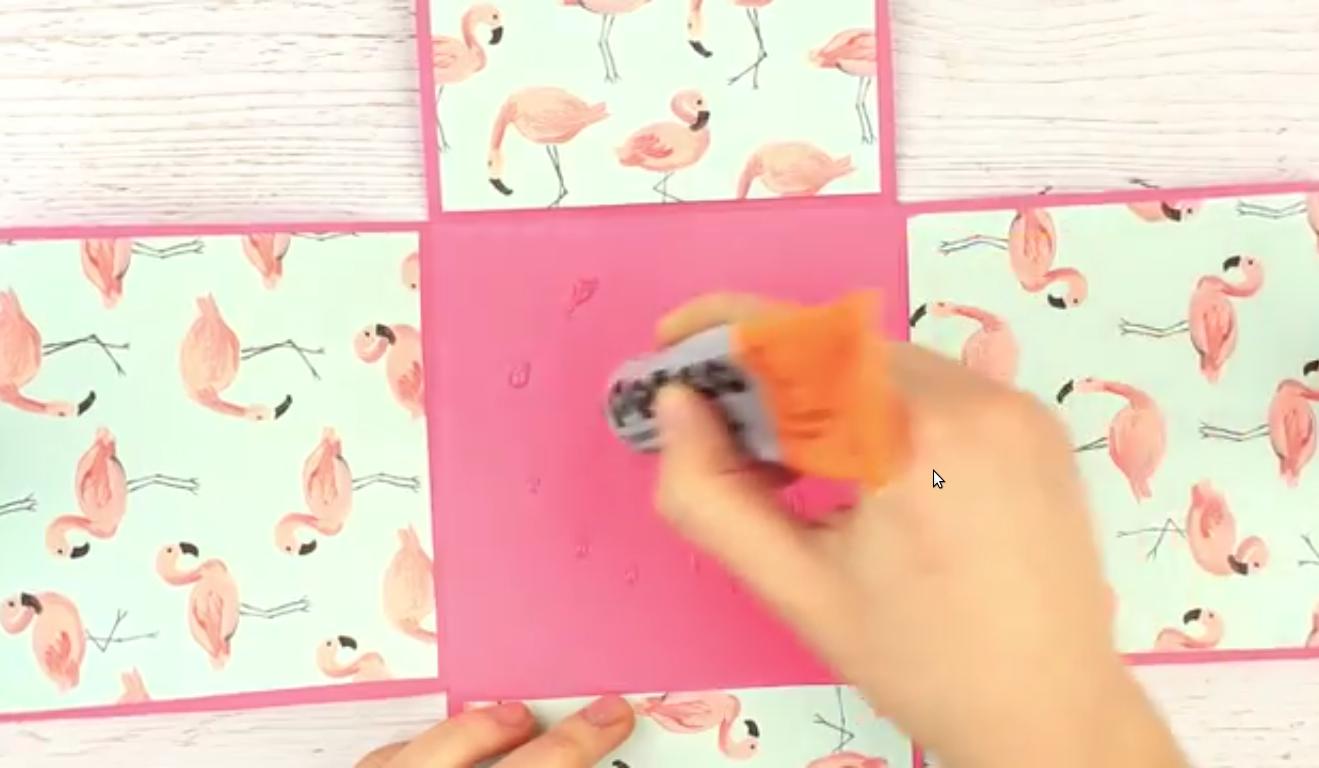
Step 3: Sparkling Hearts
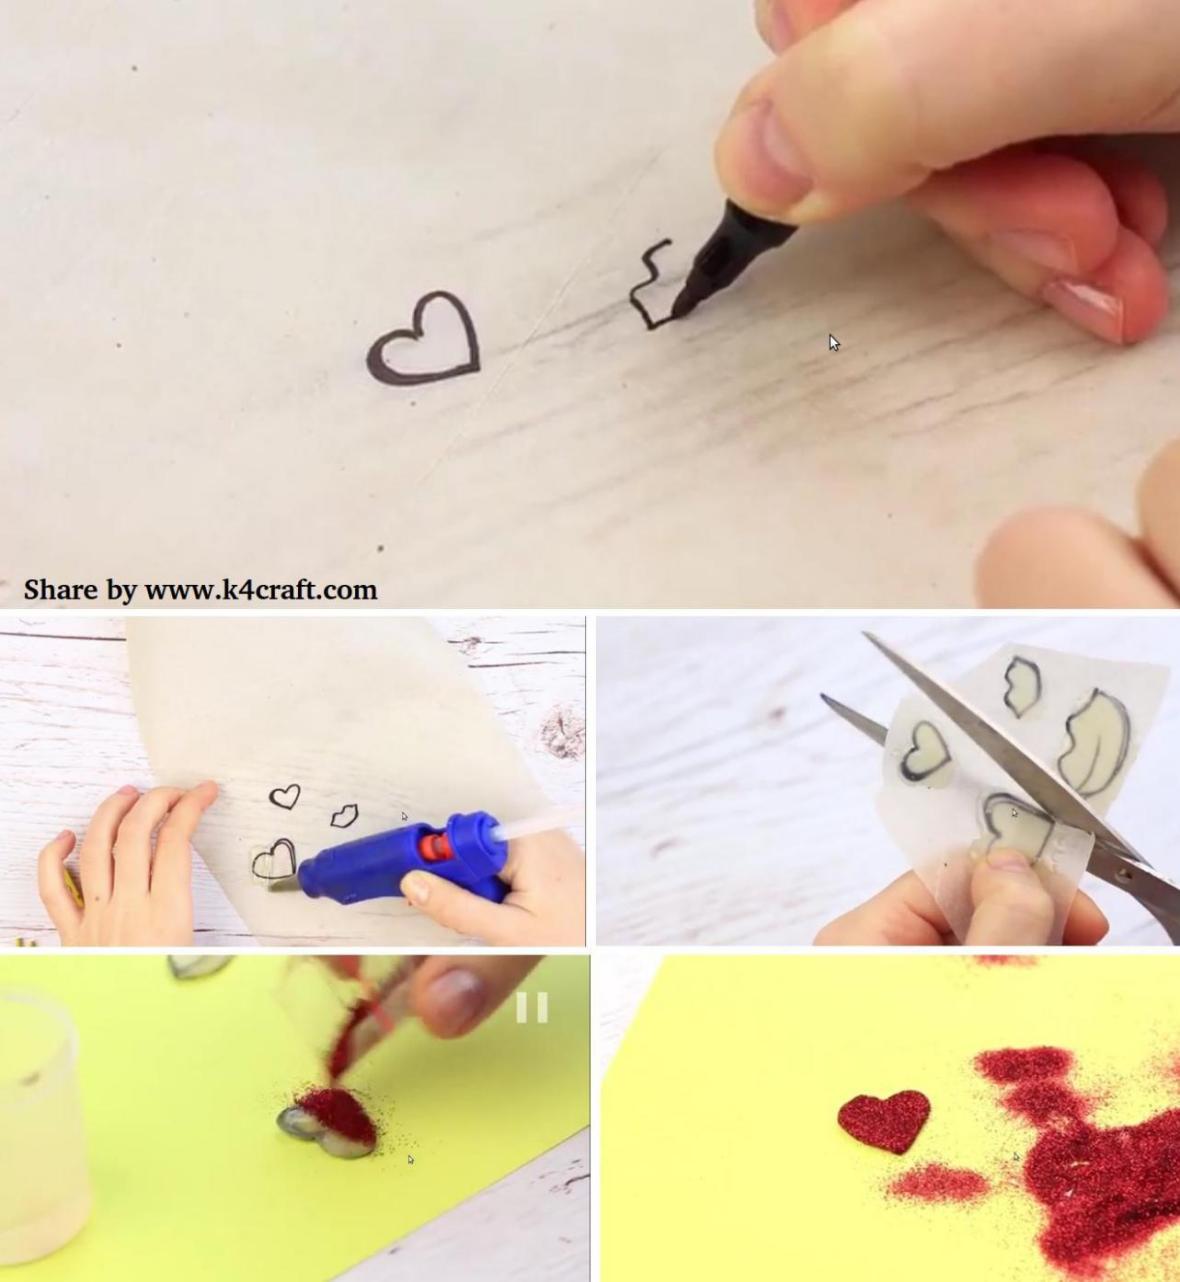
These are some really pretty heart crafts for your exploding box craft. It looks great to stick these glitter hearts inside the exploding box craft. You can make these glitter glitter hearts by tracing the heart shapes on the tracing paper. Now cut along the outer boundary of the hearts made on the tracing paper. Apply the glue on the hearts shapes cut from the tracing paper. Dip these glue laden hearts in red glitter. These heart shapes look great. You can make other kinds of crafty shapes using the same technique.
Step 4: Messages
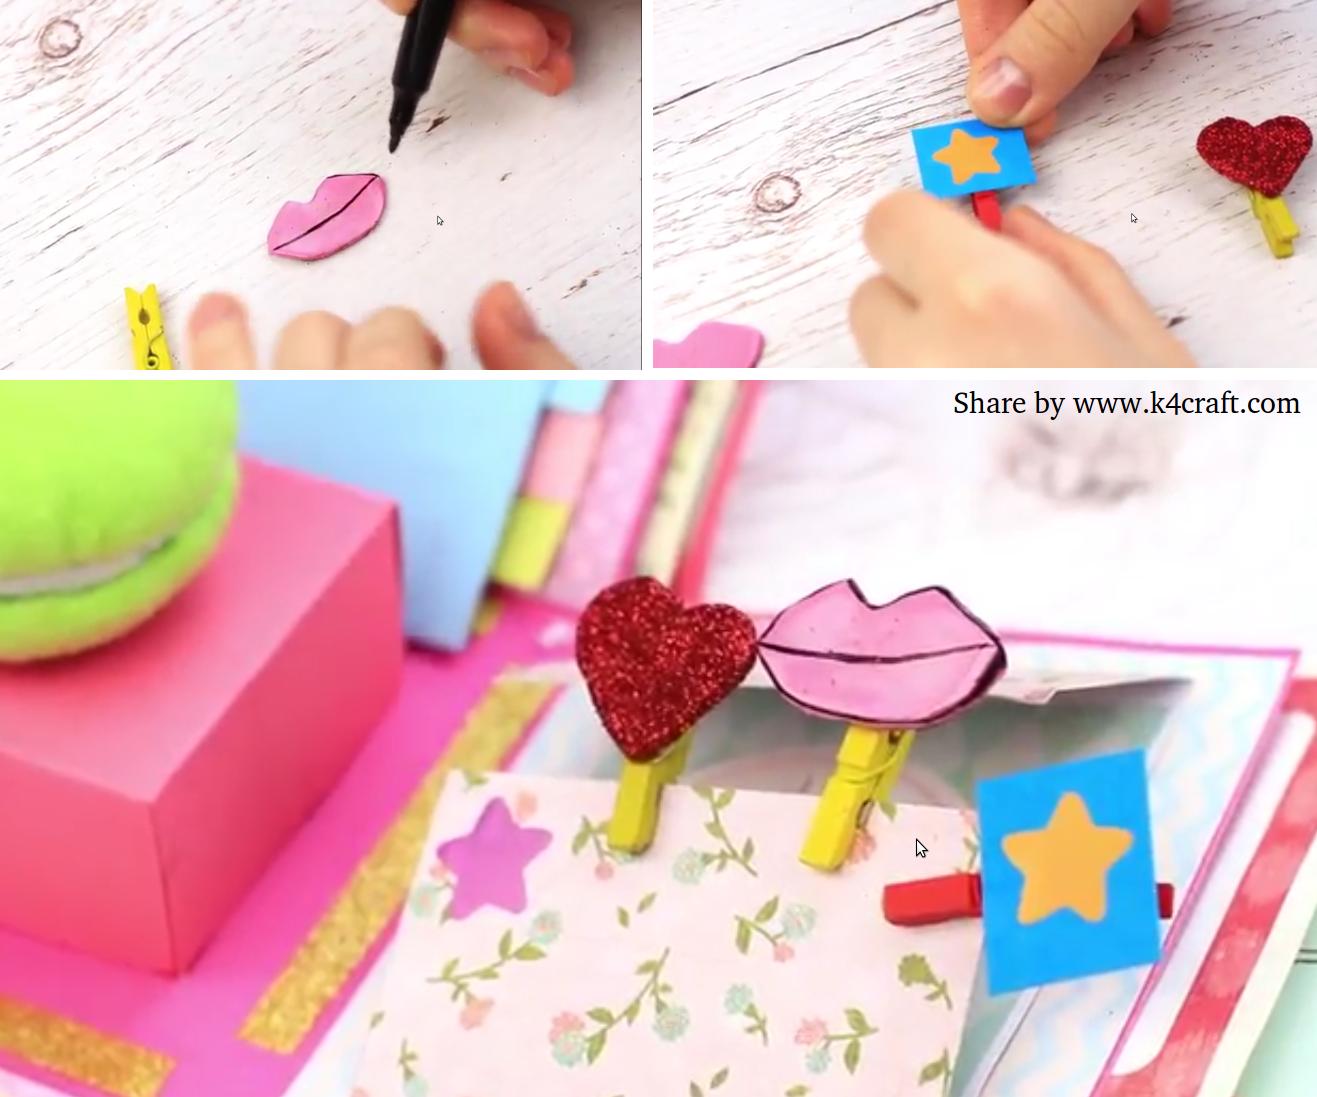
This is a great way to add hearts and lips to the message envelopes. You can use small sized wooden clips to add the hearts and lips to the message envelopes. This is a great way to add meaningful and loving messages to the exploding box craft. Start by tracing closed lips on the tracing paper. Now draw the lips on a pink sheet of paper using the tracing paper stencil. Cut the lips out. Now add the defining lines using a black sharpie marker. This makes it look pretty. Now make some glitter hearts. Add the glitter hearts and the pink lips to the messages envelops using wooden clips. Use small sized, brightly painted wooden clips.
Step 5: The boxes
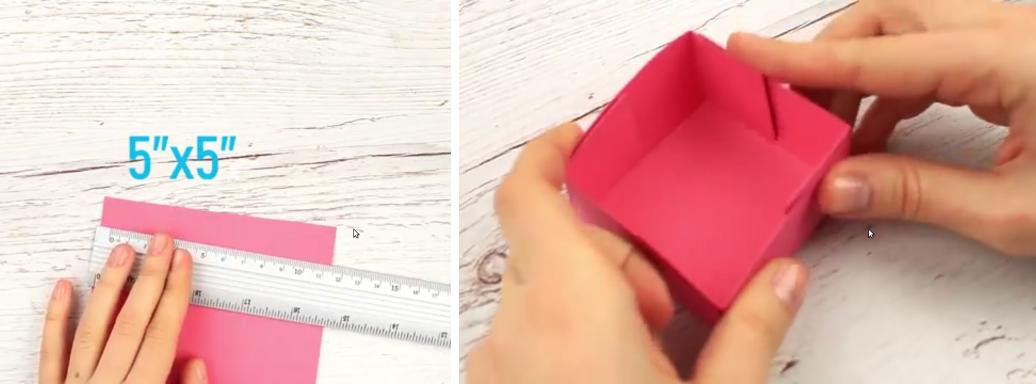
Let us make the box for the exploding box craft. The steps to make this paper box are really easy. Start with a square piece of sheet. Mark the 5 x 5 inch square. Cut the extra square corners of the sheet. Now fold the sides of the square piece from all the edges inwards to make a box. Join the edges doubly to make the box strong and sturdy. Make sure the box is slightly smaller or of exact size of the exploding box craft.
Step 6: Fitting all in
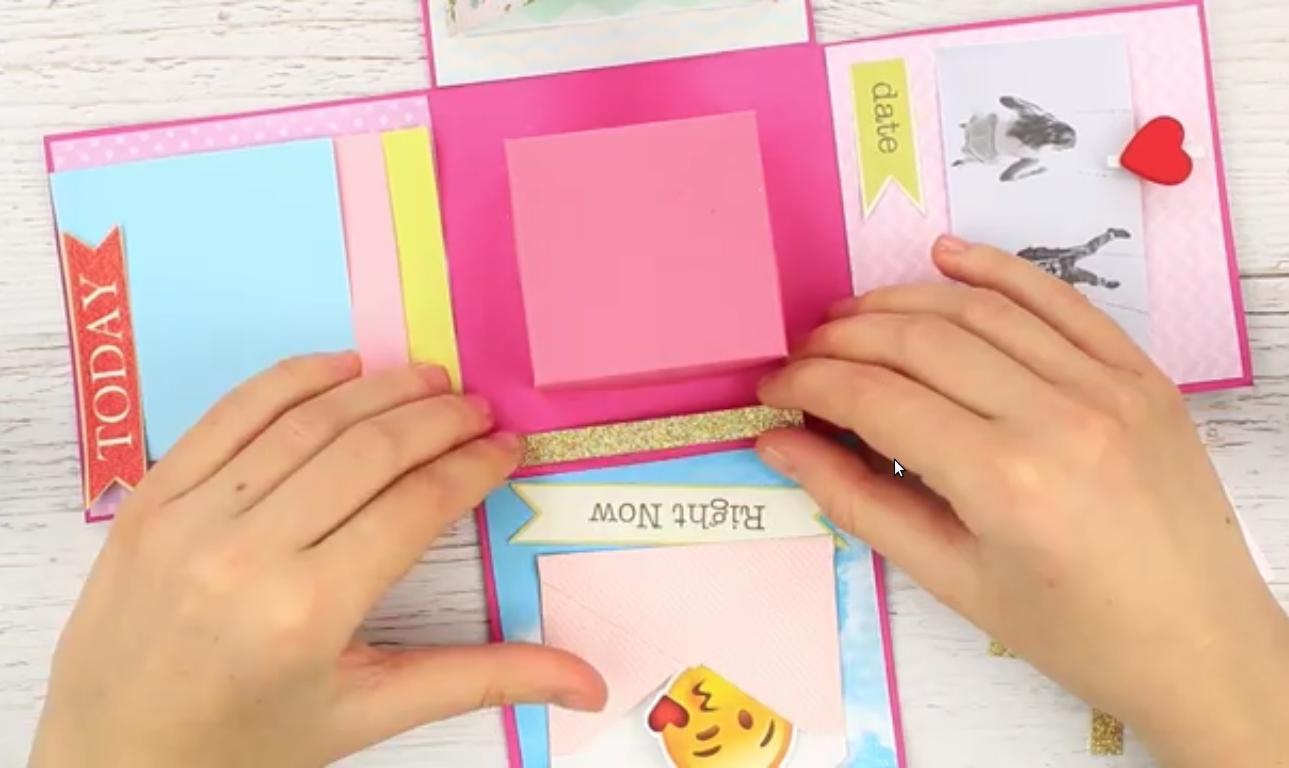
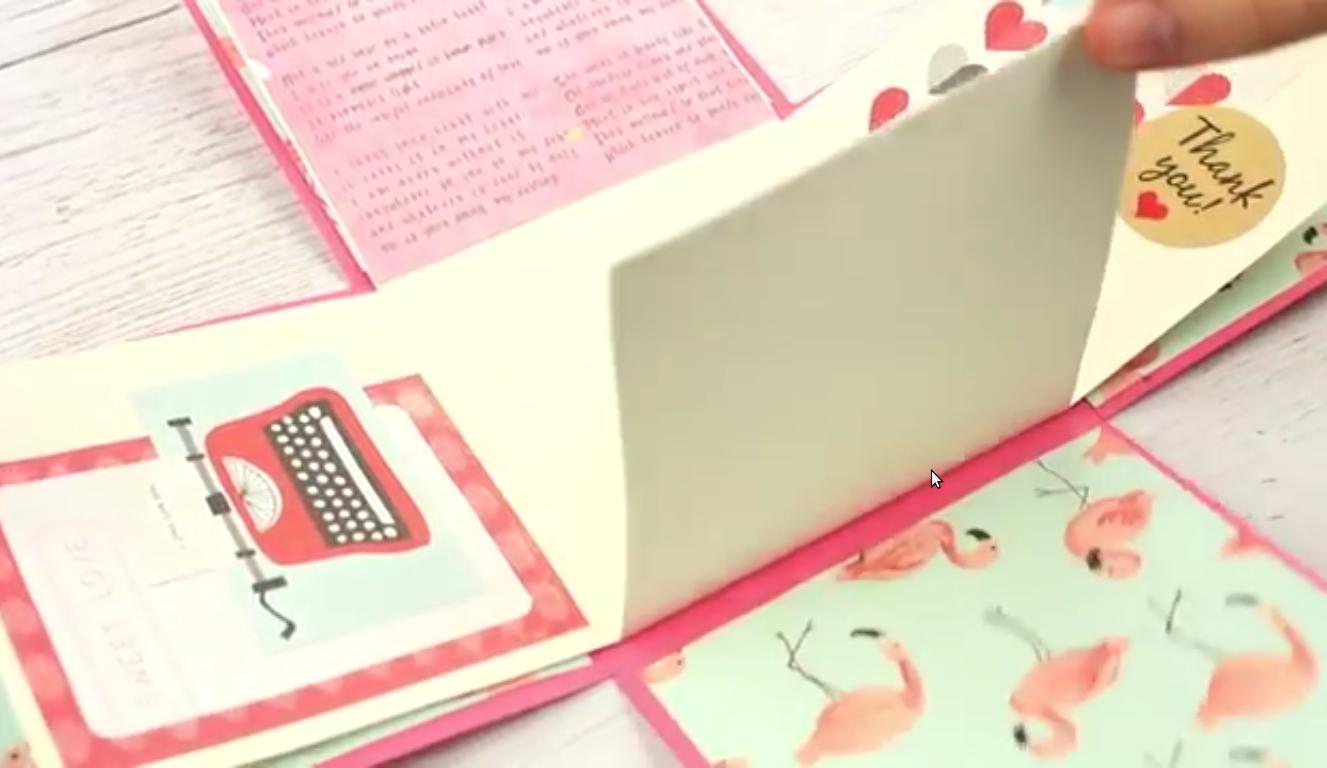
Now let us start making the main body of the exploding box craft. Start with the basic structure you have already made. Stick the emojis, message envelopes, thoughts, pictures, hearts, etc. To the sides of the basic structure of the exploding box craft. You can even add colored or glitter based Styrofoam thin strips to the base of the side squares. You should always start from the innermost layer of the card. This makes it easier to work with.
Step 7: Finishing touches to the base layer
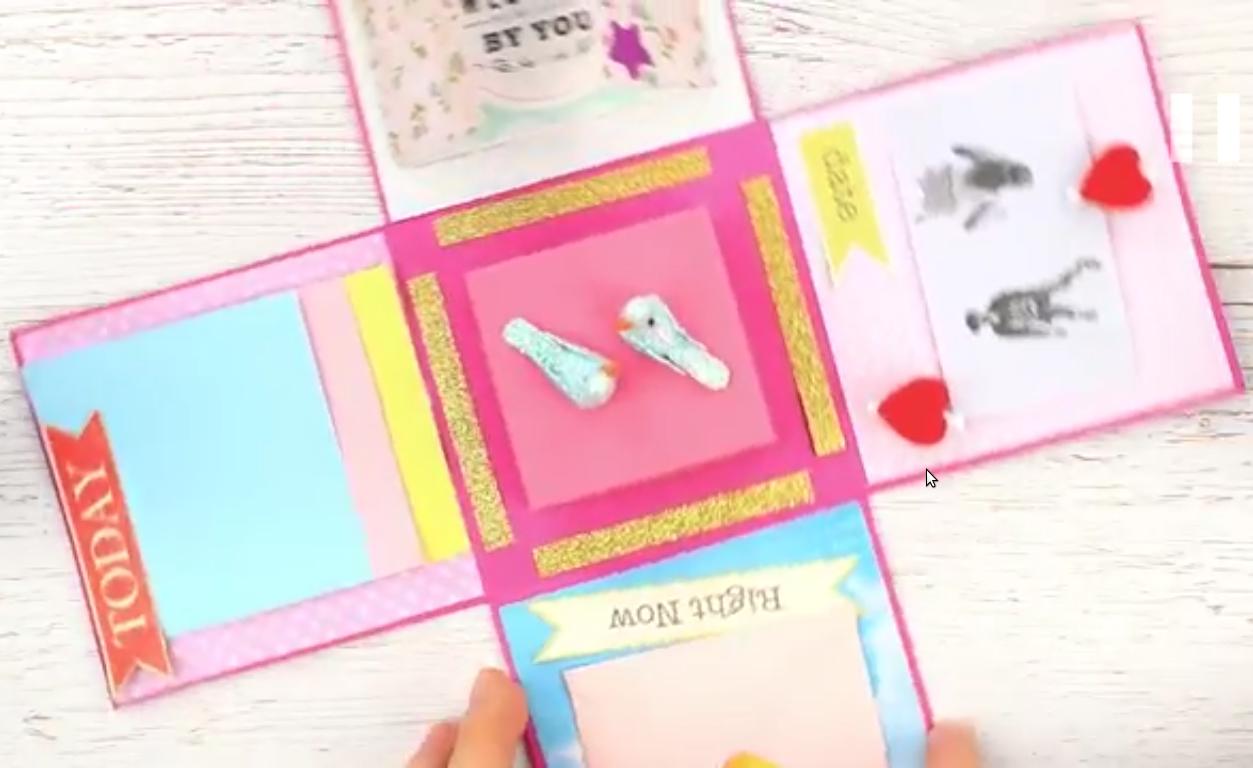
Stick the box for the gifts you made before in the middle of the smallest card structure. Cover it with its lid. Add some beautiful crafts or plastic animals on top of the lid of the box. This adds more to opening the crafty exploding box craft idea. Embellish the side squares of the card structure. You can decorate the side squares with 3D glitter lines or some dry sparkles. The crafts on the top must be placed keeping in mind the height of the box.
Step 8: Decorating the sides of the box
This is the next layer of the card. Now take a larger card structure. Stick some pretty patterned paper on the side squares of this beautiful card structure. Once you have stuck the patterned sheets on the sides, apply some glue in the middle portion. Now stick the smaller sized card structure, the one which contains the gift box. With this we have created one layer of the card. Keep on adding as many layers you want to add to this DIY exploding card project. You can decorate the sides of the card portion using different art and fraft options.
Step 9: Box Walls
This is an easy step to make this exploding card. Lift up all the side squares and keep them sturdy in the standing direction. This is a tough step. You will have to hold it in the straight direction until you can add a sturdy top. The folding ensures that the card has been made well.
Step 10: Sticking the container

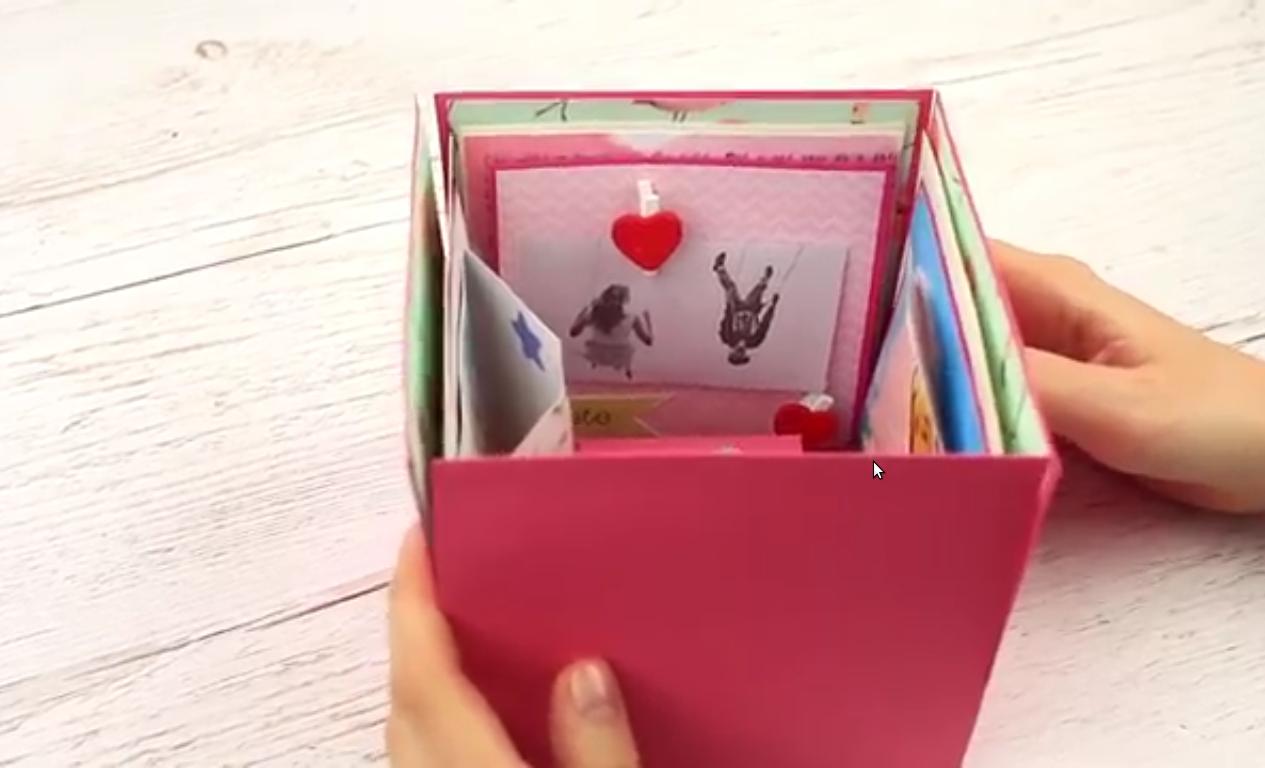
Stick the innermost box of the card. This will become the gift carrying box for you. You can add small gifts to this gift box. You can keep rings, bracelets, earrings, etc. This box provides you a secret chamber inside this explosive chamber box card. This is a unique feature of this box card.
Step 11: Decorating the boxes
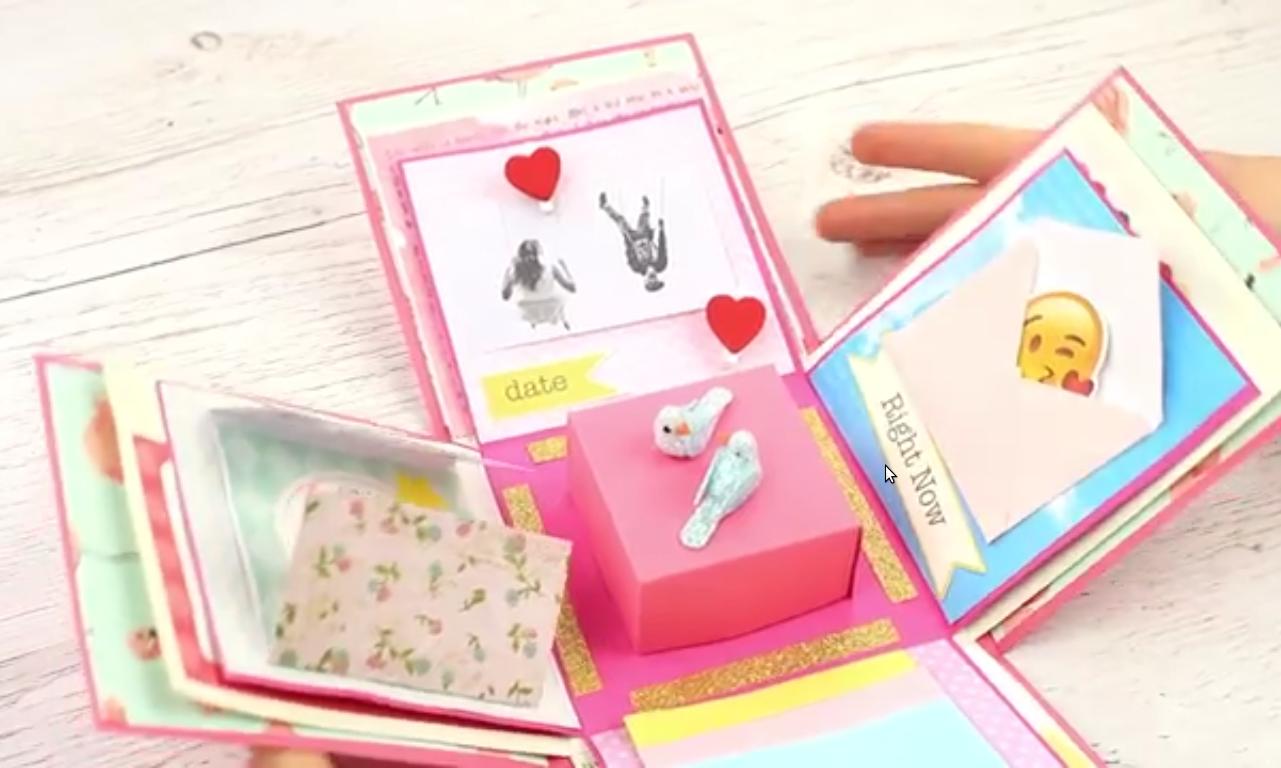
Decorate the inner walls of the box with the help of different kinds of crafts and drawings. You can add small sized photographs or crafts. You can also write some quotes or your feelings on the inner walls of the box card. Also, you can use ribbons, buttons, recycled or upcycled crafts to decorate the inner walls of the boxes.
Step 12: Looping the boxes
When you are satisfied and finished with decorating the inner walls of the square boxes, hold all the sides of the box in a vertical direction. Use a piece of ribbon to hold the sides of the box in this way. This forms the lower portion of the box. Now your exploding box craft card is ready, you need to make a paper box to store it and present it.
Step 13: The final box
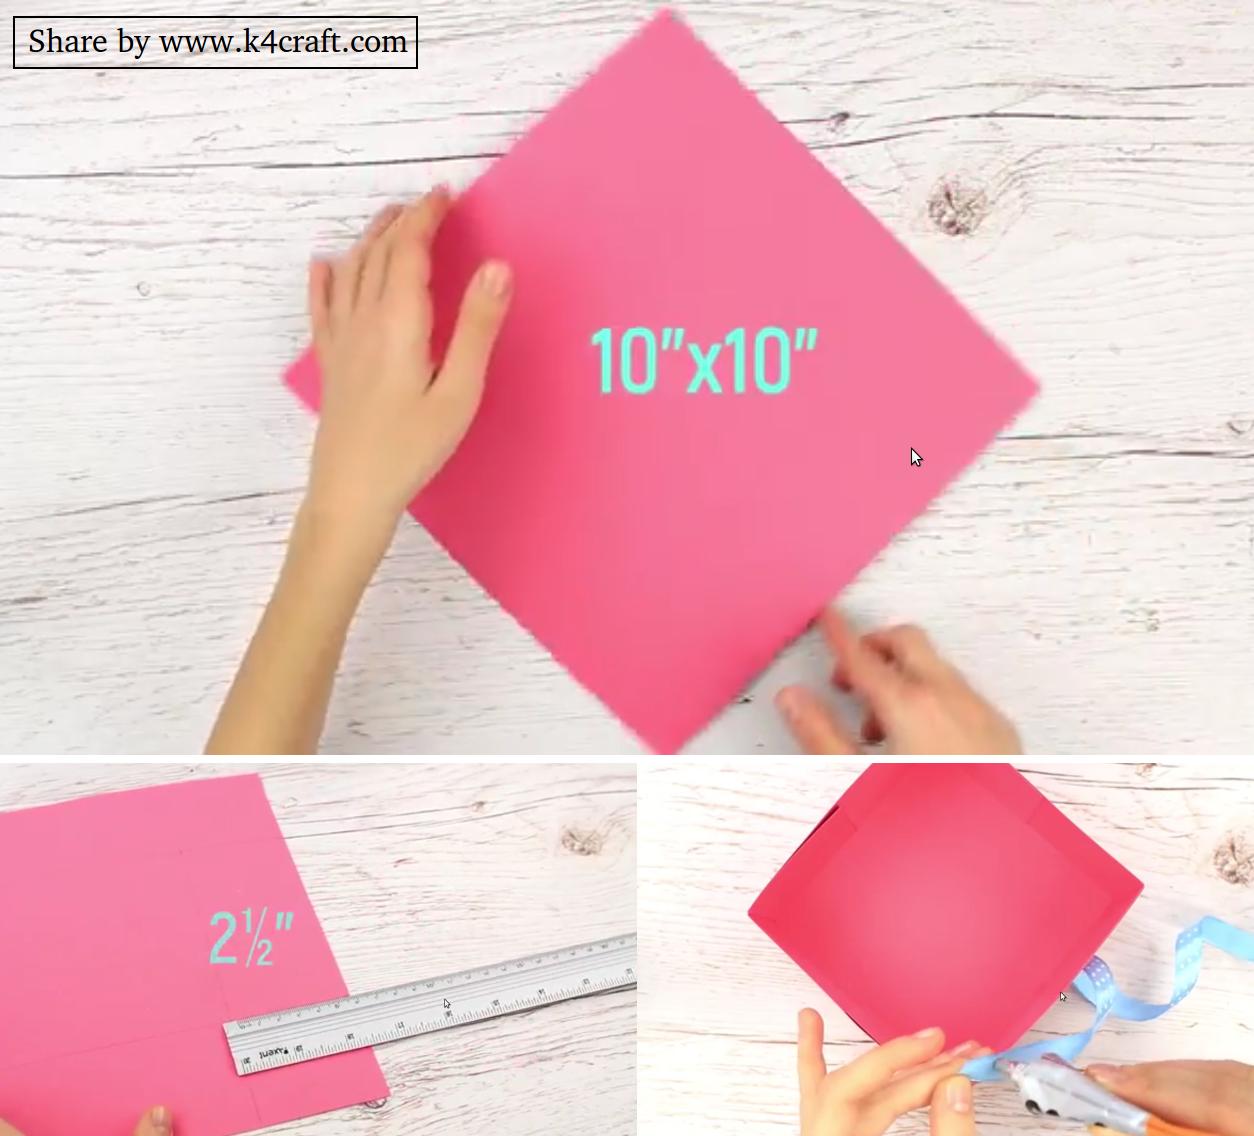
Let us make the final piece of the craft. This is a large paper box which can completely house the exploding box craft. This paper box is to be made the same way as the small paper box was made. Take square piece of sheet. Mark 10 x 10 inch square box. Cut of the square corners of the sheet. These square corners of the sheet should be 2.5 x 2.5 square inches in size. Make a box a lid for the box in similar way.
Step 14: All done
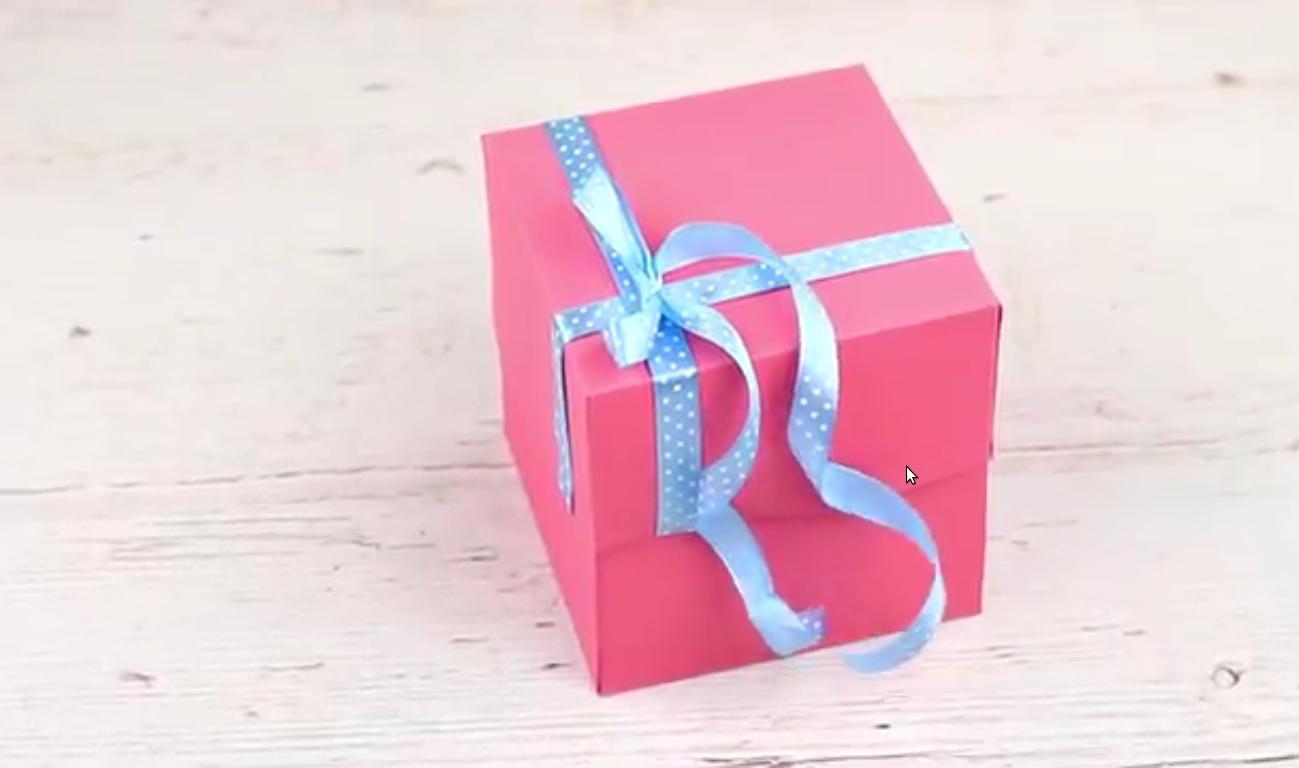
Place the card inside this large sized paper box. Take a broad ribbon piece, tie it around the box. Tie a bow at the top of the paper box. You can add more embellishments to this outer box to make it look prettier. Choose a ribbon in contrast to the color of the paper box housing the exploding box card.
You can also watch Full video tutorial:
We hope you loved this DIY exploding box step by step instructions tutorial. We will try to come up with more such beautiful craft ideas. Until then you can check out other related articles on K4 Craft. We would love to hear from you, you can leave your feedback and opinion in the comments section given below. It is great to communicate with the readers and receive an insight from you all.
And be sure to follow on Pinterest for more ideas! Thank you for visiting our website. Keep smiling and creating with K4 Craft.
You’ll also like:
- 27 Easy Craft Ideas Made With Tissue Paper
- Paper Mache Art To Decorate Your Home
- Paper Flower Making In Simple Steps
- Decorate Your Home With Beautiful Paper Crafts
- Home Decoration From Old Newspapers & Magazines
