Make fun cone Santa Claus paper craft for kids and let them have their share of fun.
This Christmas, make the celebration even merrier by creating these paper crafts of Santa Clause from cones and exploring their knowledge in craft. The steps involved here are very easy to adhere and even easier to implement on paper. The essential supplies required here are minimal and easily available.
So, get ready to vibe up the Christmas celebration with this cone Santa that is made for kids.
Learn to Make Cone Santa Claus
Materials required
- Paper color sheet : Red, white, light pink and black
- Glue
Procedure
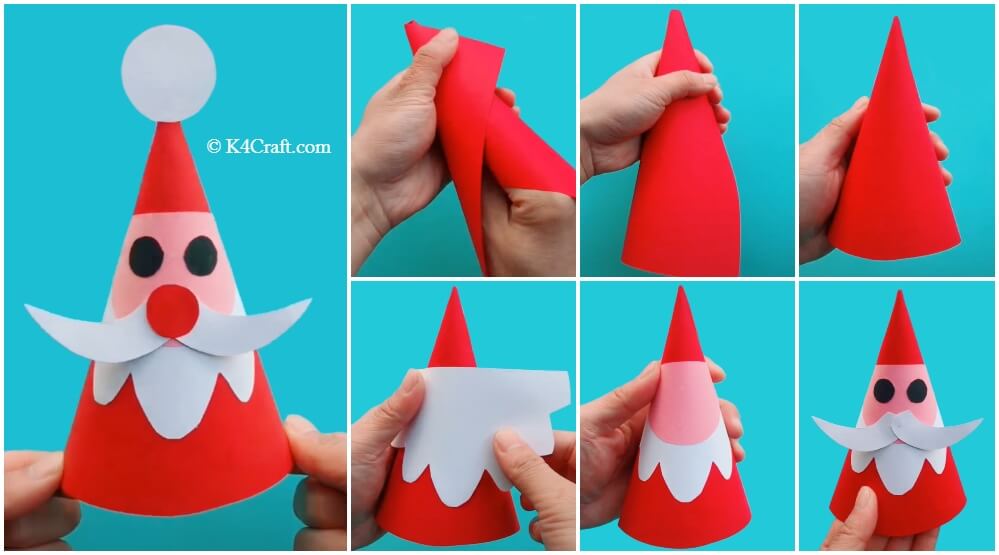
✨ Step 1: Getting ready with a red paper sheet
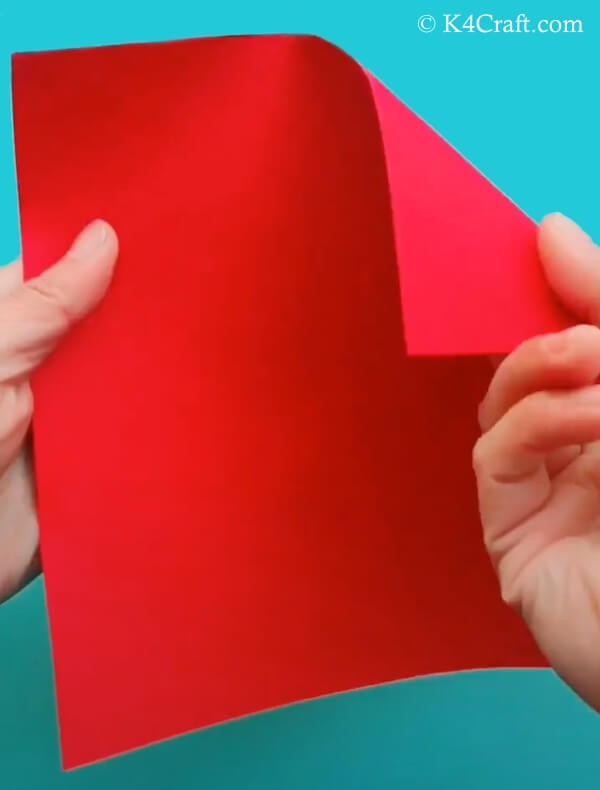
- Pick a red color paper sheet
- Start folding it from the upper right corner
✨ Step 2: Folding the red paper sheet

- Rotate the upper right corner in a shape like cone
- After you have reached the end, secure it further by rotating it from the left side
✨ Step 3: Securing the cone
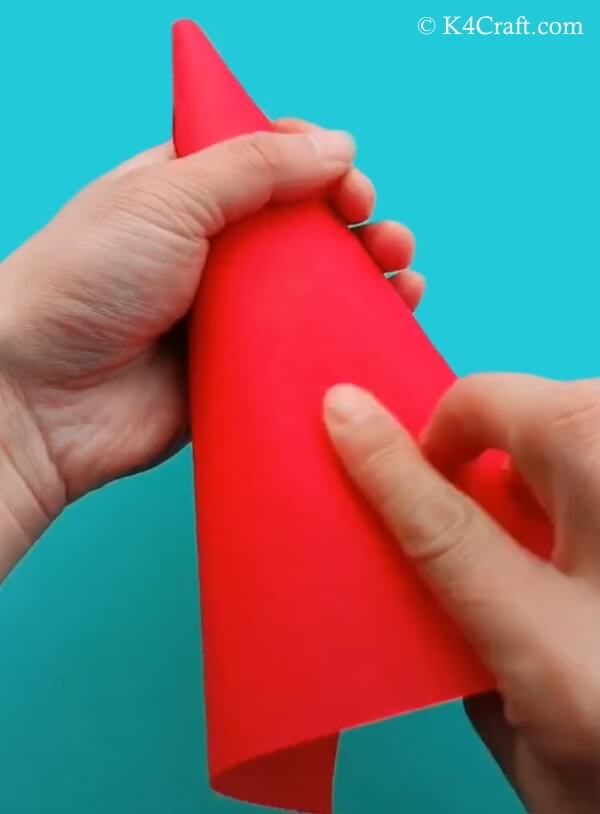
- Fold the cone securely from the tip
- Use your left hand to secure it
✨ Step 4: Holding the cone rightly
- With your left hand, hold just about the tip of the cone
- Encircle the cone with the left hand
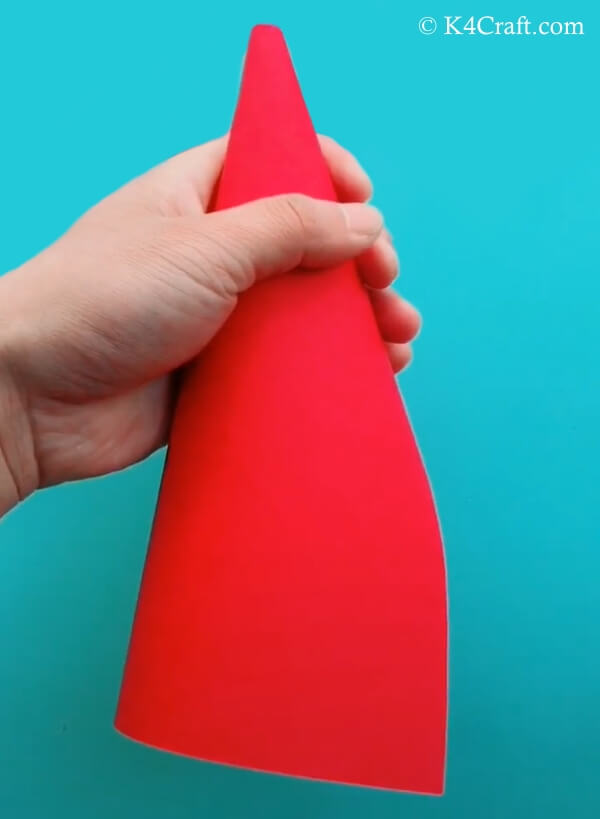
✨ Step 5: Get the cone ready by attaching it with glue
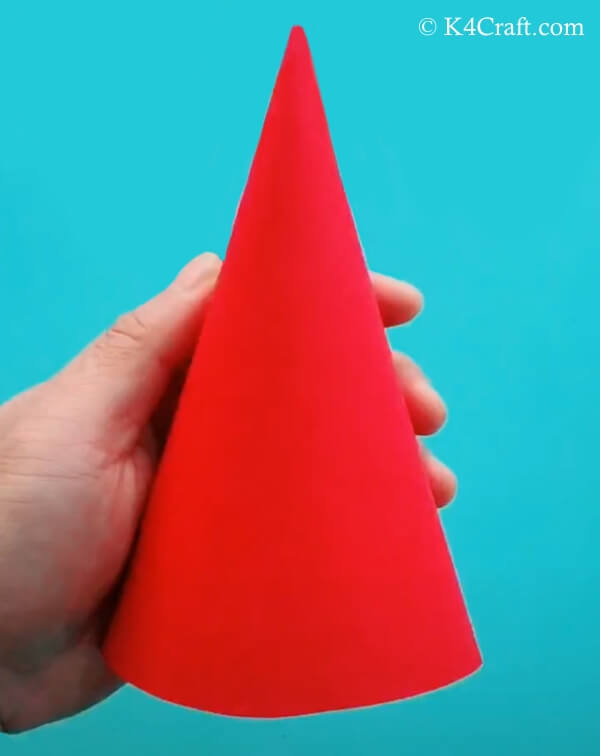
- With the help of glue, attach the cone
- Get the cone ready for further construction
✨ Step 6: The body of the Santa Claus
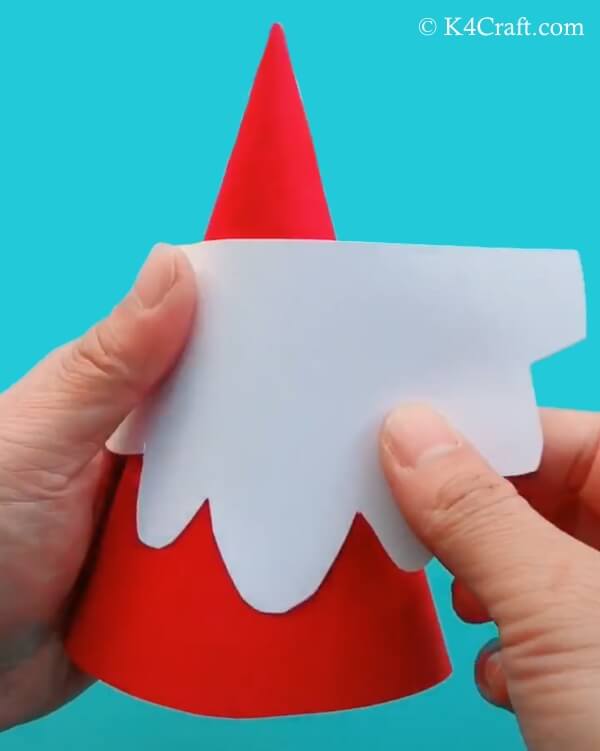
- Cut the white paper sheet in design of bush
- Place it on the cone upside down
✨ Step 7: Attaching the paper sheet to the cone to form the beard of Santa Claus
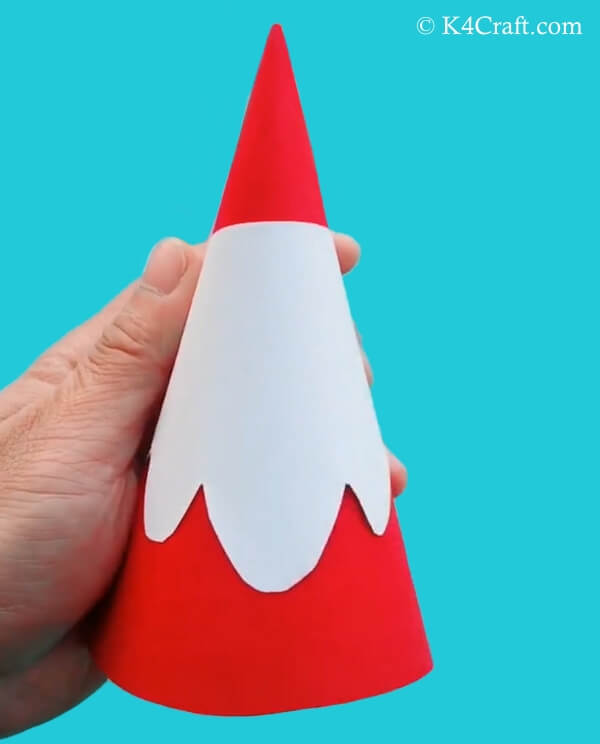
- Pick a glue
- Attach the bush designed paper sheet to the cone with the help of glue
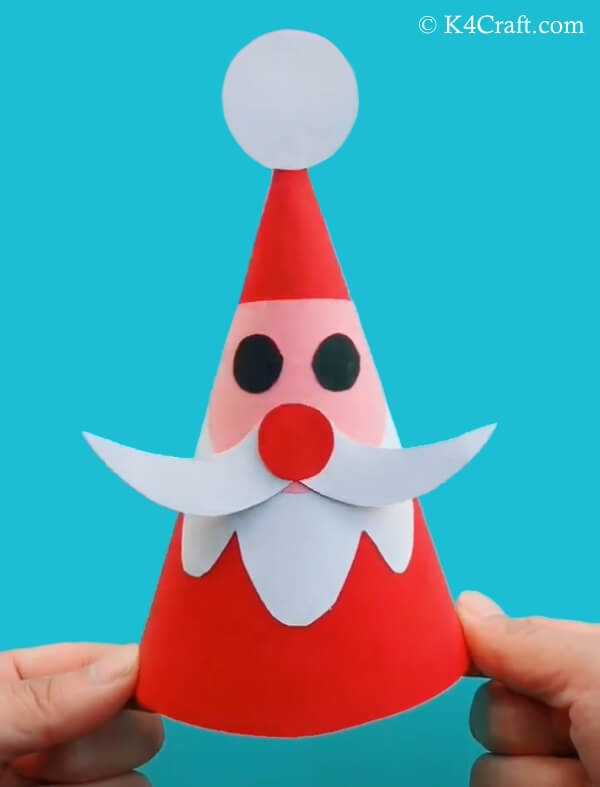
✨ Step 8: Crafting the face of Santa Claus
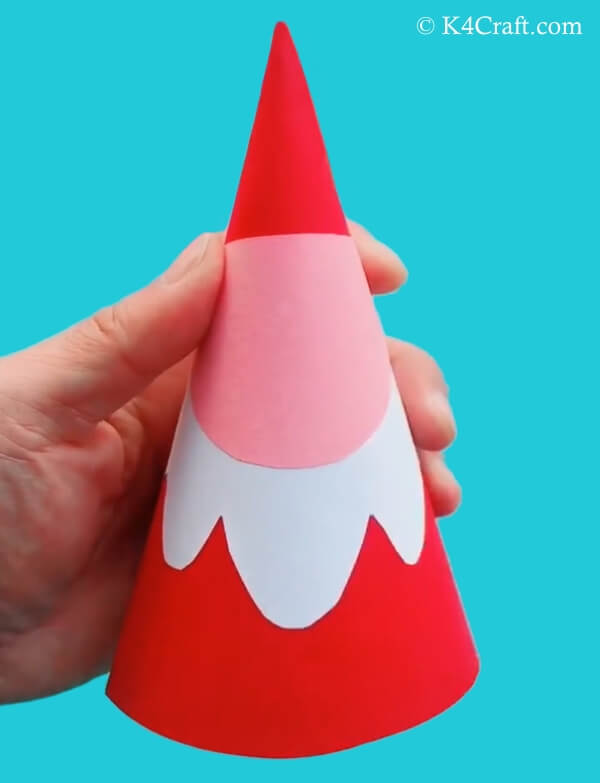
- Take a light pink color paper sheet
- Cut it in the shape of semicircle
- Attach it on the white paper sheet with the help of glue
✨ Step 9: Creating the eyes of Santa Claus
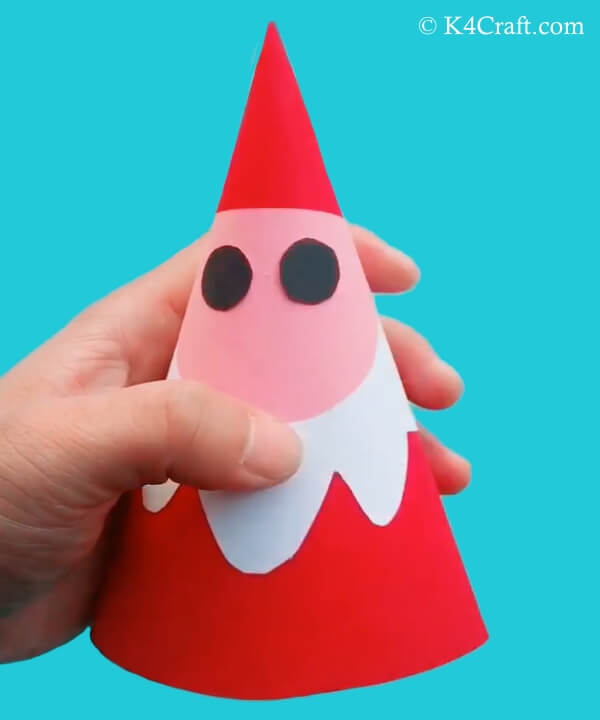
- Take a black paper sheet
- Carve out two mini circles from it
- Use them as eyes by attaching them on the light pink paper sheet with some glue
✨ Step 10: Giving Santa Claus a moustache
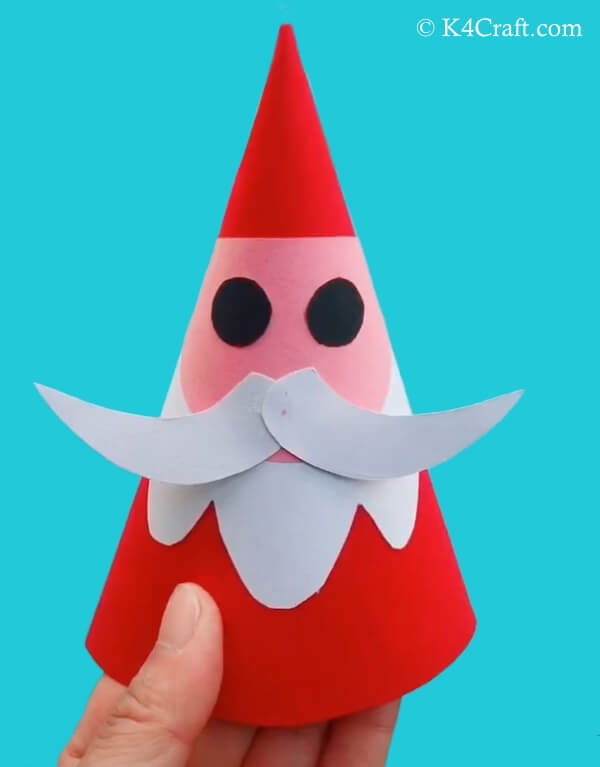
- Take a white paper sheet
- Carve out a moustache figure on it
- Cut it out
- Use them as Santa Claus moustache
✨ Step 11: Giving Santa Claus a complete makeover
- Pick a white color paper sheet
- Draw a medium size circle on it
- Place it on the tip of the cone
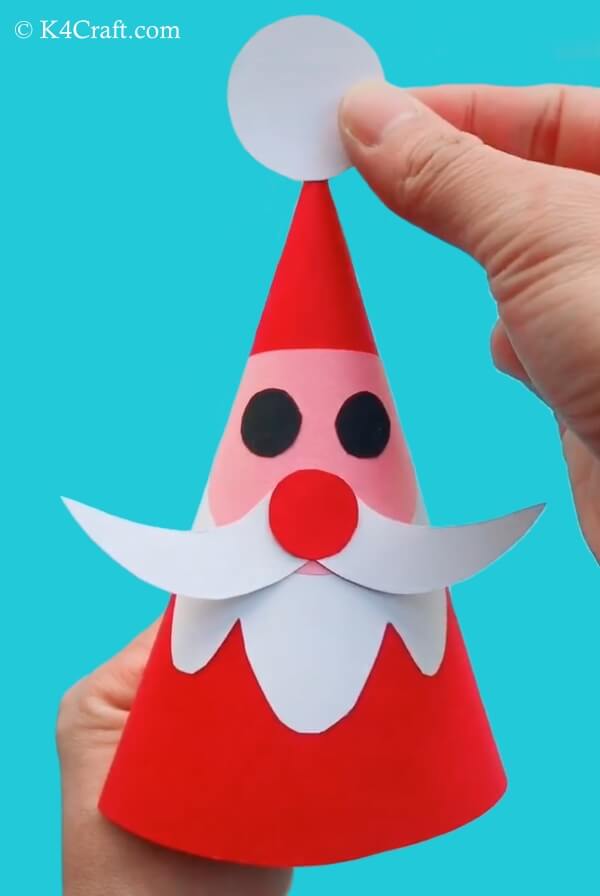
✨ Step 12: Give a final touch
- Take a glue
- Use it to attach the circle at the tip of the cone
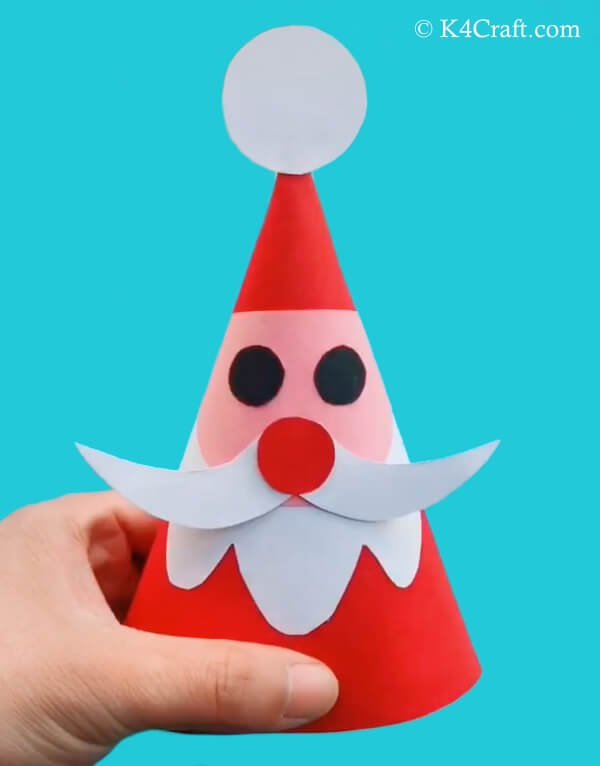
✨ Step 13: Sign off with a crafted Santa Claus
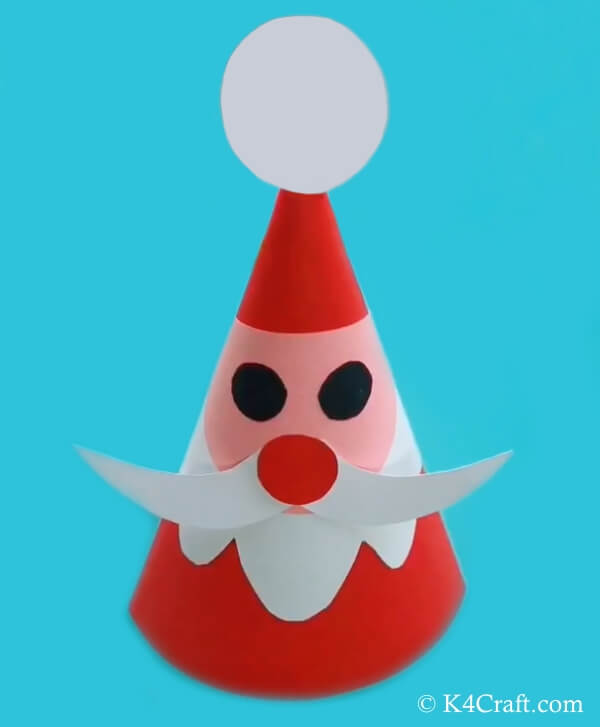
- Finish attaching the craft if you have missed somewhere
- You have a Santa Claus all ready
These are the steps that are to be followed to create a Santa Claus from paper. We hope you and your kids enjoyed making this cone Santa paper craft for kids. It can be used as a celebratory hat for the Christmas party for your kids and their friends. We have more step by step tutorials that you might find interesting, so make sure you check out those too. If you have something to tell, feel free to comment down your opinions in the comment box provided below.
We will soon come up with more such interesting craft articles for you. Until then keep smiling and creating with K4 Craft.
You’ll also like:
- Paper Circles Candy Cane Craft For Kids – Step by Step Tutorial
- Paper Caterpillar Craft for Kids – Step by Step Tutorial
- Paper Rabbit Craft for Kids – Step by Step Tutorial
- Handprint Tree Card Craft for Kids – Step by Step Tutorial
- Paper Heart Shaped Owl Craft for Kids – Step by Step Tutorial

