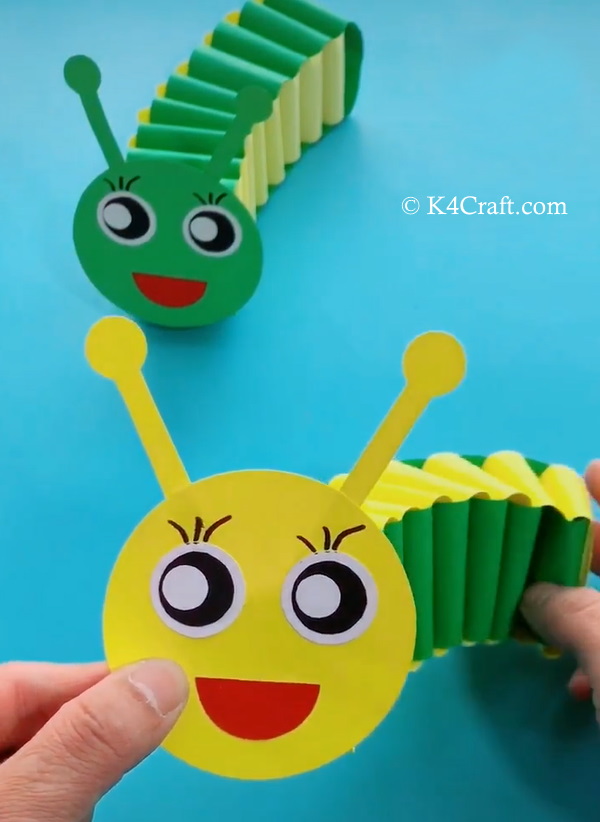
Paper crafts are a great way to beat the blues of a day. Your kids will surely love to try this beautiful paper caterpillar craft. This beautiful paper caterpillar craft is a great way to engage your children in a productive way to make crafts. Paper crafts are really easy to make and kids love to create something new. Such colorful crafts help to enrich the childhood of our sweet children.
Kids learn to make new crafts this way and also look forward to making new paper crafts at home. Making such cute crafts help kids decorate their room with these paper crafts. Kids can add this paper caterpillar craft to their study table and make their study tables more colorful. Such colorful crafts become the basis to impart.
Paper Caterpillar Craft For Kids
You may like: 3D Paper Apple Craft for Kids – Step by Step Tutorial
Material Required:
This pretty paper caterpillar craft takes time to make but requires very less material to make. Your kids will need colored paper or wide colored strips, stapler, stapler pins, a pair of scissors, glue, sketch pens to make this pretty paper caterpillar craft. This beautiful craft is a low time consuming easy to make paper craft. Kids of any age would love to make this pretty paper caterpillar craft.
Procedure:
✨ Step 1: Making Sized Strips
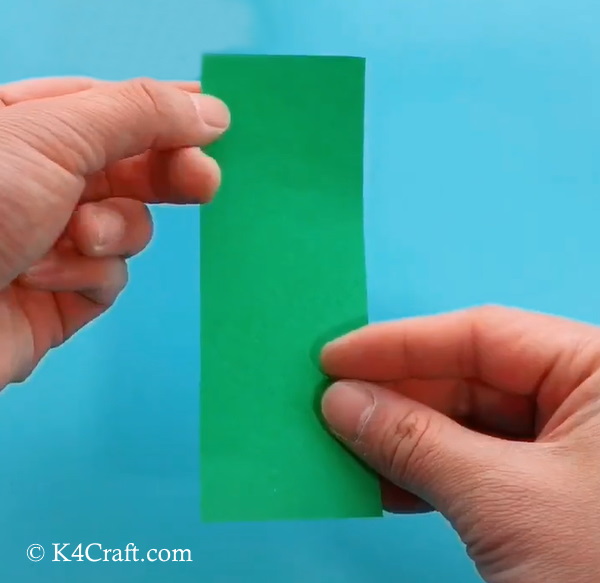
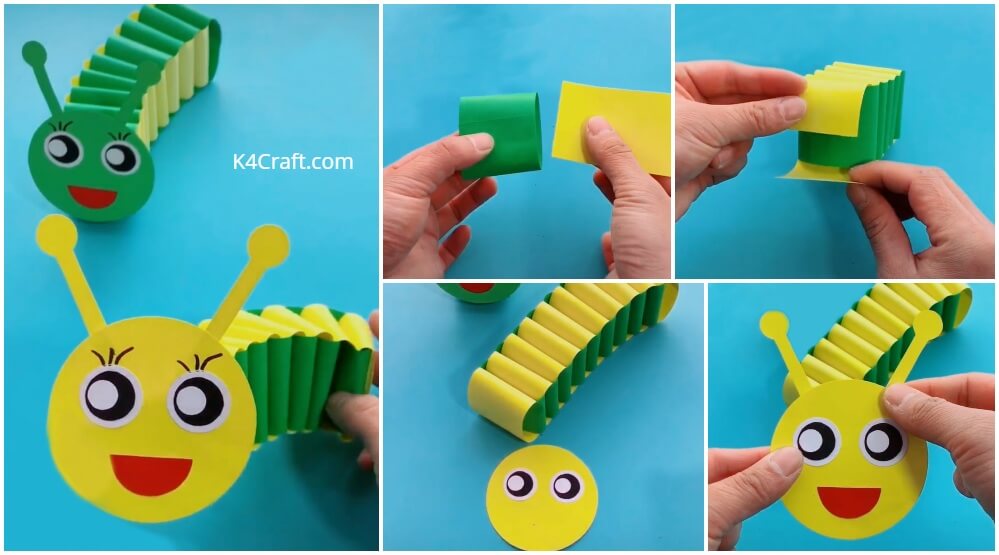
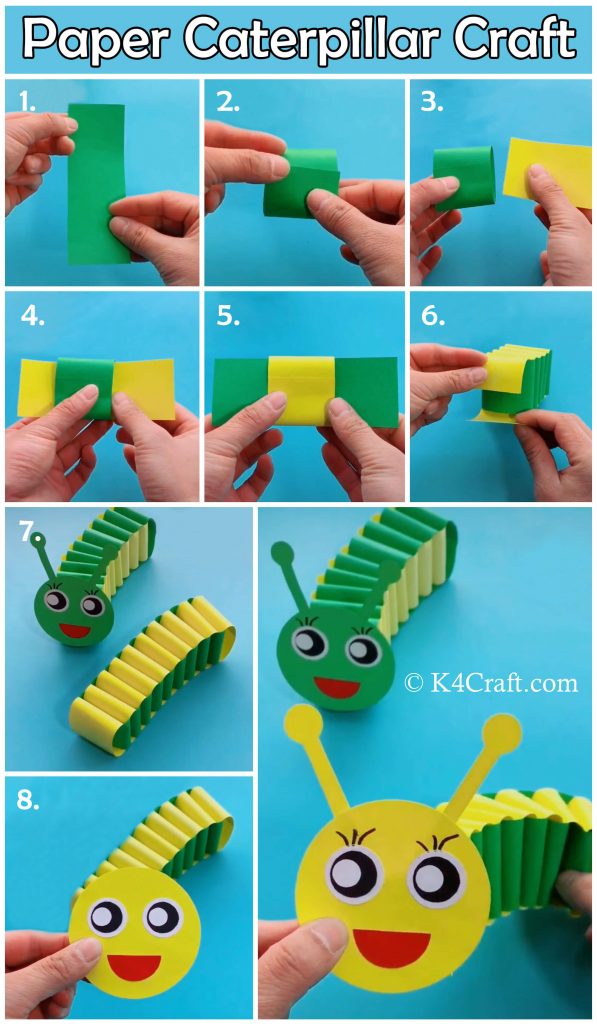
The first step involves choosing the right color combination to make the caterpillar craft. Once you have chosen the colors for the paper caterpillar craft, you can now cut wide strips of the colored paper. These colored strips of paper will become the base for the body of the paper caterpillar craft.
✨ Step 2: Making Loops From The Strips
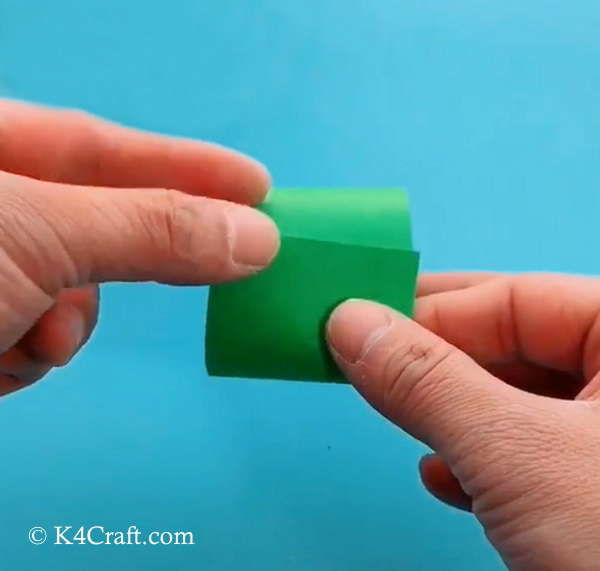
When you have cut all the strips of equal size, you can start by making the strip loops. These loops are really easy to make. Just circle the strips and make a loop with the strip. Seal the loop with a stapler. This is the base of the paper caterpillar craft.
✨ Step 3: Adding More Strips
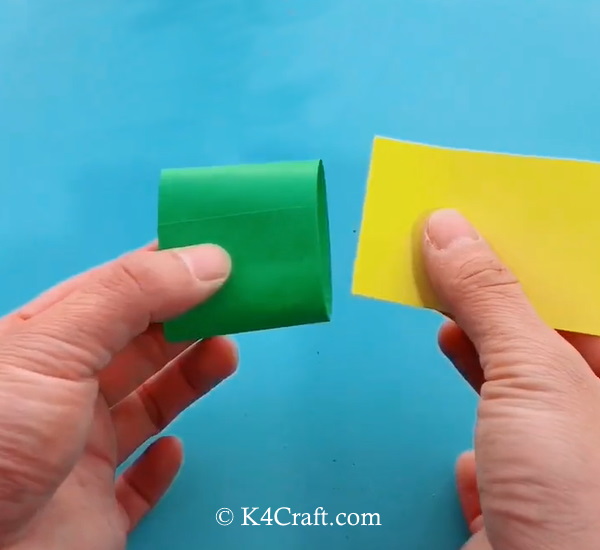
Now when you have made the first loop for the paper caterpillar craft, you can move to increase the length of the paper caterpillar craft. Now take the paper strip of another color and loop it through the previously looped strip. Pass the strips through the middle of the previously made and secured loop.
✨ Step 4: Making Another Loop
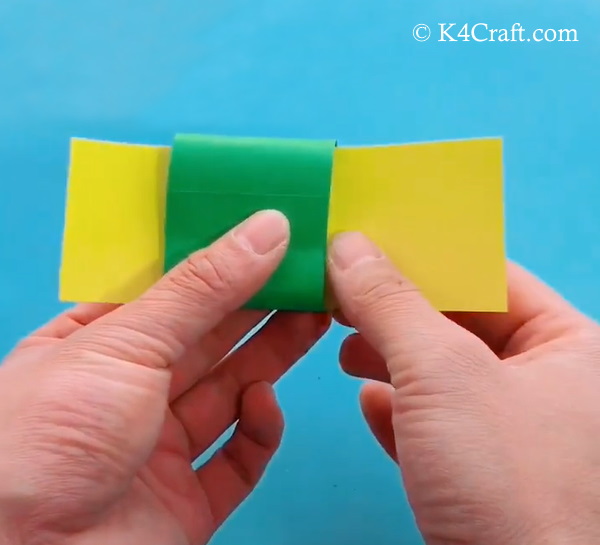
Once passed through the middle of the previously made loop, place the strip in the middle. The strip should be equally visible on both sides of the previously made loop.
✨ Step 5: Making More Loops
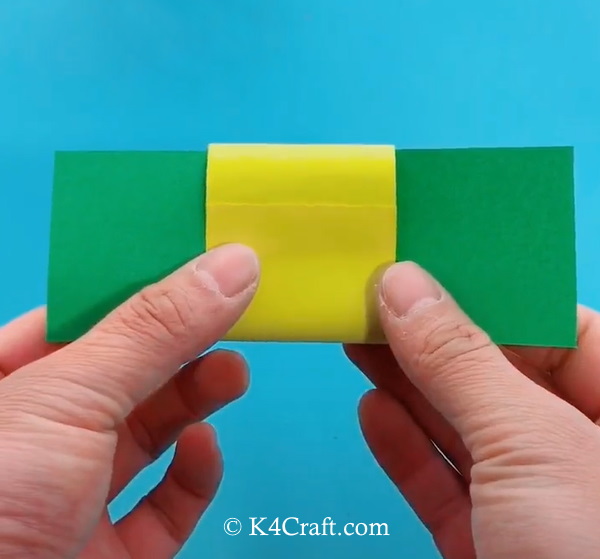
When the strip is exactly in the middle of the previously drawn loop, gather the ends together and secure them together. This makes for a new loop in the paper caterpillar craft. Now you have two loops. Now take a strip from the first color bundle and pass it through the second loop. Place it in the middle and secure it’s ends together to form one more loop.
✨ Step 6: Joining The Loops Together
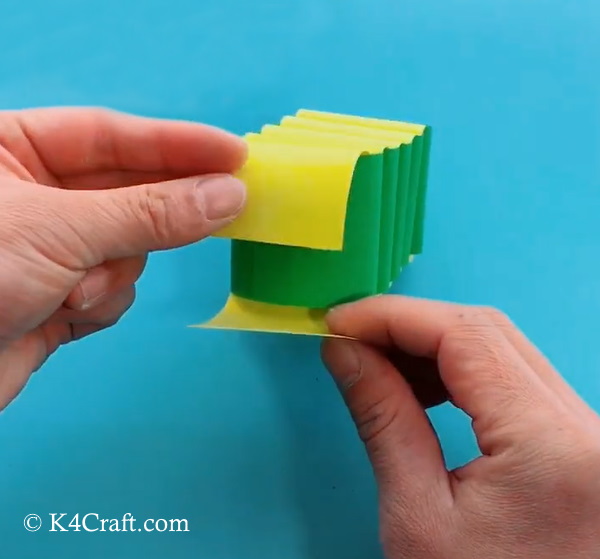
As you go on adding one loop after the other, you will get a beautiful length of the paper caterpillar craft. You must take care to loop in alternate colored strips. This makes sure that you get a pretty paper caterpillar craft body. Staple pins must be secured well in place.
✨ Step 7: Completing The Paper Caterpillar Craft Loops
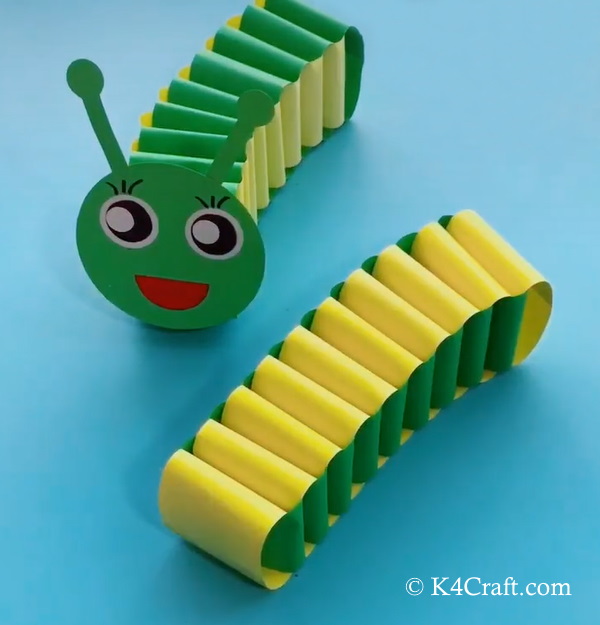
As you go on adding alternating colored loops to the paper caterpillar craft body, you will get a beautiful body for the caterpillar. When you are happy with the length of the paper caterpillar craft, you can stop adding more loops to the paper caterpillar craft. This looks pretty already.
✨ Step 8: Making The Face For The Caterpillar
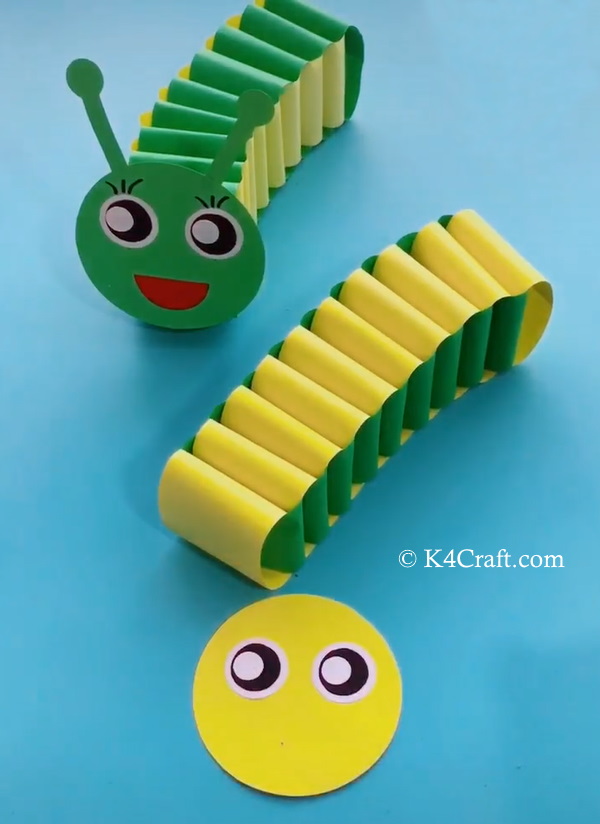
Now when we have completed the body of the paper caterpillar craft, we will move to the face of the paper caterpillar craft. You require a light-coloured paper. You can choose the lighter shade out of the two colors used to make the body of the paper caterpillar craft. Cut out a circle from this colored sheet of paper. Take two eyes stickers and stick them onto the face of the paper caterpillar. You have the face of your paper Caterpillar.
✨ Step 9: Adding A Mouth To The Caterpillar
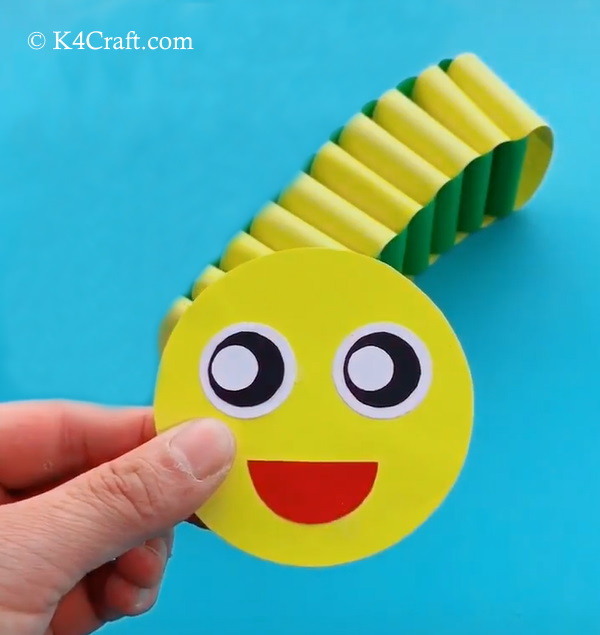
A paper caterpillar will also need a mouth to feed itself. We will be using a red or pink-coloured paper to make the mouth of the paper caterpillar. Cut out a small-sized semicircle from the red or pink paper. Stick this red semicircle on the paper caterpillar face. This becomes the pretty little mouth for the paper caterpillar.
✨ Step 10: Adding Antennas
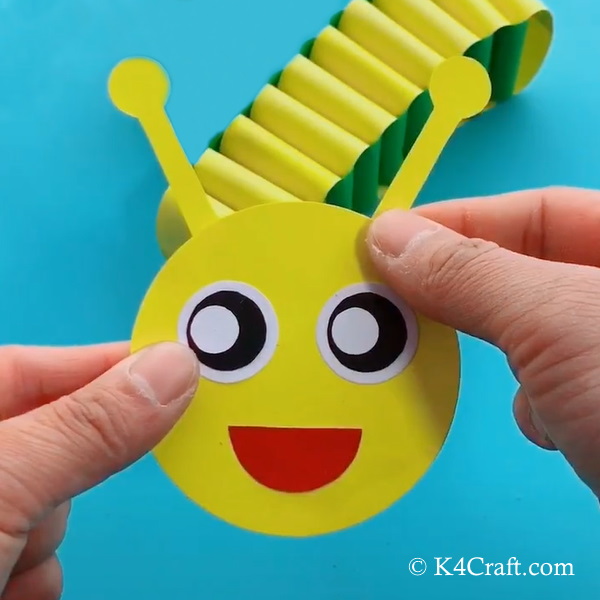
Caterpillars do have antennas. This paper caterpillar will be incomplete without the antennas on its head. Using the same paper as used for the face of the paper caterpillar, we will be making the antennas for the paper caterpillar. Draw two antennas on the colored sheet and cut them using a pair of scissors. Glue these antennas to the top of the head of the paper caterpillar.
✨ Step 11: Add Some Details
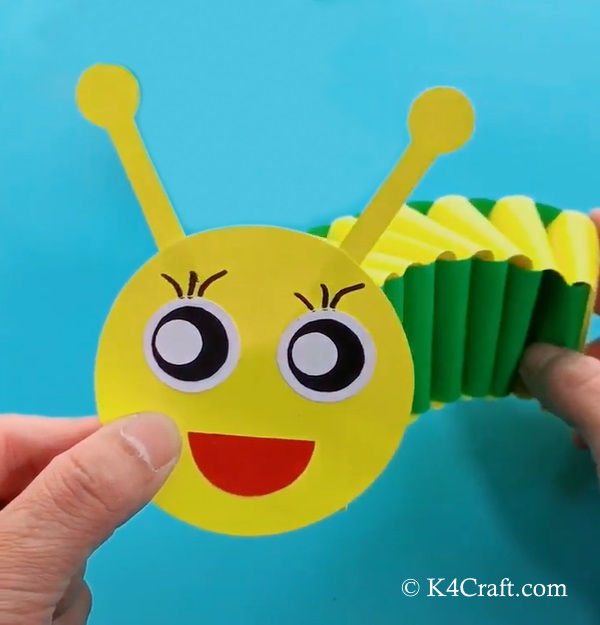
Your paper caterpillar face is almost ready. Take a black sharpie pen and add some eyebrows and eyelashes to this pretty paper caterpillar craft. These small details add life to this paper caterpillar craft. Now stick this beautiful caterpillar face to the caterpillar body. Now your paper caterpillar craft is ready to rock your kid’s room and add color to it in the most beautiful way.
We hope your kids loved making this pretty paper caterpillar craft at home. We wish that your kids always keep on striving to learn more and more paper crafts. You can check out other related articles on K4 Craft. We would love to hear from you. You can share your experience and opinion in the comments section given below. We will soon come up with more such useful articles for you and your kids. Until then keep smiling and creating with K4 Craft.
You’ll also like:
- Easy Origami Paper Crafts For Kids (Step By Step Instructions)
- Paper Plate Animal Crafts For Toddlers & Preschoolers
- 27 Easy Craft Ideas Made With Tissue Paper
- Decorate Your Home With Beautiful Paper Crafts
- Home Decoration From Old Newspapers & Magazines


