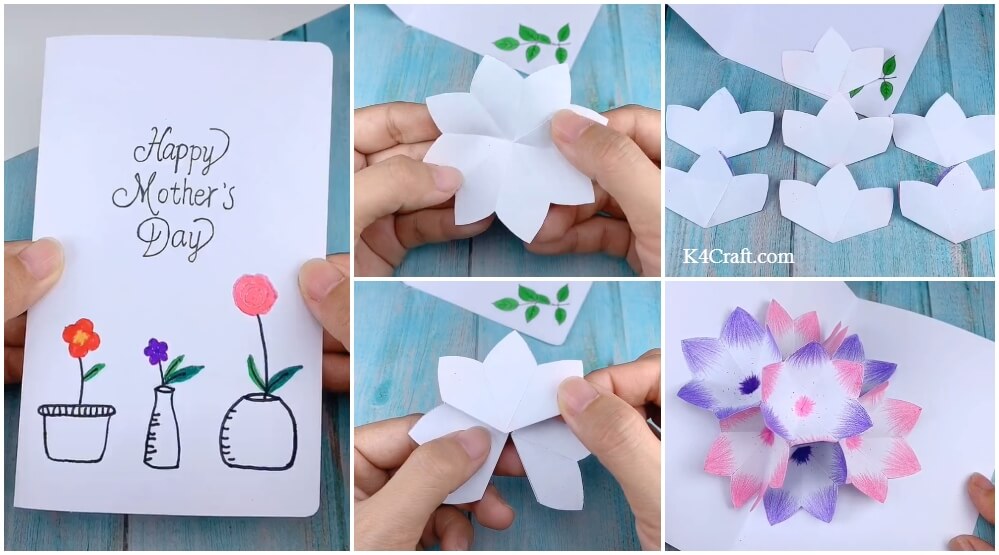
Want to make a fun 3D Flower Pop Up Card Craft for Kids that makes you smile? We thought it was time to add a 3D Card DIY perfect for any special day (Mother’s Day) – such as this 3D Flower Pop up card DIY! My kids adore this 3D Flower Pop Up Card craft. This gorgeous pop up flower card, we are sharing today is super easy for kids to make and it will bring a full smile to whomever opens it.
Flowers look really pretty in a garden. One can always go out and enjoy their beauty. We have a common practice of gifting fresh flowers to each other on different occasions. Fresh flowers wilt after some time and lose their beauty when they are detached from the plant. We can also gift out near and dear ones flowers made from paper. They are equally pretty and colorful. We can add these faux flowers to different gifting options.
Here we will be exploring the paper flower pop-up card design. This beautiful pop-up card is easy to make. Kids will love to make such cards on different occasions.
3D Flower Pop Up Card Craft – DIY Ideas for Kids

You may like: Mother’s Day Paper Plate Puppet Craft For Kids
Materials Required:
- White paper
- Black sharpie pen
- Colored sketch pens
- Colored pencils
- Pencil
- A pair of scissors
- Glue
Procedure:
✨ Step 1: The card design from inside
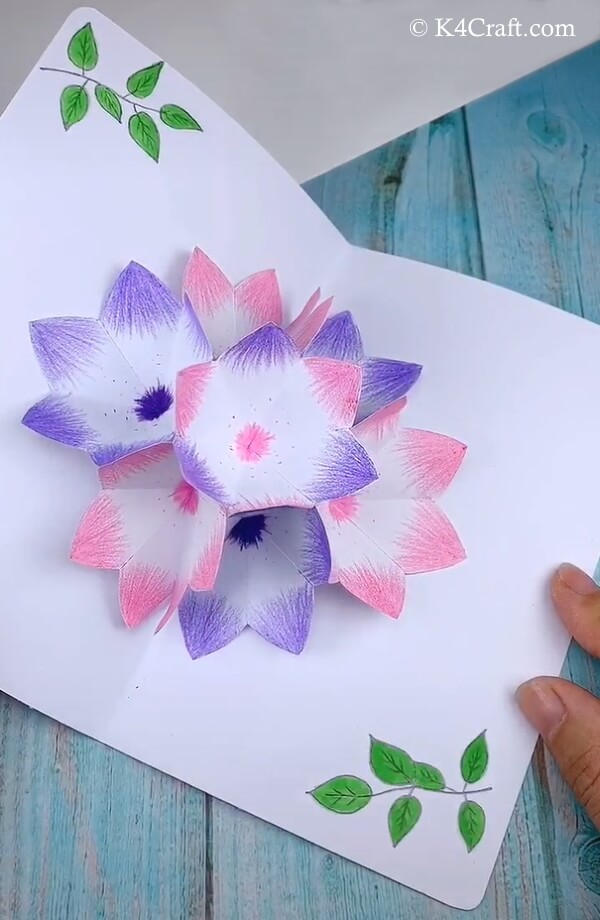
- This is a really beautiful card design to make for different occasions.
- This pretty card can be made easily at home and can become a nice spring and summer-time craft.
✨ Step 2: Folding paper to make 3D flowers

- To make these pretty flower we require square white placards.
- First of all, fold this square sheet of paper in half along one side.
- Now fold this rectangular sheet of paper again in half in the perpendicular direction.
- Now you have a square piece of paper which is one-fourth of the original square sheet size.
✨ Step 3: Drawing and cutting the petals for the flowers
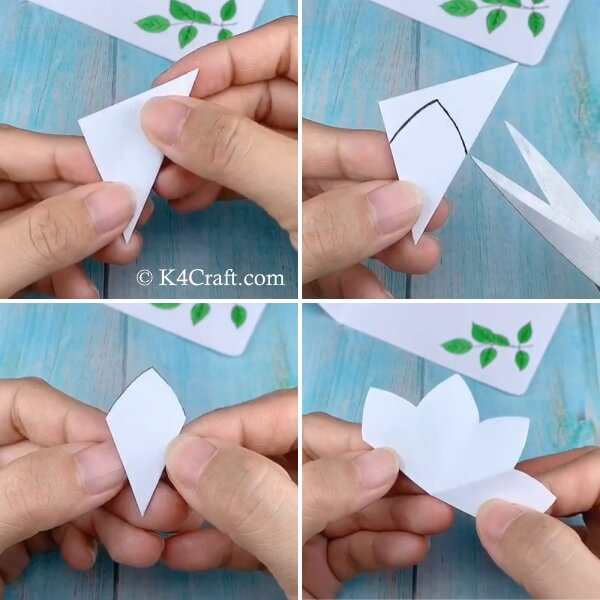
- Now fold this square folded piece diagonally to form a triangle.
- Use a pencil to draw a petal on the triangle shape.
- Cut along the drawn lines using a pair of scissors.
- Now open this folded petal pattern.
- You will get a beautiful flower design.
- Open this flower slowly to ensure that the paper does not tear up.
✨ Step 4: Opening the flower folds
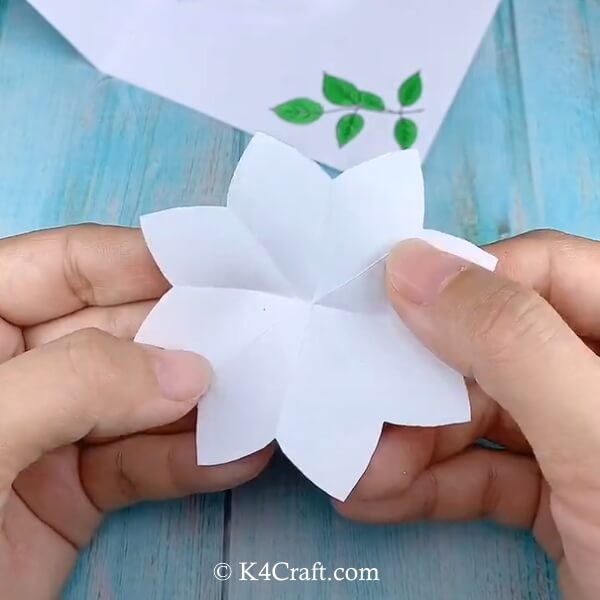
- Open up the folded petals to get a complete flower.
- Open the folds one by one.
✨ Step 5: Cutting one petal out of the flower
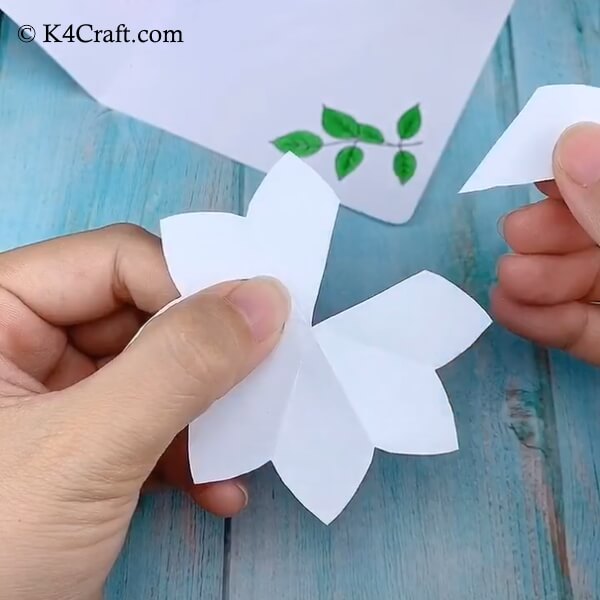
- Lay this flower out.
- Take a pair of scissors and cut off one petal of the flower.
- Now you are left with a flower which lacks one petal.
✨ Step 6: Coloring the flowers
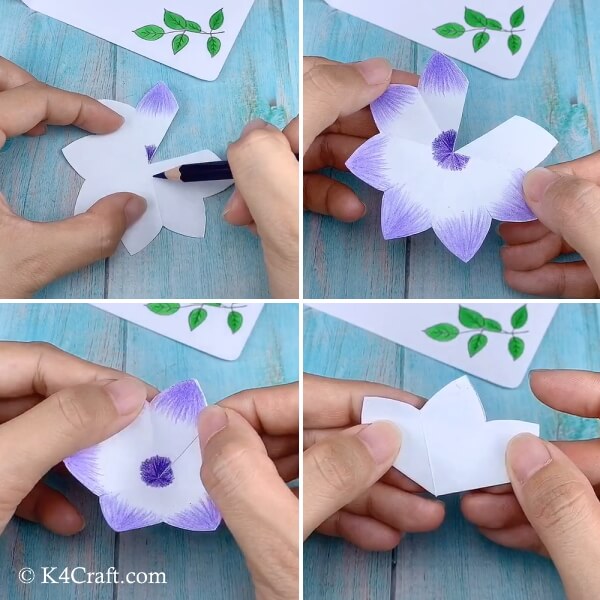
- Flowers look better when they are colored.
- Use a bright colored pencil color to color the flower.
- Color the middle of the flower and the tip of the petals.
- You can use two shades to give a pretty effect to the petals.
- Now stick the two end petals from the sides of the gap.
- This makes your flower bright and beautiful.
- Fold this 3D flower back.
✨ Step 7: Sticking the petals and making multiple flowers
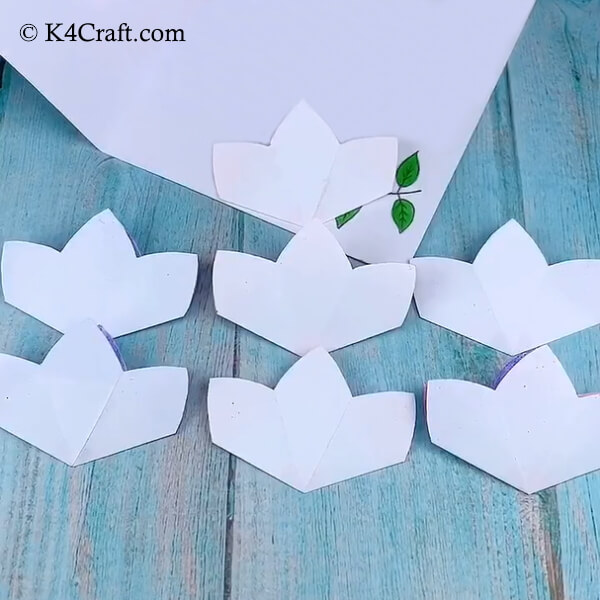
- We will need multiple such flowers to make a beautiful bouquet inside the card.
- You can use more such square white placards to make these flowers.
- You can make around seven such flowers.
- Use pencil colors to shade the insides of the flowers.
✨ Step 8: Sticking these flowers together
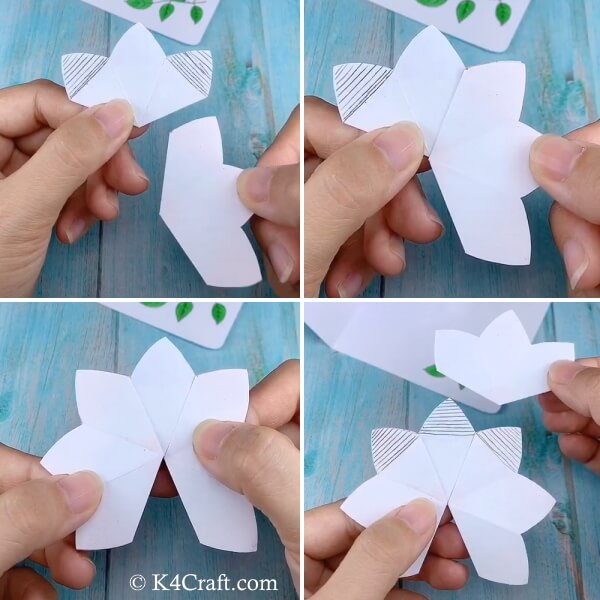
- Now we need to fit these flowers on top of each other.
- Take a folded flower and arrange it alongside the other flower.
- Add another flower in the perpendicular direction.
- Mark the tips of the petals to guide you while sticking the flowers together.
✨ Step 9: Stacking the flowers on top of each other
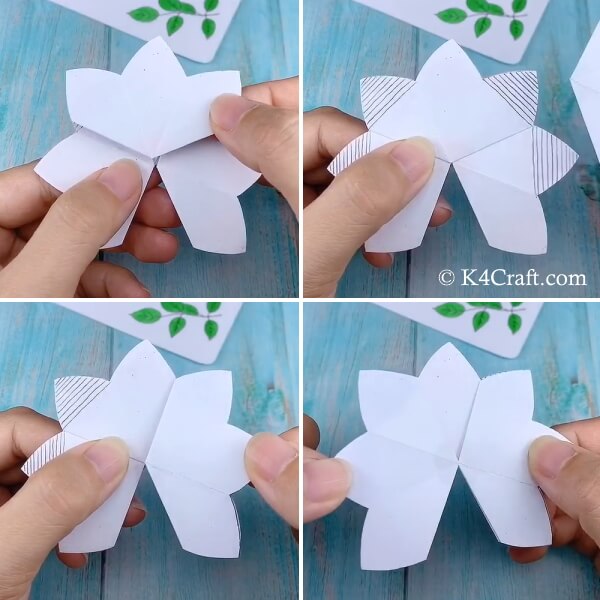
- Keep on stacking more and more folded flowers on top of each other.
- This will give a nice pattern of flowers.
- Leave on side of the flowers stack open.
✨ Step 10: Stacking more flowers
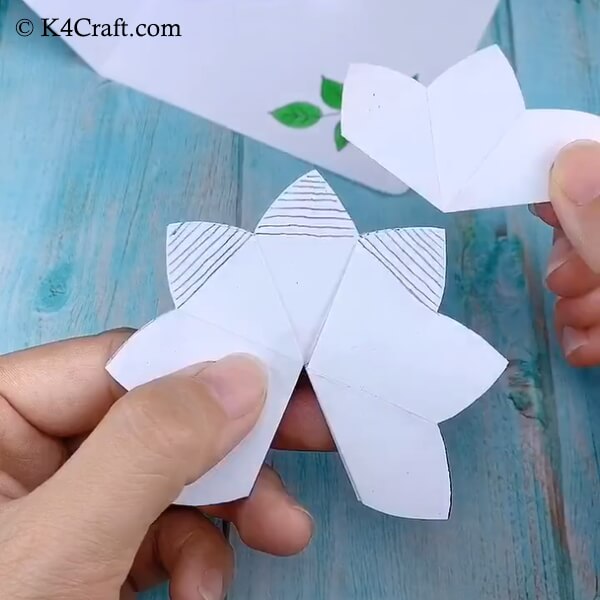
- Stack these folded flowers on top of each other.
- This will give you a bouquet of flowers when you open them.
✨ Step 11: Start to stick the flowers
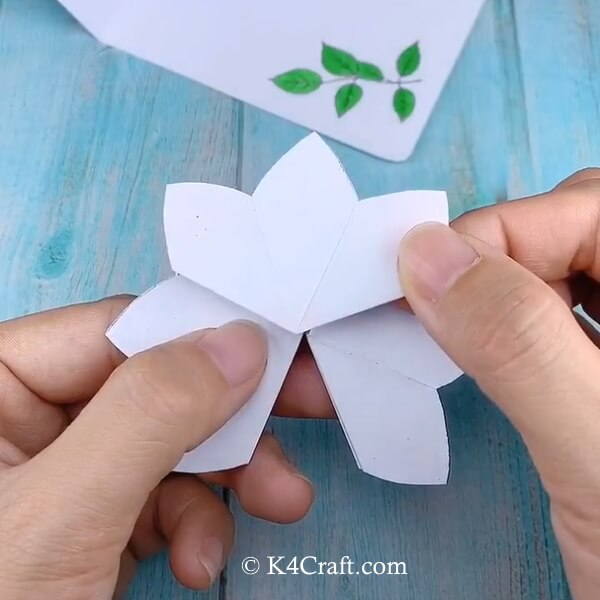
- Use a glue to stick the flowers in place.
- You need to stick the flowers in the same order as they were stacked.
✨ Step 12: Sticking all the stacked flowers together
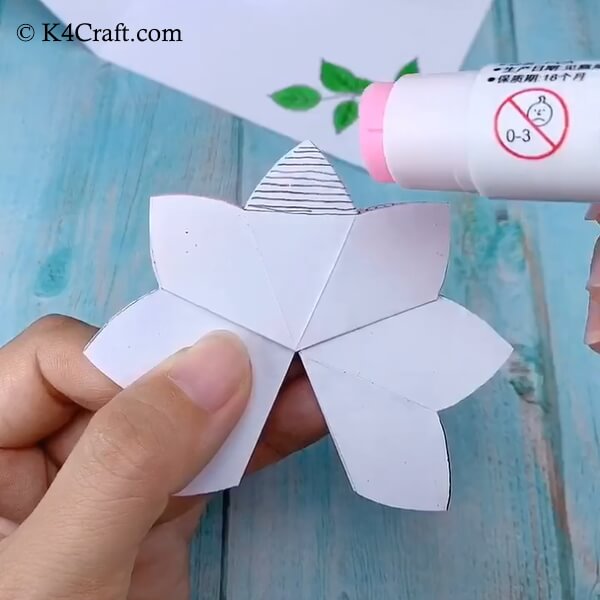
- Slowly keep on sticking the stacked flowers on top of each other.
- Press the flowers after applying glue.
✨ Step 13: Placing the flowers ensemble inside the card

- Now we will be sticking this flowers ensemble inside the card we have made.
- Stick the base of the flower on the base of the card.
- Align the mid rib of the card with the base of the flower stack.
- Stick the top of the flower stack to the back of the card front.
✨ Step 14: Sticking the whole ensemble inside the card
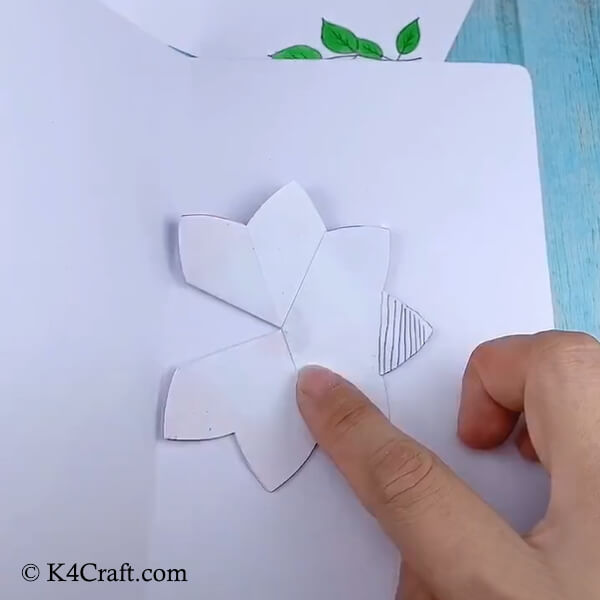
- Press the flower stack to the base after applying glue at the base.
- Now stick the top of the flower stack to the back of the card front.
- Press the cover on the flower to ensure a good bond.
✨ Step 15: Colorful 3D flower ensemble

- When the flowers have stuck to both the back and the front, you can open the card.
- When you open the card, you get a beautiful flower bouquet.
- This looks pretty.
- You can even add some leaves or other leafy or green patterns to this pretty card design.
- You can add some drawings and caricatures to the front of the card design.
We hope you loved this pretty 3D pop-up flower card design. It looks pretty and can be made for various occasions. You can beautify the flowers further with the help of sequins or colors, etc. You can check other such useful articles on K4 Craft. We would love to hear from you. You can share your experience with this craft with us in the comments section given below. We will come up with more such content soon. Until then keep smiling and creating with K4 Craft.
You’ll also like:
- 3D Paper Apple Craft for Kids – Step by Step Tutorial
- How to make Tricolour Indian Flag 3D Flower Popup Card (Tutorial)
- Christmas Craft DIY : How to Make 3D Paper Christmas Tree
- DIY : 3D decorative Paper Heart Garland Tutorial
- DIY: How to make Quilling paper 3D “Lord Ganesha” at Home


