Easy popsicle stick crafts ideas!
As the summer chimes in we all can resonate with ice creams and left over popsicles. All these popsicles end up in the garbage heap and that is a grim picture to present to the children of today. We should encourage our kids to Reuse, Reduce and Recycle. That is the best way to use everything. We can make different craft items using the ice cream popsicles.
Easy Popsicle Stick Crafts Ideas
We have tried to think of some of the best craft ideas and then put them together in this article. Some crafts also come with video links and help pictures to help you to realise the crafts. You can help yout child’s motor skills with these craft activities. Let us start.
#1 Popsicle Stick Craft Box
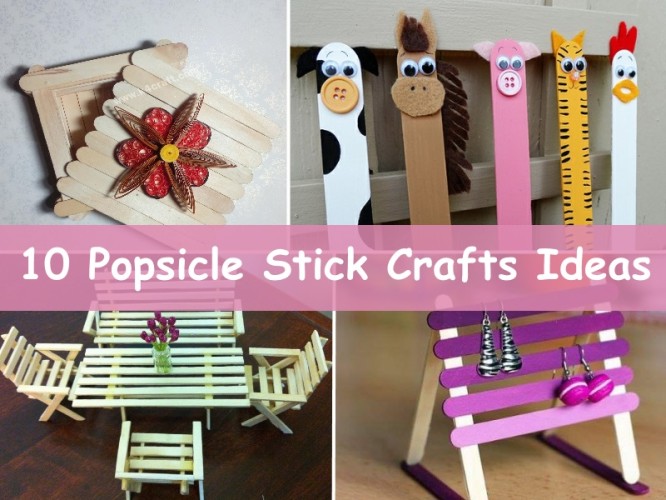
This utility popsicle craft box is a great idea to make out of the somewhat waste popsicle sticks. Collect some popsicle sticks as and when you and your family members eats ice creams. Now make a square grid using the horizontal alignment of the popsicles. This will form the base of the box. Now start making a vertical wall for all the four edges of the square piece. Now start working on the lid. The lid is basically a rectangular piece of horizontally joined popsicles. You can decorate the lid with various things; glitter, stuckers, ribbons, quilling art, paper flowers, etc. This ho to crafty utility box is a must have for you.
#2 Popsicle Stick Pen Holder
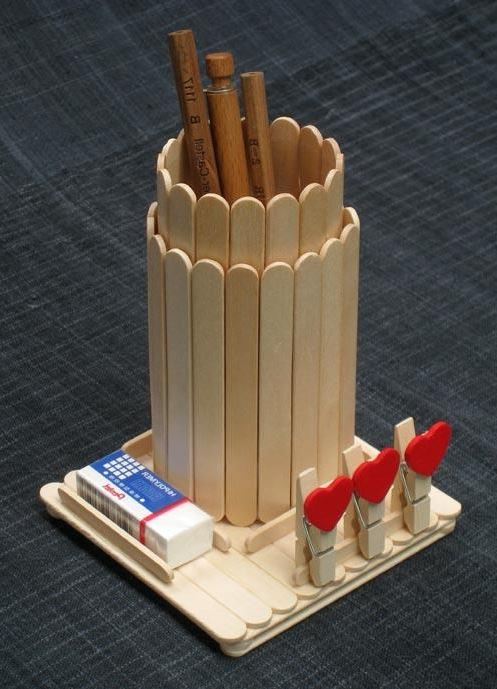
This is a again a utility project made from the ice cream popsicles. First of all collect some used ice cream popsicles, clean them and dry them. Store them in the freezer until you have collected enough popsicles. Start by making a design on the paper. Now make the base for the pen stand. The base must be sturdy and heavy so you can be generous in applying multiple layers of the popsicles. For the pen holder, start with an inner round of the ice cream sticks. Now layer it on the outside with one more layer. This second layer makes the pen stand sturdy. Stick the pen holder onto the pen stand base. Mark the pen holder boundries and stick the popsicle slits on the four sides. Make a portion for the eraser by sticking a slit at a distance of the eraser from the slit for the pen holder. Now stick a popsicle at the front and clip some wooden clips onto the popsicle.
#3 Popsicle Stick Earring Stand
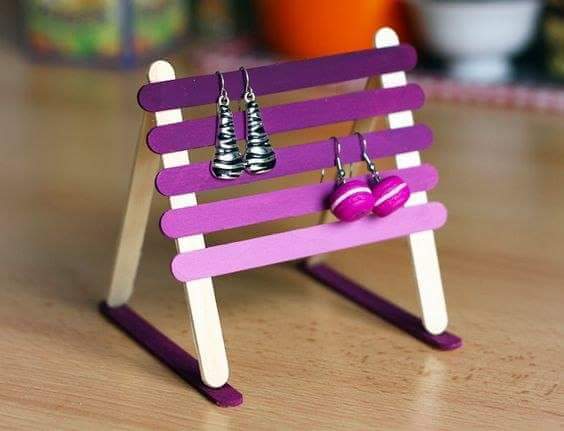
This is a sweet and very useful DIY project. Take two popsicles and paint them in a dark magenta colour. Take five popsicles and colour them in a gradient shade. So as to get one popsicle in the darkest shade and then lighter and then lighter, ending up with the fifth and the lightest coloured popsicle. Take four uncoloured popsicles. Now make a triangle out of the uncoloured popsicles with the dark magenta coloured popsicles as the base. Secure the upper corners of the uncoloured popsicles with hot glue gun. Now stick the gradient coloured popsicles on the sides of the triangles. Jjoining the two across popsicles. Your earring organiser is ready, you can now hang your hearing on the different levels of the gradient popsicles.
#4 Popsicle Stick Golden Light Lamp
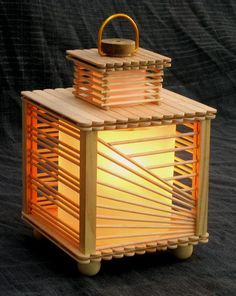
This is a great popsicle lamp. First of all decide the size of the bulb or filament you want to place inside the lamp. Now make a lamp base using the popsicles. Leave a hole at the bottom for the wires to pass. Use hard wood base for the base to keep it raised. You can double layer the base so as to make it sturdy. Now start making the sides of the lamp. You can use different kinds of designs to adorn the lamp. Make sure you leave enough empty space so as to make sure enough light is let out of the lamp. Complete with a popsicle top. You can add more design to the roof of the lamp using more popsicles. You can also adorn the lamp using glitter and paints. It makes for a great show in your living room or as a bedside lamp.
#5 Popsicle Stick Folding Stand
This is a very different popsicle folding stand. It is really easy to make. Collect a few popsicles. Now start with making a triangle with only two sides. Paste a popsicle across the triangular structure. This will be the base at which your card, photograph or drawing rests. Now join a back stand popsicle. This will give the opening and closing mechanism for the stand. This way you get a very different kind of opening and closing stand. This folding stand can be used as a frame for your crafts and other artefacts. You can put this up on your bed side table or your living room mantle.
#6 Popsicle Stick Swing Chair
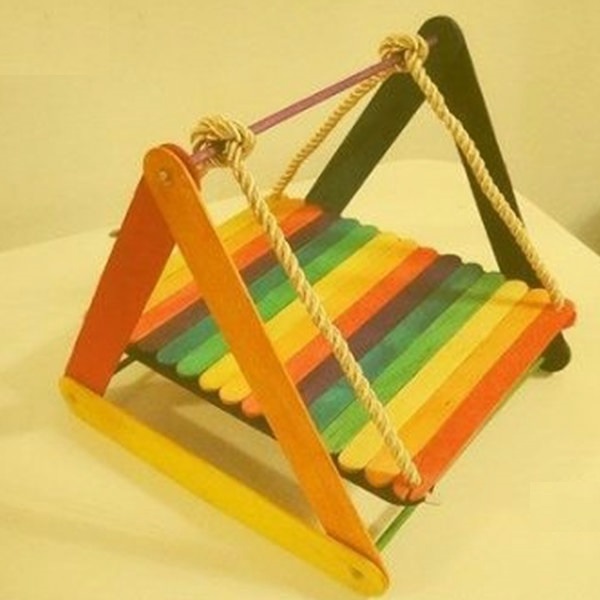
This popsicle stick swing is a great addition to your collectible DIYs. You can easily make this DIy project. First of all collect some popsicles and choose a colour scheme for your swing. Now start with two colourful triangular sttuctures as the base for the swing. Join the two triangular structures with a thin popsicle slit. This makes for a suitable distance between the two triangular structures. Make the swing base for the swing. This will be the part of the swings which swings. Make it sturdy using perpendicular popsicles on the reverse side. Thread the ends of the swing and tie the thread or thin rope through the top slit. Your swing is ready to swing now.
#7 Popsicle Stick Table & Chairs for Toy House
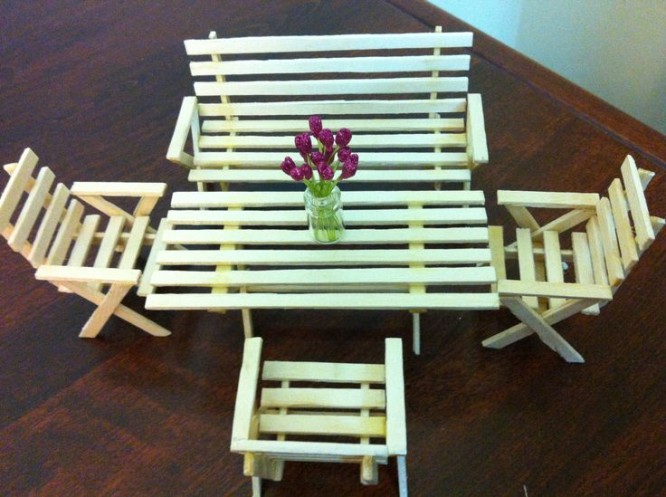
This is a very exquisite craft using popsicles. You can realise it in a very effective way. You will require patience to acvomplish this craft. First of all collect lots of popsicles, clean them and dry them up. Now cut the popsicles in revtangular strips of equal sizes. Now make the top of the table using long thin strips of the popsicles. Give a firm base through horizontal thin strips of popsicles. Make legs of the table by crossing two thin slits of popsicle strips. The same technique can be applied for the chair. Start with two different flat pieces and make them firm by using perpendicular strips of popsicles. Make legs of the chair using croos shape of two popsicles. Your kids can use this table and chair set as a meeting table or guest table in their games. You can also keep this as a prized showpiece at home.
#8 Popsicle Stick Photo Frame
This is a very sweet popsicle photo frame. Your kids can gift these to their friends, even you can make these cute photo frames for yoir near and dear ones. First of all collect some popsicles. Make a base with the popsicles. The base is to be made from the horizontal alignment of the popsicles.
Make a small holder for the frame with popsicles. Now stick the photo onto the plain popsicle base. Now frame the photograph with the help of coloured popsicles on all the four sides of the photograph. This will define the beauty of the photograph. You can decorate these coloured popsicles with glitter, sequins, etc. You can check this tutorial at the youtube page of k4craft.
Popsicle Stick Animal Bookmark
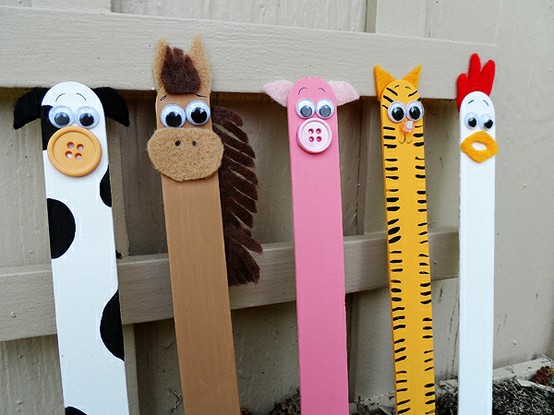
These cute stick puppets are a great fun to make and play with. They are safe playmates for your kids. You can help your children in making these cute colourful puppets and also teach them about different animals through these. First of all take a popsicle, clean it and dry it. Now start with a base voat pf paint for the popsicle.
Make sure you do not use too much water. Acrylic paints shall be preferred. For example if you are making a tiger. You will give a yellow-brown base coat. Cut small triangular felt ears for this tiger. Stick them on the back. Add goigly eyes for the tiger. Make a nose put of the felt. Make the mouth for the tiger using a black sharpie pen. Complete the look with thin strokes of black along the edges of the popsicle. Your tiger popsicle puppet is ready. You can make lots of such puppets, such as cow, hen, lion, giraffe, dear, etc.
Which one you like most? We would love to hear your thoughts on these easy popsicle stick crafts ideas in the comment section below. And be sure to follow on Pinterest for more ideas!
Thank you for visiting our website. Keep Creating with K4Craft!
You’ll Also Like
- DIY – How to Make Paper Snowflakes fun Step by Step Video Tutorial
- How to DIY Pom Pom Tree Skirt Video Tutorial
- DIY Faux Stained Glass With Acrylic Paint – Crafty Stuff Video tutorial
- Ombre Napkins – Easy DIY Table Runner and Napkin Video Tutorial
- Republic Day activities and crafts for kids India Republic Day Celebration


