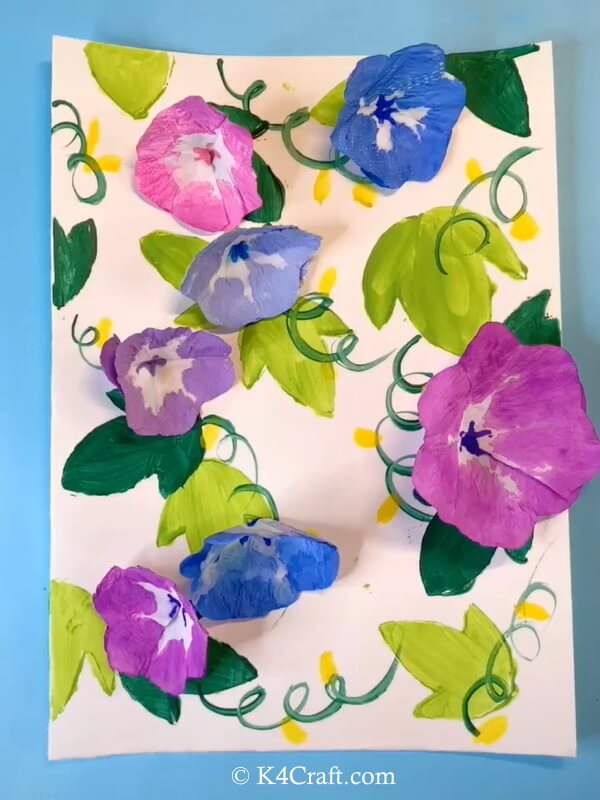
Do you want to paint a greeting card with watercolors? Here is amazing Hand Painted Watercolor Card Step by Step Tutorial. You can gift it on birthday, new year or any other festival or special occasion. Express your love with your original ideas and creativity!
We all love to paint but we are unable to find enough time. But in the present time, we have enough time to pursue our passion to the fullest. You can try out this pretty handmade watercolor card with tissue paper flower in this time. This is a very beautiful craft idea. Watercolors are easy to handle and work with. Your kids can also explore watercolor through this pretty craft.
The card design has 3D flowers which make it look even more attractive. it can be gifted to near and dear ones on different occasions like birthdays, congratulatory occasions, Best wishes, achievements, spring season, summer season, etc. You can personalize this card design according to your own needs. This craft will bring in happiness and hope in your heart. It is a great craft to try at such a time.
DIY Watercolor Card with Tissue Paper Flower
You may also like: Handprint Tree Card Craft for Kids – Step by Step Tutorial
Materials Required:
- Hard stock sheet
- White tissue paper
- Watercolors; dark green, light green, blue-purple and others
- Paintbrush
- glue
- pencil
- a pair of scissors
Procedure – Watercolor Card
✨ Step 1: Making the Stencil for the leaves
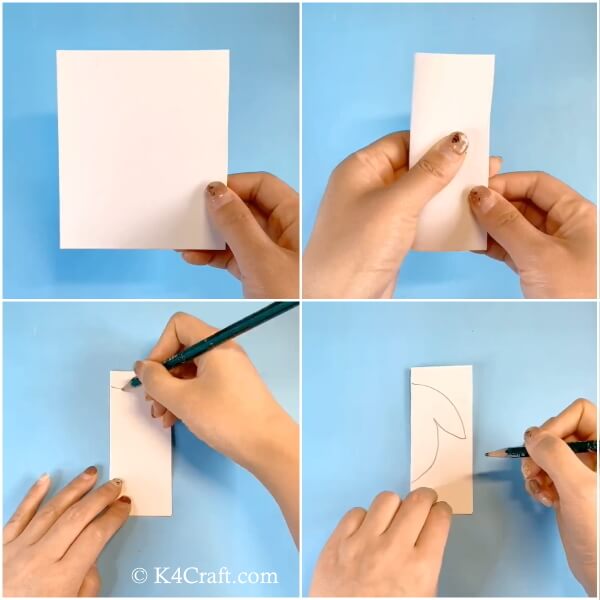
- We will be making leaves for this beautiful handmade craft.
- We need a stencil to get similar looking leaves.
- Take a square white colored hard stock sheet.
- Now fold it in half.
- Draw a leaf pattern along the midrib of the folded piece of paper.
✨ Step 2: Cutting the Leaf pattern
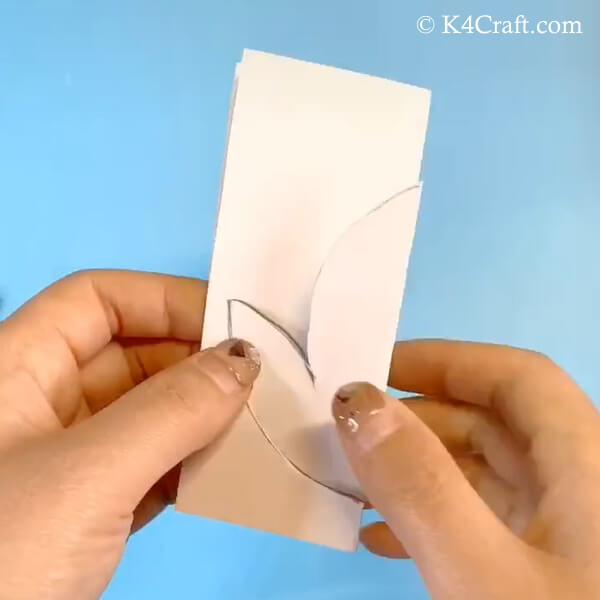
- Now we have drawn the stencil.
- Use a pair of scissors to cut out this leaf design.
- Now remove the leaf pattern from the white paper.
✨ Step 3: The stencil is ready
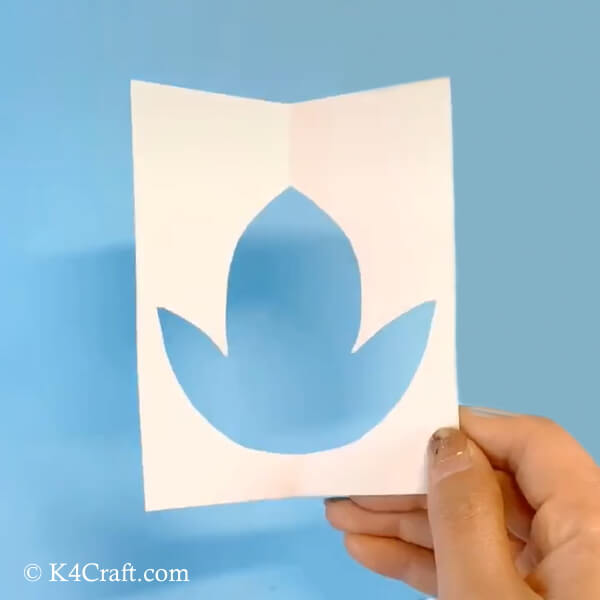
- The stencil for the leaf patterns is ready.
- Unfold the white square paper piece to get a hollowed out leaf pattern in the middle of the white square piece.
- Now we will use this stencil to paint the leaves on the base of the handmade craft.
✨ Step 4: Painting the leaf patterns
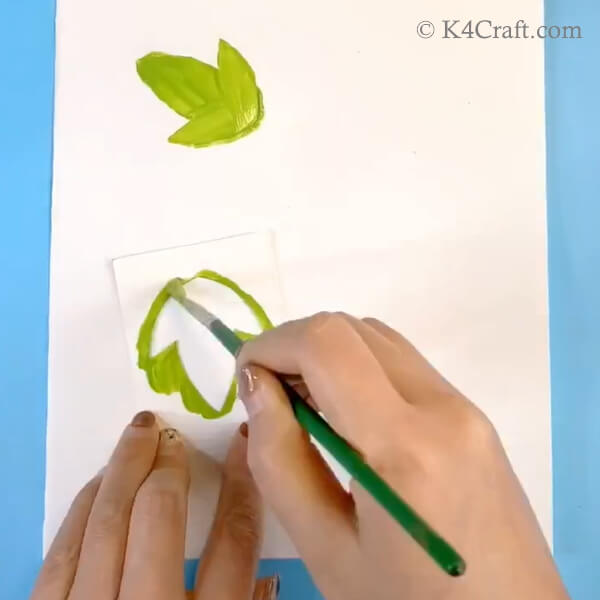
- Now we will start to paint the leaves on the base sheet.
- Place the stencil on the base sheet.
- Hold it in place with the help of the second hand.
- Take a paint brush and dip it in green paint.
- Now fill in the stencil with the help of this paint dipped paint brush.
✨ Step 5: Completing the leaf
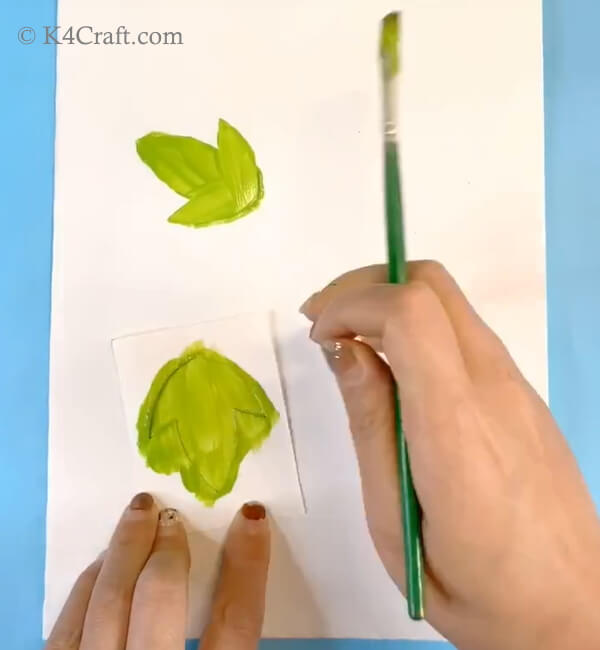
- Fill in the leaf shape in the stencil from every corner.
- Hold the stencil in place for some time.
- Then slowly remove the stencil from the base sheet.
- You will end up with a beautiful leaf pattern painted on the base sheet.
- Now paint more of such leaves.
✨ Step 6: Making more leaves
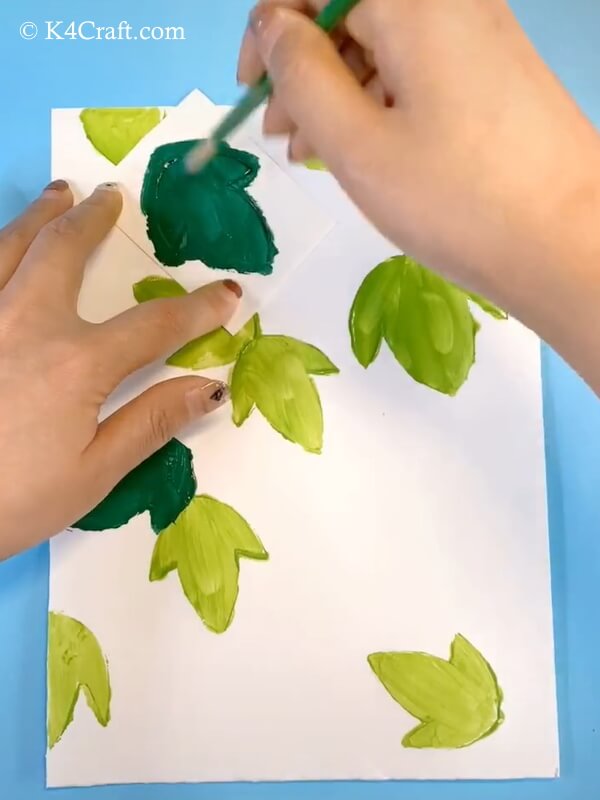
- Now we will be making more leaves which will be in a dark shade.
- Choose an ivy green color of the paint.
- Place your stencil in place.
- Hold the stencil in place.
- Hold it with your other hand.
- Dip your paintbrush in paint.
- Now start filling in the stencil.
- Make sure you paint in all the corners.
✨ Step 7: Making tendrils with paint brush
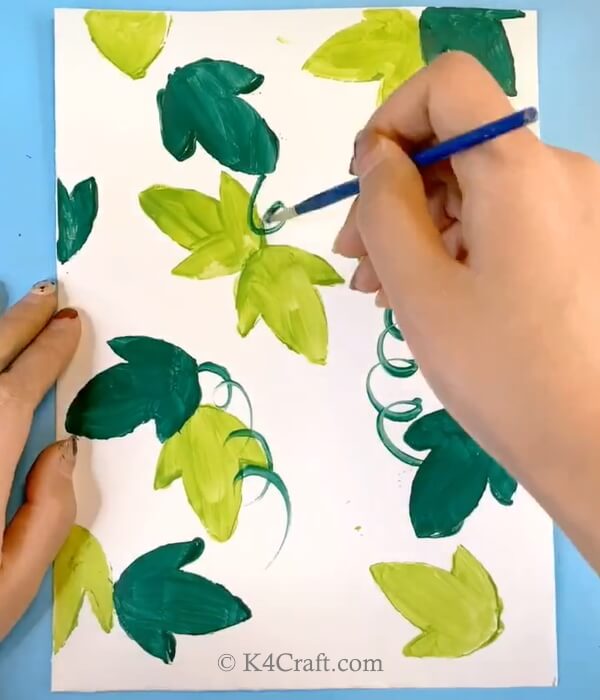
- The leaves still look incomplete.
- Now we shall add some more detail and dimension.
- We can paint some tendrils and branches with a thin paintbrush.
- Dip your brush in dark green paint.
- Make your paint filled brush flow in curls and curves to make these tendrils.
✨ Step 8: Making yellow flower buds
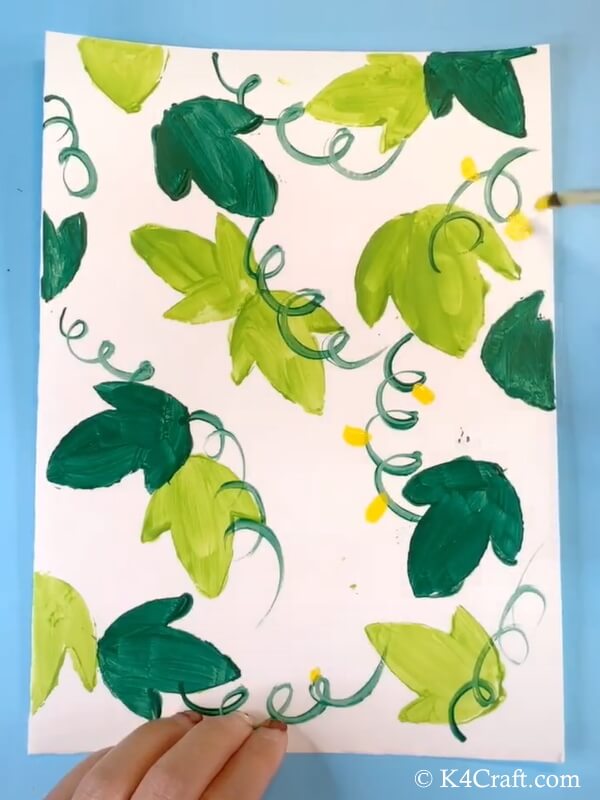
- Now we will be adding some spring to this handmade painting craft.
- Dip your clean paint brush in bright yellow paint.
- Now use this paint filled brush to make small yellow dots and buds around the tendrils.
✨ Step 9: Making the flower with tissue paper
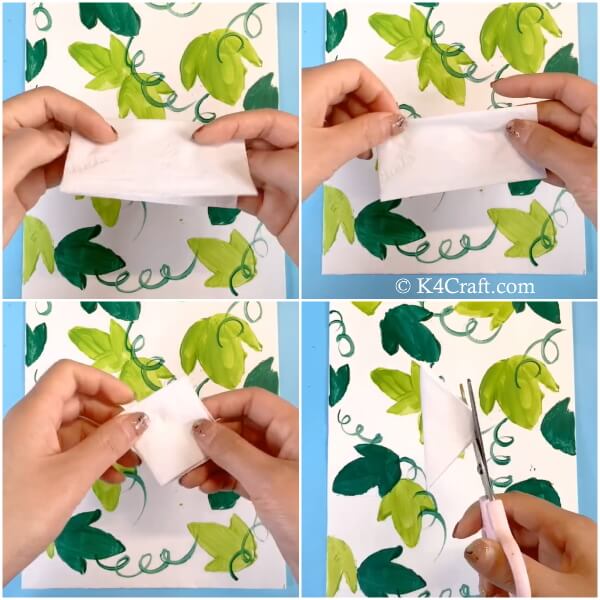
- Our base for this handmade craft is ready.
- Now we need to make some tissue paper flowers for this craft.
- These flowers are easy to make.
- You need a square piece of white tissue paper.
- Fold this square piece of tissue paper in half length-wise.
- Then again fold it in half in the perpendicular direction.
- In the end fold the square piece diagonally to en up with a triangular piece.
- Now use a pair of scissors to cut at the apex of the triangle so formed.
✨ Step 10: Painting the tissue paper flower
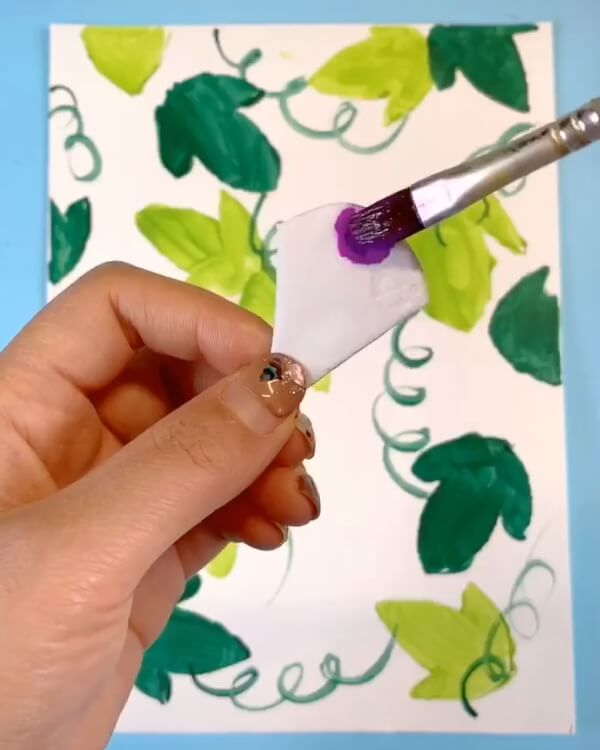
- To paint this tissue flower, dip your paint brush in water and then in bright colored paint.
- Now press this paint filled brush on the top of the flower fold.
- The water in the brush will help the paint to spread towards the base of the flower.
✨ Step 11: letting the tissue flower dry
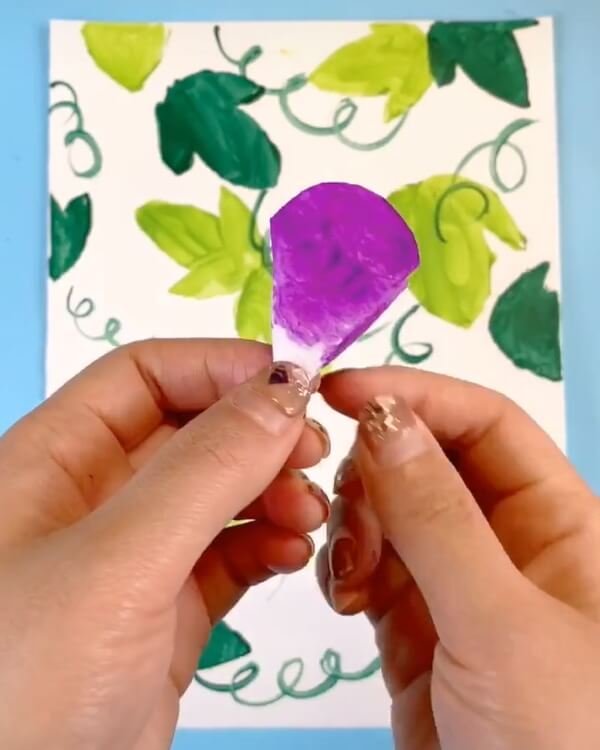
- Once you have painted the tissue paper flower and the paint has spread towards the base, we need to let it dry.
- Leave the tissue paper flower to dry.
- It dries in approximately 5-6 hours.
✨ Step 12: Opening the dry flower
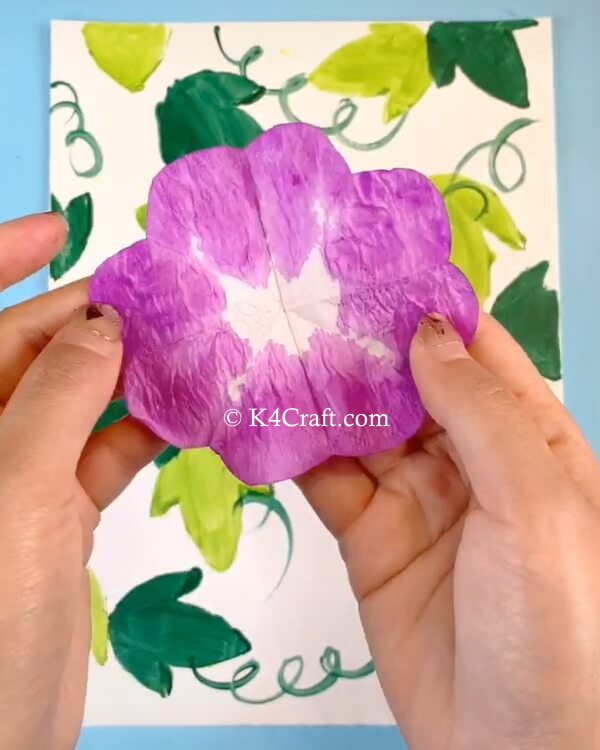
- Once the tissue paper flower has dried, we can open it up. Open the flower slowly as to avoid damage to the tissue paper flower.
- Open the flower fold by fold.
- Do not jerk the tissue paper while unfolding as it may lead to tearing of the tissue paper.
✨ Step 13: Adding detail to the central bulb
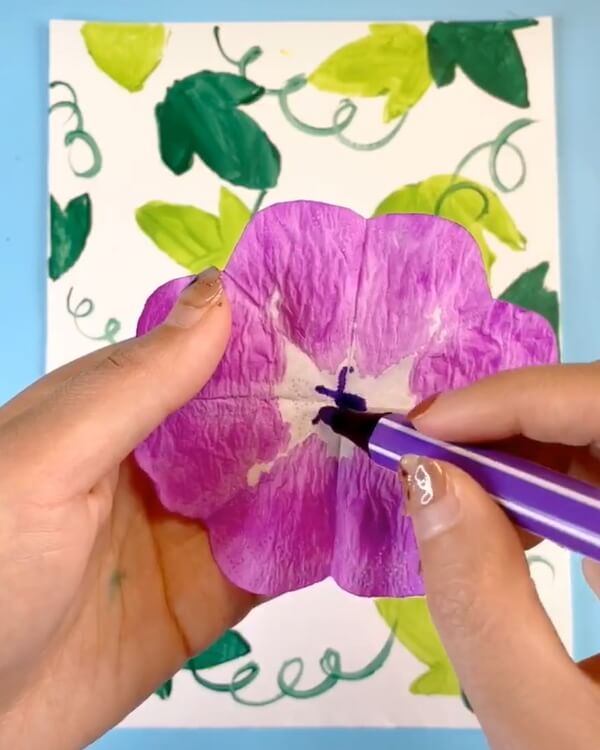
- Our tissue paper flower is almost ready.
- Now take a colored sketch pen and use it to draw the central bulb of the tissue paper flower.
- You can make the central bulb as you deem fit.
✨ Step 14: Cutting a slit in the tissue paper flower
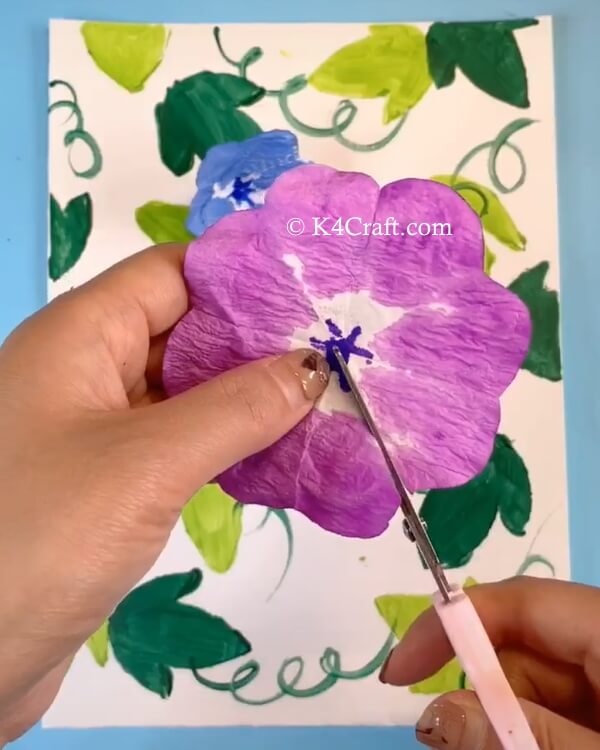
- As we are trying to make this tissue paper flower a 3D flower, we need to make a slit in the flower.
- Take a pair of scissors and cut along a fold line in between two petals carefully.
- Do not jerk while cutting as it may lead to tearing of the flower.
- Cut till the middle of the tissue paper flower.
✨ Step 15: Fold the flower
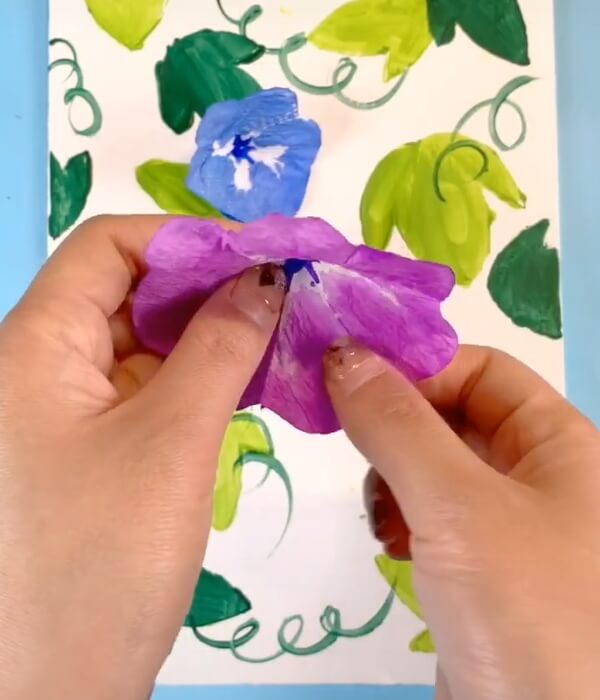
- Now we need to fold the flower along the cut slit.
- Carefully hold the two petals adjacent to the slit.
- Now push one petal over the other.
- This way the two petals become a single petal.
- Now glue these petals together to secure them in place.
✨ Step 16: Ready tissue paper flower
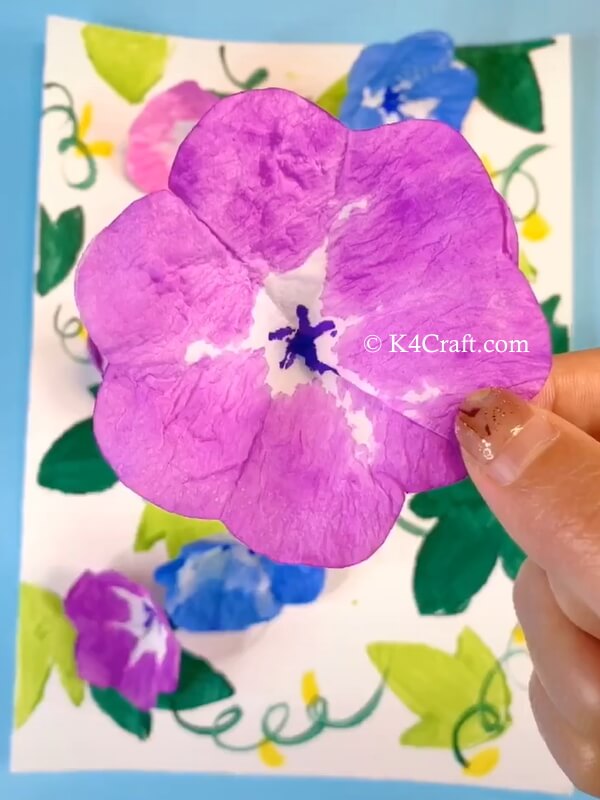
- Hold the two petals in place.
- It takes time to stick.
- You need to keep patience while sticking the two petals to each other.
- Now your flower is ready.
- make more such pretty tissue paper flowers for the hand painted base.
✨ Step 17: Sticking the flowers to the base
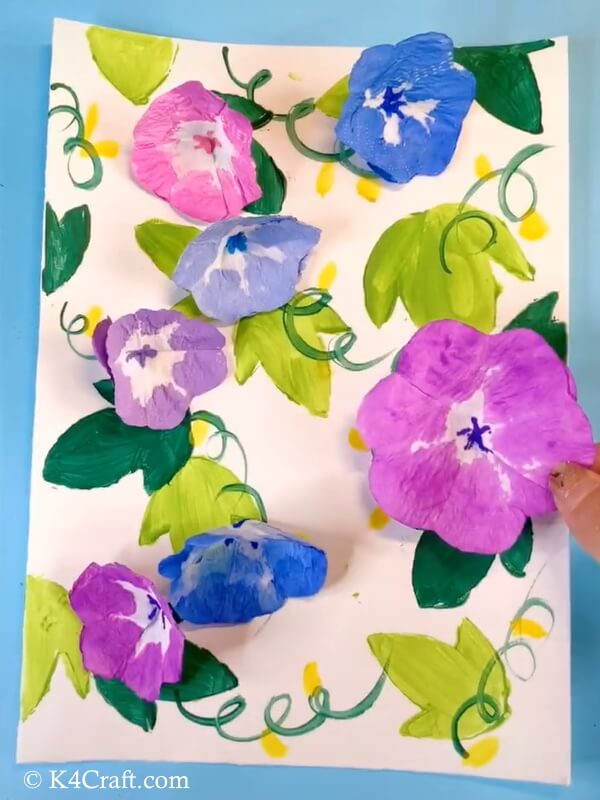
- To complete this hand-painted craft you need to make more such pretty flowers.
- Now stick these flowers on the hand-painted base.
- Make sure you do not huddle the flowers together as it will not look good.
- Stick the flowers at some distance from each other.
- You can use this beautiful hand made a painting to decorate your home.
- Add a string to the top of the painting to help in hanging it or add a stand at the back.
- It is also perfect for a card design.
- You can add your wishes and messages inside the card.
We hope you loved making this beautiful handmade painting. We are positive that this would have brought a smile to your face. You can check out other related articles on K4 Craft. We would love to hear from you. You can leave your comments and feedback in the comments section given below. We will soon come up with more such useful step by step articles for you. Until then keep smiling and creating with K4 Craft!
Don’t forget to subscribe to our Youtube Channel – K4 Craft Video Tutorials
You’ll Also Like
- 3D Flower Pop Up Card Craft for Kids – Step by Step Tutorial
- DIY Paper Card Crafts and Activities for Kids
- DIY Paper Rose Flower Vase Card for kids – Step by Step Tutorial
- 100+ Beautiful Quilling Flower Designs and Paper Quilling Cards
- How To Make Paper Apple Card Craft – Step by Step Tutorial


