Being an owner of a mobile phone mean’s you got to have its accessories which can keep you delicate tech-baby safe and comfortable. The first thing that comes in your mind regarding accessories may be the Mobile Charger which is good-on-the-go or a mobile panel which can keep your bud safe without being shattered on the floor, But there are some other Things you probably which you have no idea about and can be totally Helpful, Great and very necessary at the same time-Mobile Holder, Pop-socket, wall projector, Desk dock to name a few.
If you want to keep you phone protected but also make sure it looks fabulous at the same time then you should definitely be trying some DIY phone accessories. There are a lot of Online and offline shopping products for you mobile like beautiful cell phone covers but that cost’s for over 500-800 rupees ? Sounds really crazy to me, right! So, lets grab some Craft supplies and start creating thing’s for your tech-baby.
Below are some easy Tutorials with Video links and also detailed description which can be handy even if you are a beginner they are fun to play around- yes Trust me you’re going to absolutely love what the Outcome will be, without further go Let’s Get started for an organised life.
1) DIY Wall projector
Slide projector’s in early 80’s are great but Outdated now, Digital projectors cost’s a bundle so let’s build a Projector! Yes why not. The craft below is shown to Turn an Empty shoe box into a Cool Wall projector. The project is so easy that you can Overdrive on Instagram and also Flickr living Large. Let’s do a small physics Project 😊
Materials
- Magnifying Lens
- Foam board ( optional )
- Smartphone
- Glue sticks
- PVA Glue
- Shoebox
- Hobby Knife (XACTO)
- Hot glue gun
- Cutter Knife
- Ruler
Procedure
- Take a Magnifying glass and carefully use your hacksaw to cut off the handle
- Reinforce the box by gluing the flaps and corners of the box. This prevents it from wiggling
- Let it Dry for few minutes now position it in upright way and measure the magnifying lens on the top then centre it. Use a pencil to trace the cut line.
- Cut the round hole ( Hint: use the XACTO knife at the end of the compass for cutting a perfect and round hole ) Push it which itself is so satisfying!
- Glue the lens in place and then cover it with lid then carefully slice off the excess cardboard that’s like blocking your lens
- Tape the phone inside after adjusting the brighter projection. Simple
Now adjust the position of your phone by observing the image getting sharper or softer position. Turn off the light and Enjoy in Dark!
Read: DIY: Learn to make Homemade Smartphone Projector in just $2| 10 Easy Steps
2) DIY Charging Cell Phone Holder
Don’t toss those plastic bottles away so quickly – instead, turn on into Charging phone and keep that cell phone and cord up off the ground while it’s charging. You can either hook the phone holder over the base of the phone cord or hang it from a removable hook next to your outlet. Let’s see how to make it.
Materials
- Shampoo bottle
- Scissors
- Marker ( black )
- Fabric
- Hot Glue and Glue sticks
Procedure
- Take an empty shampoo bottle and rinse it well ( Note that the body of the holder should be wide)
- Make one cut on the front of the bottle, Half down only cut the front part remaining intact.
- Slice off the top bottle and round out the top to create a ‘U’ shape upside down
- Add a hole in middle of ‘U’. The hole will allow you to hang the holder from the adapter
- Take desired designed Fabric and mark the dimensions on the fabric, then cut out the pattern
- Paste the fabric using hot glue and you’re done
- Allow the holder to dry completely before use. 😉
Read: DIY: Nail Polish Painted Cell Phone Case (Tutorial)
3) Pop Socket DIY Craft
Never drop your phone again after using a pop socket and if you are a Muser or a Selfie Lover you are going to love this idea here’s how it’s made.
Material
- Suction cups
- Bottle caps
- Colourful Fabric threads
- Fabric Glue
- Hot glue
- Beads, Nail polish (For Decoration )
Procedure
- In this diy we are going to make 5 kinds of pop sockets. Firstly take bottle caps (5) and fill it with clay for support.
- For the first design wrap the colourful fabric thread around your hand now remove your hand and cut the end’s of the thread to give it a Pom-pom shape-secure it then paste it on the bottle cap after that place it on the suction cut using hot glue and your first design is ready .
- Similarly decorate the bottle cap with nail polish/ sparkles/ Beads etc and make your own design
Have fun experimenting with your own DIY pop socket.
Read: DIY Easy Mobile Phone Case Decoration Ideas – Step by step
4) Home made speaker’s | DIY Dock Station
Make your own DIY speakers in just 3 Steps, Yes you heard it right! Without getting into the description let’s jump to the procedure, Keep scrolling.
Materials
- Paper cups/ Foam Glasses ( 2 )
- Cardboard tube
- Marker
- Hot glue gun
- Scissors
Procedure
- Measure your smart phone base and similarly cut the shape on the cardboard roll (1 inch min)
- Make circles on the paper cups using the measurement of the cardboard roll and cut it
- Place the things together and voila! Your speakers are ready, Volume up !
Read: DIY WRAPPED STYLED EARPHONES
5) Personalized Headphones | Totally inexpensive
Time to style your headphones for next diy you just need 1 craft supply!
Materials
- Embroidery Floss
- Scissors
Procedure
- Grab the embroidery floss and make three knots on the head of the ear plug.
- Take the rest of the yarn and wrap it around your fingers to stop it from being tangled.
- Now place a scissor on the wire for balance and wrap around the yarn on the ear-plugs.
- Use different colour’s to make it look more attractive. Your done! 😊
Read: 15 Beautiful Shelves Designs for Your Home Decoration
6) Phone Stand | DIY using Marble and Beads
Hands-free display on a cell phone is a Great idea. And what’s even better is that you can make your own stand! It’s really easy and fun to make.
Materials
- Cardboard
- Paper roll
- Contact paper
- Glue gun
Procedure
- Check the description for the template of the provided video.
- Cut the cardboard using the template and then paste the contact paper.
- Take another piece of cardboard and cut it ( 9cm* 10cm ), paste the contact paper. Now place it as shown in the video on the two template cardboards.
- Measure your smart phone and accordingly place the cardboard pieces. After that take a paper roll and cut it. Place it on the two side of the phone stand.
PS : Also add some beads and Colours to decorate it 😊
Read: DIY : Learn to Make Donut Phone Holder
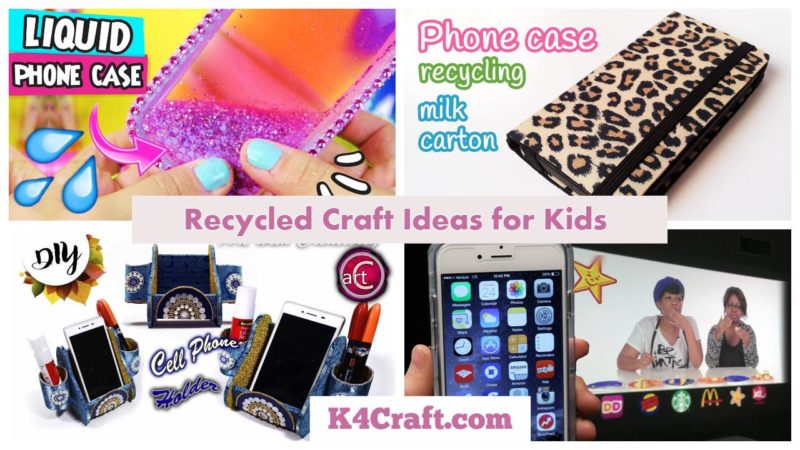
7) Milk carton Phone case | Recycle DIY craft
Materials
- Milk carton
- Piece of fine cloth
- Felt
- Elastic band
- Glue
- Adhesive tape
- Pencil
- Ruler
- Scissors
Procedure
- Take a milk carton and Trace out your mobile on two sides
- Cut the two pieces leaving all round’s on one piece and two sharp end’s on other piece
- Trace the pointed end piece on other carton and cut it into half place them at a distance of 5cm from pointed piece and 0.08 inch from each other, Now tape them
- Paste the fabric on these and remove the tape ( Trick : use a hot iron to stick the fabric ) . Now cover the front side with black foam sheet
- Take the rounded corner piece and drape it around with fabric adjust the elastic as shown in the video and place it accordingly .
For more detailed and elaborated step’s click on the video provided above .
Read: DIY: HOW TO MAKE ‘PEN QUILL’ (FEATHER PENS)
8) DIY Liquid Phone case
To make this Amazing phone cases without wasting so much penny to buy for it lets get started.
Materials
- PVC transparent sheet
- Wax paper
- Hair iron
- Mouth wash
- Glitters, Beads
- Foam sheet
Procedure
- Make a blueprint of your mobile case by tracing the mobile phone ( Draw a 0.11 inch margin around it and 5mm inside ).
- Similarly cut 2 pieces using this model out of transparent sheet take a wax paper and place it on the sheets to glue them together using flat iron.
- Fill the inside with liquid ( fill it with sparkles, Crystals and beads of your choice ) Secure it and then measure the height for the phone case add a foam sheet and glue it all together.
- Leave the space for camera lens, Buttons, Charging slot carefully.
Hope you’ve enjoyed the Simple and pocket Friendly Phone DIY accessories. 😊
You’ll also like
DIY: Learn to Make Non-Sew Zipper Bottle Case
Read More
- DIY: Recycled Newspaper Photoframe to Decorate Your Wall
- DIY: 10 Wall Hanging Ideas to Decorate Your Home
- Learn to Make Basic Patchwork Cushion Cover in Step by Step Tutorial
- DIY: Make Dandiya Sticks for Garba This Navratri (Video Tutorial)
- 10 Patchwork Cushion Designs to Decorate Your Home


