“Jewelry is like icecream there is always room for more “. This post is entirely dedicated to some really amazing DIY bracelet ideas that you can make without much effort and can gift them to your dear ones with a bit of customization to make them feel more special.
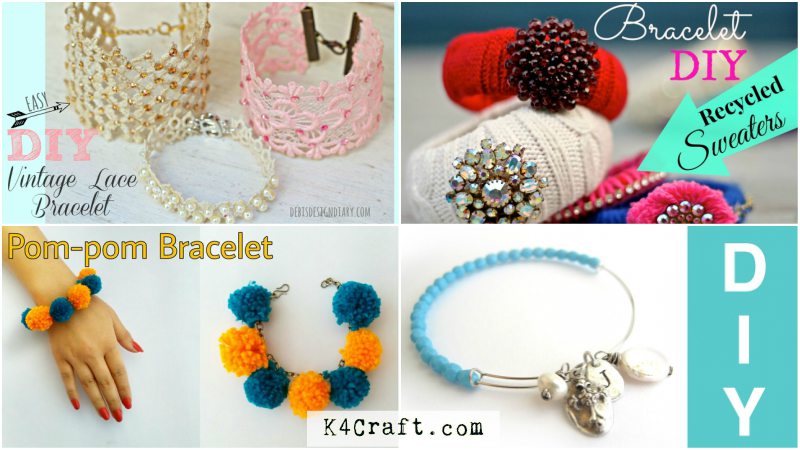
Pom Pom DIY Bracelet
Pom poms never go out if style and are always trending in different avatars. In this video you will learn to make a pom pom bracelet, which can easily go with your indo-western look.
Materials
- Colorful wool
- Fork and scissors
- Chain with lock and jump rings
Procedure
- Take a colourful yarn and place it in the center of the fork and start rolling around the fork as shown in the video to make a pom pom.
- Once the pompom is fluffy enought tie a knot with the yarn placed in the center.
- Cut the yarn and give a finishing touch to the pompom.Make as many pompom as you wish to have in your bracelet.
- Now take the chain and tie the pompoms to it at different intervals.
And finally your pompom bracelet is ready! You can also add some charms in between the pompoms to beautify your bracelet.
Read: Easy DIY Bracelet : Make your own beautiful bracelet
Bracelets from Recycled Sweater
Everyone has those unused and old sweaters which we don’t use anymore, so now is the time to put them to use and make some really amazing bracelets from it.
Materials
- Old sweaters
- Old charms or broke accessories
- Scissors and fabric glue
- Old wooden bangles ( broad and thin any of your choice)
- Other decoratives
Procedure
- Take your old sweater and cut the sleeve part from it as shown in the video.
- Now take the bangle and glue the sleeves to it with fabric glue or fevicol and let it dry properly.
- Once the sweater is completely stuck on it , now take the old vintage charms or any decorative that you want on your bracelet and stick them
- If you don’t wish to use your old sweaters, you can use a yarn to cover the bangle and then stick charms on it , but ensure the yarn is wrapped properly.
P.S- This is the easiest bracelet and can totally made from the recycled products found at home.
Read: DIY Stitched wood Cuff / Embroidered bracelet
Slave DIY Bracelets
Slave bracelets are the quirkiest thing that has been made.This bracelet cover your entire hand and make it look more gorgeous and highlighted.
Materials
- 4 mm Jump rings , faceted black beads, seed beads
- Iron twisted chains in platinum
- Magnetic clasps, spacer beads
- Lobster clasp, pliers, charms and glue and cello tapes
Procedure
- Take a cello tape and measure the hand im the shape you want for your slave bracelet and cut the chains of that size.
- Now take a wire and create a small locking loop at the end of it and add beads of your choice to it and create another locking loop at the end.
- Place that wire in the middle and cut chains for the remaining length and attach them to it with jump rings.
- Similarly cut all the chains according to the sizes and attach them with jump rings as shown in the video
- Add magnetic clasps to both the ends of the chain and lock it. You can also use regular chains with locks if you dont want to put magnetic clasps.
You can use various beads or charms of your choice and recreate this slave bracelet.
Read: DIY: Bracelets for bridesmaids (Tutorial)
Delicate Chain DIY Bracelet
Sometimes we choose to use the policy of “lesser the better” when it comes to accessories as heavy accessories with heavy dresses is a complete No- No situation. This video has the simplest yet delicate bracelet looking bracelet that can be made at home.
Materials
- 1 ft golden chain
- Circle charms
- Wire cutter and jump rings
- Lobster clasps
- Needle nose pliers
Procedure
- Take a jump ring and open it with needle nose pliers and attach it to the circle charm.You can use any charm of any shape.
- Measure the chain around your wrist along with the charm and then cut the chain
- Take another jump ring and add it on the end of the chain with the charm.
- Similarly add the lobster clasp at the other end of the chain and tighten it with the help of needle nose pliers.
- Just keep in mind the size of the wrist while cutting the chains.
P.S – Flaunt your delicate charm bracelet at the parties now.😆
Read: How to make Macrame Bracelet (Tutorial)
Adjustable Wire DIY Bracelet
Adjustable wire bracelets are always life savers, they can fit you even on your thin and thick days😋 This video shows easy and quick ways to make an adjustable wire bracelet at home.
Materials
- Memory wires
- Memory wire cutter
- Charms and beads
- Round nose pliers and flat nose pliers
Procedure
- Take the memory wire and cut on the one and half part of the wire such that it fits your wrist and can still be overlapped.
- After you cut your wire you will have to make a loop at one end of the wire and then turn it at 90 degrees as shown in the video.
- Add some beads to about three quarters of the round.(24-26 beads approx)
- Pass the open end of the wire through the loop you made and now create another loop at the end and before you close the loop slide on some charms if you want and then close the loop.
- Keep in mind both the loops should be facing in opposite directions and lock both ends properly as shown in the video.
Finally your adjustable bracelet is ready.
Read: How to Make a Wrap Bracelet Tutorial
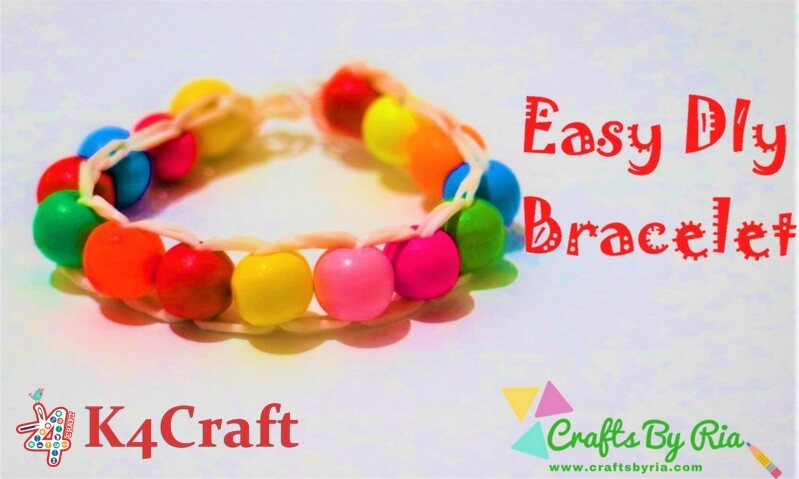
Beaded Elastic DIY Bracelets
Beaded jewelry works with almost everything.Here we will learn how to make simple elastic beaded bracelet.
Materials
- Elastic and jump rings
- Beads and charms
- Pliers
Procedure
- Measure your wrist and cut the elastic a bit longer than the wrist size.
- Take a bead stopper and fix on the other end such that the beads dont fall ou, now start puting the beads and rings in the elastic.
- Once all the beads and rings are passed through the elastic, remove the bead stopper and bring both ends together and tie a knot.
- Apply some glue to secure the knot and fix it in place
- Take a jump ring and attach it with a charm and attach the entire thing to the main loop in the bracelet and your beaded bracelet it ready.😆
Read: DIY: Learn To Make Wrapped Crystal Bracelet
Lace DIY Bracelet
This is really a unique type of bracelet and is really easy and cheap to make.
Materials
- Lace
- Fabric thickener
- Crystals and glitter
- Beads and jump rings and clasps
Procedure
- Take a lace and measure it around your wrist and cut it.
- Apply a fabric thickner and let it dry overnight around a circular object such that it dries in the shape of a bracelet
- Now once the lace has dried and thickned, stick beads or crystals or add glitter according to your choice.
- Finally add clasps on both the ends of the lace or you can also use chains with locks and also lobster clasps.
This is the trendiest bracelet and will look awesome with casual and party wear.
Read: COLORFUL CHARM BRACELET TUTORIAL
Chain – Elastic DIY Bracelet
This bracelet is simply made out of two materials and looks trendy and it takes hardly two mintues to make this.
Materials
- Jewelry making pliers
- Elastics
- Chains
- Ruler
Procedure
- Take an elastic and measure it around your wrist.
- Now measure the elastic on the ruler and check for the remaining distance of the wrist.
- And now cut the remaining length from the chain such that it can be attached to the elastic.
- Take the help of pliers to open up the chain and insert the elastic in both the ends.
- Close the chain ,and your bracelet is ready.
These were some really easy and quick bracelet hacks that turn out to be really amazing. You can make more customization to these bracelets by adding charms of zodiac signs or initials of the name etc. I hope you like them.
Happy crafting.😆
You’ll also like
Easy Jewellery Step by Step Tutorial
Read More
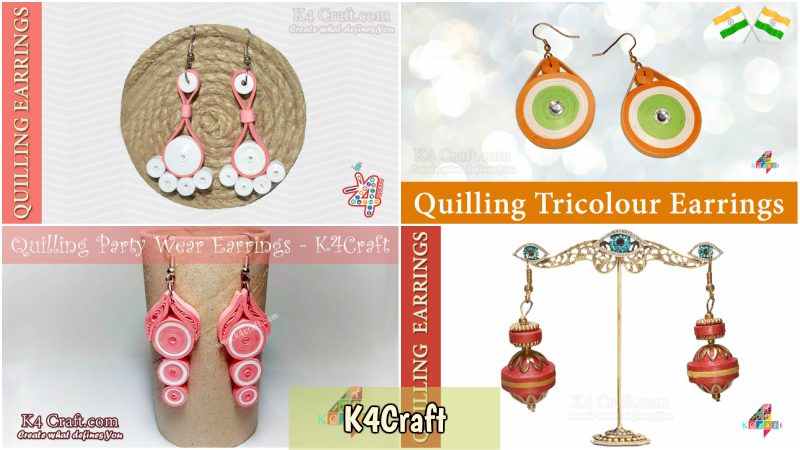
- DIY: How To Make Paper Quilling Jewellery in Simple Steps
- Collection of Antique Jewellery by Famous Artists
- DIY: Learn to Make Indian Tricolour Flag “JEWELLERY”
- DIY Beautiful Quilling Party Wear Fashion Jewellery
- 10+ Beautiful Tissue Paper Craft Ideas