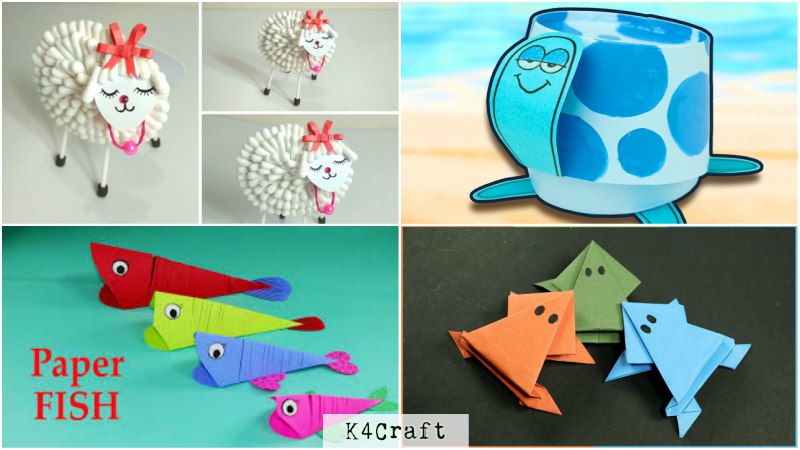
The most amazing part about Paper is that it is easily available and even easier to work with in many different ways, for kids it is the perfect start in the world of crafts. Taking inspiration from nature here are a few crafts your kids will be delighted to do.
1. Origami Paper frog that Jumps
Things You Need
- Origami Sheets
- Black Sketch Pen
- Scissors
Procedure
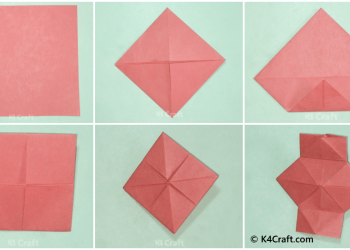
- Make lines by folding the paper, first fold it in half then fold both upper corners to the centre line. Then fold the remaining portion below upwards and cut out that portion.
- Open the sheet and turn one side inwards to from a triangle.do the same for the other side. Now as the lines are formed you can start folding for making the frog.
- Fold both sides to the centre. Flip the paper and fold to from a triangle from the shorter side from both ends. You will get a diamond shape square.
- Now fold the edges of the triangles from one side inwards and then tuck it from one side. Now the paper behind that edge will be folded to form a long triangle and the end tucked away will be placed back on it. Repeat this process on the exact opposite side.
- Take the edge of the smaller square formed and fold it outwards to form frog legs. Fold the top of the bigger triangle inwards and then fold the sides above it inwards twice to form another set of legs
- Fold the side and two legs inwards and then press to form a curve which will enable the paper frog to jump.
- Draw eyes on the front and the frog is ready for a leap.
2. Paper Fish
Things you need
- Origami colourful sheets
- Ruler, Pencil, sketch pen
- Glue stick, Scissor, paper cutter
Procedure
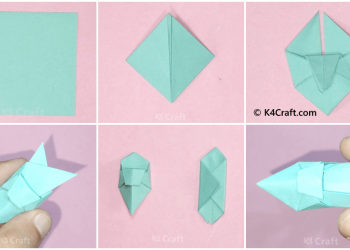
- Take A Square Craft sheet and fold it to form a diagonal crease. Open it and now fold from one side to form a long triangle and do this for the opposite side too. This will give you more creases.
- Leaving the bigger end of the side for the face of the fish. Start making slits for the body at equal distance, only on the top side, now paste the two sides below together to form the body of the fish.
- Cut the side from below at the front, to make fins cut out shapes of fins from another piece of coloured paper of your choice. Cut out one long fin and two short ones. Then sketch lines on the fins.
- For eyes take white paper cut into circles and using sketch pens draw the eyes.
- Paste the eyes at the sides of the face and the fins in the middle and the long fin at the end.
- Draw brows and outlines on the eyes of the fish. Take more paper to cut out the mouth of the fish in a semi-circle. Paste it in the front and done.
3. Paper Bird
Things you Need
- Coloured Paper
- Scissors
- Glue
- Sketch Pens
Procedure
- Take two pieces of craft paper and cut them into Circles of diameter 10 cm each. Fold the side of the circles into an arc to cut slits for wings. Curve them by hand to give them a feather like effect.,
- Take a small circle of diameter 5 cm or less for the head, take white paper circles for eyes, draw eyes with sketch pen and paste them on the head.
- Take orange paper for the beak by cutting it into a triangle with two longer sides. Paste it as well on the front of the head.
- Take a rectangular small strip approximately 6 cm for the tail and cut slits on the top end for feathery effect. Paste it at the end of the body and start pasting the wings to the body. Make sure the bottom of the body is not pasted together, this will enable the bird to rock back and forth when we keep it on surface.
- Take the orange paper again and cut semicircles for making legs of the bird. Paste them and voila! The bird is ready.
4. Paper Elephant
Things You Need
- Construction Paper black and white
- Pencil, Scale
- Scissors
- Glue
Procedure
- Take a black paper and fold it in two halves, Draw the sketch of an elephant and cut it.
- Paste both the elephant sides together. Take another black paper sheet, fold it and draw the huge ears of the elephant. Then cut them out.
- Make a cut near the head and insert ears into it. Take a white sheet and fold it into a long strip and cut along the fold. Draw tusks and then cut them out. Make a slit for the tusks and paste them in place.
- Taking small white paper circles make the eyes of the elephant, then cut out black circles smaller than them to paste on these white circles. Than cut small white circles again to paste on black ones to finish the eyes. Paste them on the elephant to complete it.
5. Paper Dog
Things You Need
- A4 Cardboard Paper brown, black and white
- Sketch pens
- Scissors
- Glue
Procedure
- Take the a4 Cardboard sheet and fold it in half and cut it, take one half and fold it again.
Cut two slits at both sides for legs and paste the middle portion together to make the torso of the dog. - Fold the ends of the legs outwards to make paws.
Take the leftover other half from before, fold it in the middle and cut out the face shape of the dog from it. You will get two shapes attached together. - Then separate the two shapes from each other and using white paper cut two circles for eyes and paste them on opposite sides of each face cut-out. Draw eyes, nose and mouth on both faces.
- Take black paper and cut out ears for the dog by cutting a long strip, folding in half, curving it from one side and cutting the pair of ears obtained from the middle. Paste it behind the eyes.
- Take the black paper and cut out a tail. Now using glue paste the dog faces on the body and the tail. The dog is now ready.
6. Paper Lion
Things you need
- Craft paper
- Sketch pens
- Glue
- Scissors
Procedure
- Take A4 sized orange paper and draw equidistant lines horizontally, take more paper and cut out a round circle for the lion head, two small curved ears, a tongue, a mouth, a drop shape for the tail.
- Paste eyes on the face using black and white paper circles, below them the mouth and the tongue below it.
- Then cut out the body of the lion and sketch the body. Now start making the mane by cutting out the orange strips. Cut the strips in half when done and leave one strip for the tail. Using glue stick paste these orange strips to the backside of the face. Using scissors give curve them inwards.
- Paste the ears behind them to complete the face, now take the face and attach it to the body. Taking the leftover strip paste the end of the tail one it after curving the strip and attach it to the body. Your roaring lion is now complete.
7. Paper rabbit
Things you need
- Yellow Construction paper
- Scissors
- Glue stick
- Pencil, markers
- Googly eyes
- Pink Pom Pom
- A bowl to trace
Procedure
Using the bowl as a template, draw a circle and cut it out.
Cut all parts of the rabbit like ears, feet, face and hands.
Fold the circle in half and cut on both sides to make a U shape. Then using a marker paint bunny paws and ears then paste all the parts together. leave the folded portion as it is which will enable the rabbit to move
Paste the google eyes on the face and flip over to add a tail made of the pink pom pom.
Using black marker add nose, mouth and whiskers. The rabbit is ready to rock.
8. Paper Cup Turtle
Things you need
- Paper cups
- Marker
- Acrylic paint and paintbrush
- Craft Paper
Procedure
Take two cups, Using the marker mark a line on both cups, but one cup having the line higher than the other. Cut them out along the line and paint the pieces of cups with the bottoms intact.
After drying the colour, Paint the bigger cup with a darker shade making circles to make its shell.
Draw the face and body of the turtle using marker on paper around the tracing of the cup on paper, colour the body and cut it out in pieces.
Paste the legs on the smaller cup and the tail on the bigger cup, Paste the face inside the bigger cup and put them together, it can also be used as a container, but for kids you can just paste it together to finish the turtle.
9. Cotton bud Sheep
Things You need
- White and black Craft Paper
- Marker
- Cotton swabs
- Ribbon
- Scissors
- Glue
- Decorative string with a bead
Procedure
- Take a piece of white paper and cut it in two oval pieces to form a sheep body and a face. Draw features using a marker on the smaller piece such as eyes face mouth and nose.
- Use scissors and cut the sticks in such a way that only the swabs remain.
- Start pasting the swabs above the face to make in a row but the ends pasted lower to resemble the ears.
- Stick a red stone sticker at the nose. Now take the body and start pasting the swabs at the boundary.
- Start pasting the swabs in the same manner inside to fill the body. Then paste the decorative string with a bead onto the body.
- Paste a small ribbon bow on the crown of the sheep head, then paste it onto the body take 4 sticks which were left after cutting the swabs, take the black paper and cut strips to roll and paste onto one end of the sticks to make legs of the sheep.
- Paste two on the back side of the paper and two on the back side of the sheep body. The sheep is now ready.
10. Paper giraffe
Things you Need
- Coloured paper and black paper
- Pencil
- Scissors
- Glue stick
Procedure
- Take coloured paper and cut it to size of legs, and using pencil shape them into cylinders for making legs, make four of these and glue the ends.
- For making the body cut a rectangular strip and paste the legs onto it, then join the ends.
- Make a longer cylinder for the neck and paste to the body. Now take another small rectangular strip for the face and cut out two small pieces for the ears of the giraffe and paste them as well.
- Using Black paper cut out squares to make the patches on the giraffe body, cut out two smaller squares for the eyes and to place on the tip of the ears.
- Take a lean strip of paper to make the tail and attach a black paper at the end and your giraffe is ready.
Read More
- 20+ Summer Special Home Decoration Craft Ideas
- DIY Cat and Mouse Corner Bookmarks for kids
- DIY Teddy Bear Craft : How to make a Pom Pom Teddy Bear
- Paper Lavender: How to make beautiful paper lavender
- How to make a Moving Paper Caterpillar


