“An amazing piece of jewellery works wonders for your outfit”
It is always a task to choose the perfect accessory for your outfit as sometimes choosing a wrong accessory can lead to really awkward situations. So here are a few amazing necklace ideas that can be easily made at home.
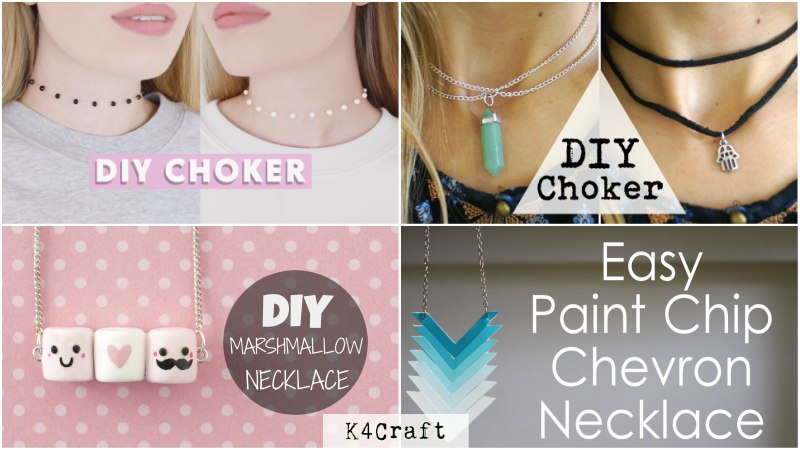
DIY Ombre chevron necklace
The ombre is considered as the latest trend in the jewellery. In this video you will learn a really amazing ombre scheme based locket idea that can easily go with your casual outfits.
https://youtu.be/U_tLdFgkSYI
Material Required
- Chains and jump rings.
- Shade card of your choice
- Wire cutter, pliers and scissors and glue
- Paint brush and a pen and mod podge
Procedure
- Take the shade card and cut the colour papers and separate them
- Now take a triangular object and cut a piece out of the paper as shown in the video with all the ombre based colours.
- Once all the papers are done arrange them in a pattern of light to dark shades or vice versa.
- Now stick them on another paper and allow them to dry and add some mod podge over it.
- Now cut the extra area along the pattern and make two holes over the top and attach the jump rings and the chain.
And yeah your DIY Necklace is ready! Flaunt your ombre based necklace with a white casual t-shirt.
Cute and Easy Marshmallow Necklace
This necklace hack is one of my personal favourite and it is really adorable.
Material Required
- White and pink clay
- Chains and jump rings and eye pins
- Cutter and paint brush and black and pink paints
- Varnish or triple thick gloss
Procedure
- Take some white clay and make a thick snake from it and repeat the same with pink clay. So you will need two snakes of pink clay and one snake of white clay, you can also use one pink portion and two white.
- Now place them in a row and cut equal piece from it.
- Now attach all the three clays with eye pins and secure it on both ends
- Take small balls of black clay and make eyes, you can also use black paint to make eyes and moustache.
- Allow them to bake in the oven for a while and then make a pink heart with paint over the white clay and add details with black paint over the pink clay as shown in the video
- Add some triple thick gloss to secure the paint from spreading. You can also use varnish to add some shine to the clay.
- Now add jump rings and add the chains and your marshmallow necklace is ready.
DIY Minimal Pearl Bead Choker
We have always heard the saying “Less is more”. So here is the minimalistic pearl choker that will look really elegant with almost every outfit.
Material Required
- String or elastic
- Pearls
- Chains with clasps
- Pliers, ruler and glue gun and scissors
Procedure
- Cut the clear thread or string of about 34-35 cms long whichever fits the best and keep in mind that an extended chain will be added to it so cut accordingly
- Stick the string to the table such that the beads don’t fall out and start passing the beads through the string and once the bead reaches its position add a drop of glue and ensure the bead gets stuck to it so that it remains in place.
- Repeat the process till you are done with all the beads.
- Cut of the excess string and attach the clasps at the end of it with the help of glue gun as shown in the video.
You can use colourful beads or a combination of two different sizes of beads to customise this chocker.
Forever 21 Inspired Choker Necklace
We all have been craving to buy some really cute stuff from F21 , but haven’t purchased it because it costs a bomb. So today we are going to make easy and cheap F21 inspired choker.
Material Required
- Leather cord
- Pendants and jump rings and crimp beads
Procedure
- Measure the length of the leather chord around your neck and cut a little extra.
- Take your crimp bead and place it at one end and fix it with the help of the pliers and repeat this step on other side of the leather belt.
- Now take a jump ring and connect that to a clasp and add it to one end and on the other end add some chain.
- Choose a charm and attach it with a jump ring and pass the leather chord through it. And now you are done
- You can make another chocker with simple chain and a few jump rings and a pendant by repeating the same steps as above.
- You can add more chains to the main chain to make it fancier as shown in the video or can go with a single chain pendant necklace.
BOHO Necklace
BOHO necklaces have always been the eye candy and really go well with festive outfits and also with simple kurtas.
Material Required
- Silver boho coins and main necklace base.
- Jump rings and thick silver chains
- Pliers and clasps rings
Procedure
- Take the main necklace base with holes at the bottom as shown in the video.( you can purchase it from the craft of some jewellery thrift store or online)
- Open up the jump rings and attach the coins to them and now attach the entire thing to the main necklace.
- Once all coins have been attached ensure that all the jump rings are perfectly fixed.
- Now add the thick silver chains at the back with connecting the clasp at one end and some extending chain at the other end.
- Finally your bohemian necklace is ready to flaunt in style.
Mosaic necklace
This necklace will definitely take you back to the 90’s era , but simultaneously give your outfit a vintage look.
Material Required
- Beads of different colours
- Jump rings, chains, eye pins, clasps
- Pliers
Procedure
- Take a 2 inch eye pin and pass some beads through it and close the end with the pliers such that a loop is formed.( You will need at least 19/20 beads)
- Take two eye pins and pass them through the beaded eye pins from the side as shown in the video
- Now make another beaded eye pin with different colour and pass it through the side eye pins
- Now add two different shades of beads in the third eye pin and pass it through side eye pins
- Complete ten pins in such pattern and colour combination of your choice.
- Measure chain of the desired length and attach it to the mosaic necklace with the help of jump rings.
- Add the clasp at one end and a jump ring to another and your mosaic necklace is ready.
P.S- You can use ten different colours of the bead to make this necklace or can simply use white pearl finshed beads.
Statement necklace
You would surely love this necklace as it turns out to be the simplest one.
https://youtu.be/ELJnRtoedng
Material Required
- Thick Paper and soft board
- Super glue, scissors and paint
- Jump ring and chains and mod podge
Procedure
- Take a thick paper and draw a shape as shown in the video and cut at least six to seven such pieces.
- Stick them to a soft board and cut the shape again
- Paint both the sides of the soft board shape in the colour of your choice and allow it to dry and add some mod podge to add some shine to it.
- Once the shapes have dried, take the upper part and make two holes on the side, to attach jump rings
- Attach all the shapes with jump rings and add a chain on both ends of the shapes and later add a clasp as the lock
- Your statement necklace is ready.
DIY easy chain choker
Say bye to the same old leather chord choker and welcome the new and elegant chain choker with charms that will totaly redefine your look.
Material Required
- Charms and jump rings
- Pliers and cutters
- Scissors and clasps
- Thicker and thinner chains
Procedure
- Measure the length of the chain around your neck and cut it with the pliers
- Now cut it into half again and attach a charm or pendant to the chains on both the ends with the help of jump ring.
- Add some thicker chains to the main chain which is thinner as shown in the video.
- Attach all the chains with jump rings in a loop like pattern.
- Add clasps and extending chains to both ends of the main chain to form the lock.
- Finally your chain choker is ready.
How to Make a Wrap Bracelet Tutorial
Wrap bracelets are trending now, every woman want to have in her jewellery collection. and they are so much easier to make than they look. And best yet, you only need a few components to make your own one-of-a-kind DIY wrap bracelet!

These were some really easy to make DIY necklaces that would hardly cost you some money and also will allow you to reuse your old chains and charms from your broken accessories. I hope you like these videos. Please share your experiences in the comment section. Happy crafting!
Read More
- Summer Art Ideas To Have Fun This Summer
- Easy To Make Flower Art For Decor, Gift & More
- Creative Life Hacks Using Recycled Items
- Creative DIY Phone Accessories To Make At Home
- Innovative Recycled Craft ideas for Kids To Try This Vacation


