

Learn how to fix a diamond spill with our simple guide. Prevent future spills and enjoy your diamond painting projects with ease and stress-free creativity!
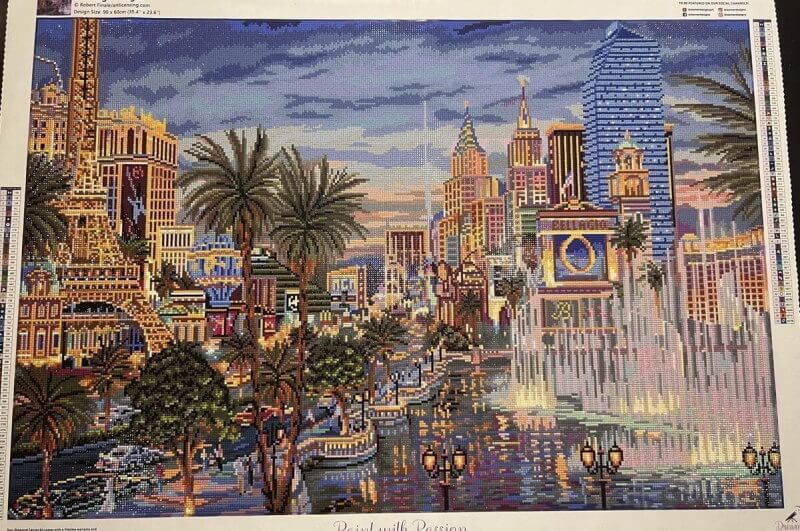
How to Fix a Diamond Spill While Working on Your Diamond Painting Kits
When it comes to diamond painting, sometimes you put hours of effort into your project and suddenly disaster strikes. Your container tips over, and hundreds of tiny diamonds scatter everywhere.
This is frustrating, especially when you’ve organized everything perfectly using your diamond painting kits. You might be wondering if your project is ruined.
But take a deep breath. This happens to every diamond painter at some point. The good news is that diamond spills are completely fixable with the right approach. You can save most of your diamonds and get back to crafting without starting over.
In this guide, we will show you exactly how to clean up a diamond spill quickly and efficiently. We will also share simple tips to prevent this from happening again.
What Causes a Diamond Spill?
When working with diamond painting kits, spills are almost inevitable due to the loose nature of the diamonds. The tiny, shiny pieces are easy to scatter, especially when trays get bumped or your hand reaches across your workspace. It’s the nature of the hobby! A slight nudge, a misstep with the tray, or an accidental knock while grabbing a tool can send diamonds flying.
How Diamond Painting Kits Are Designed to Minimize Spills
Many high-quality kits are designed to minimize spills. They include tools that help with organization and diamond placement. These tools significantly reduce the chances of accidental spills:
- Well-organized trays
- Secure containers
- Strong adhesives
5 Steps to Fix a Diamond Spill: A Simple Guide
Mishaps happen, but fixing a diamond spill is easier than you think. Let’s walk through the simple steps to get you back to crafting in no time.
Step 1: Stay Calm—It Happens to Everyone
First things first, take a deep breath! A diamond spill is a normal part of the process and there is nothing to stress about. Stay calm and focus on resolving the issue. Don’t let this steal the joy from your crafting time. You’re still going to create something beautiful.
Step 2: Gather Your Tools and Supplies
To clean up your diamond spill, you’ll need a few simple things you probably already have:
- Tweezers for picking up individual diamonds.
- Small containers or bowls for sorting the diamonds.
- A tray to safely contain the diamonds as you organize them.
- A brush to gently sweep any stray diamonds from your canvas.
Step 3: Collect the Spilled Diamonds
Use your tweezers or brush to carefully collect the spilled diamonds. If different colors get mixed together, try sorting them as you go. It’ll save you time later and keep everything organized.
Step 4: Restore Missing Diamonds
If you can’t find all your diamonds after cleaning up, don’t panic. Most good kits come with extra diamonds for exactly this situation. Check your kit for a backup set, or reach out to your kit provider to request replacements. You’ll be able to finish your design without any problems.
Step 5: Check the Canvas for Spilled Diamonds
Take a gentle look at your canvas for any diamonds that might have landed on it. Use a soft brush to carefully clean the area without messing up the sticky surface. Getting rid of these loose pieces helps make sure your new diamonds will stick properly when you place them.
Tips to Avoid Diamond Spills in the Future
While fixing spills is important, preventing them in the future will make your crafting experience even more enjoyable. Here are some helpful tips to keep things spill-free.
Use the Right Workspace Setup
The best way to avoid spills is to set up your workspace the right way. Make sure you have a clean, steady surface where your tools and diamonds won’t get knocked over easily. Try using a tray with raised edges or a container with a lid to keep everything safely in place.
How to Organize Diamonds for Maximum Control
Get some containers with separate sections to keep each diamond color apart. When your diamonds are organized this way, you’re less likely to have spills, and you’ll find the colors you need much faster. A tidy workspace makes everything so much easier!
Why Handling Drills Gently Matters
When placing diamonds on your canvas, always handle them gently. Pressing too hard or trying to rush can lead to a spill. Instead, use a light touch when positioning each diamond, allowing the adhesive to hold them securely in place.
How Dreamer Designs Kits Help You Avoid Spills and Enjoy Your Crafting

Dreamer Designs makes diamond painting kits with strong canvases and better sticky surfaces that keep your diamonds right where you put them. This means fewer spills and less frustration while you create. Here’s what makes their kits special:
- Uh-Oh Insurance: Had an accident? Don’t worry! They’ll replace your spilled diamonds or even send you a whole new kit if needed.
- Easy-to-Follow Instructions: Clear, step-by-step guides that make sense whether you’re just starting out or you’ve done this before.
- Lifetime Warranty: Missing pieces? Damaged parts? They’ll fix it for life.
Spilling diamonds while working happens to everyone, but it’s really not as big a deal as it feels at the moment. With a few simple tools and the right approach, you can get everything back on track quickly.
All you need to do is set up your workspace smartly, choose good quality materials, and remember that these little accidents are just part of the journey. Your diamond painting should be fun and relaxing, not stressful.


