Do you love toilet paper roll craft as much as we do? you’ll start collecting (or hoarding) toilet paper rolls after you see these incredible DIY toilet paper rolls crafts because we are sure that they are tempting enough.
You can make amazing crafts for kids and engage them in creative journey to recycle tissue rolls. Toys made of toilet paper rolls are not only easy to make but also eco-friendly. You can decorate your kids room with toys and decorating material made of these paper rolls. These paper roll DIYs look great and alluring.
DIY Toilet Paper Roll Craft Ideas
#1 Owl Toilet Paper Roll Craft
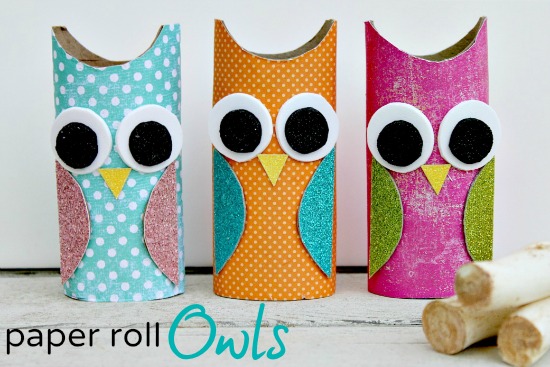
This is a cute DIY craft and is easy to make. You can also make this into a pencil stand. Your kids can also make this owl paper roll DIY. First of all take an old paper roll and cut of the top in two semi-circles. This gives the head of the owl. Now cover the surface of the toilet paper roll in coloured paper or glitter. You can also use patterned paper. Take two big google eyes and stick them onto the owl face. You can use white and black foam in case you do not find big googly eyes. Add a triangular nose for the owl and two thin semicircular wings as well. This completes the toilet paper roll. You can turn this into a pen stand by adding a heavy base at the bottom of the owl.
#2 Pom Pom Pets: Toilet Paper Roll Houses
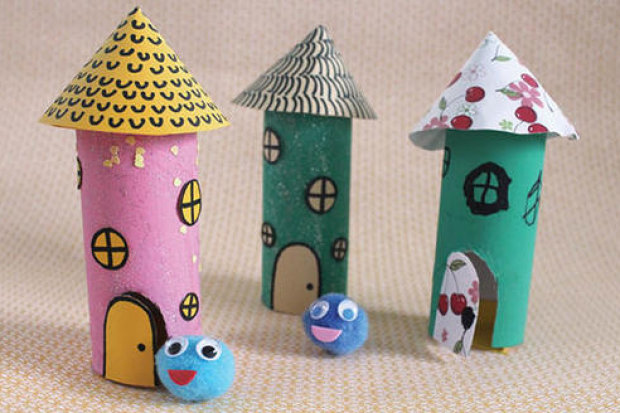
This paper roll DIY will remain a long time playmate for your kids and their friends. You can hold the making of these as a group activity where each pom pom character will signify each of the kid. Then help the children to make houses for their pom pom characters. The houses are easy to make. Take a paper roll, cut a door in the roll. Paint the roll. Also make windows in the house. Add a conical top on the roll tower. Design the pom pom character with googly eyes and a mouth. With this the character and its home are complete. You can have a long drawn game with these characters.
#3 Spider Toilet Paper Roll Craft

This is a craft item worth the Halloween vibe. Take a paper roll and cut it in half. Cut six strips from one half of the paper roll. Now paste these six strips at the bottom of the other half of the paper roll. Paint the whole ensemble in black paint. Now choose colourful and scary googly eyes for your spider. These googly eyes will add the required scariness to the spider. You can also add silver or hold glitter lines to the spider to give it a Halloween touch up.
#4 Bat Craft
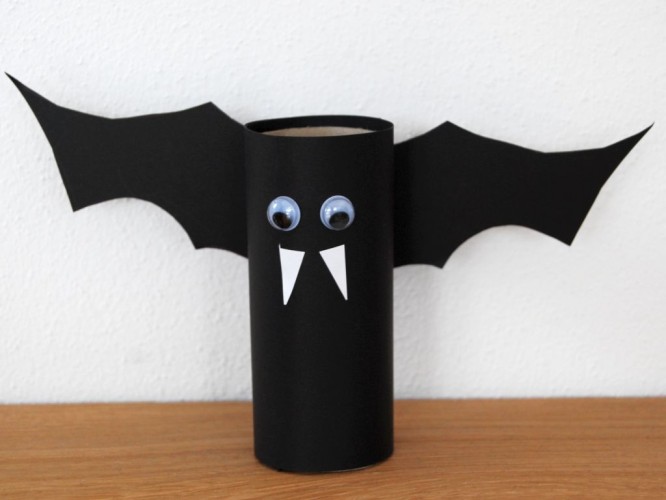
This bat fly DIY has a true Halloween vibe to it. You can create this bat craft easily. Take a paper roll and cover it with black paper. Secure the black paper onto the paper roll well. Now cut the fangs for the bat in white paper and stick them onto the black paper. Add googly eyes to the bat. Now cut some bat wings for this crafty bat out of black paper. Stick the wings at the back of the bat. You can hang this bat craft or keep it as a showpiece on the mantle piece or on the side tables.
#5 Plant Pots
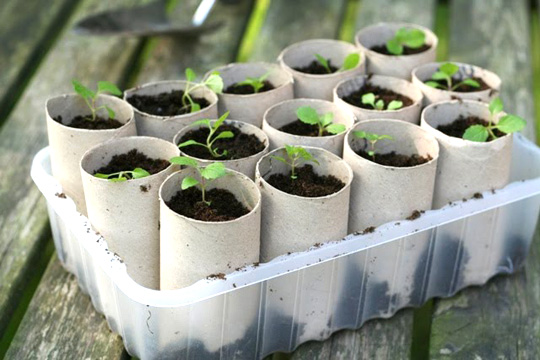
These paper rolls can also be employed to hold new saplings or help in growing out new seeds. The best part is that they are biodegradable and the sapling can be replanted in a bigger pot without much hassle. Collect some paper rolls and align them in a box. Now put some soil in the paper rolls and plant one or two seeds per paper roll. This will provide of the seed proper nutrition and space. Once the sapling grows to an enough size, you can place these paper rolls in a bigger pot directly.
#6 Glasses
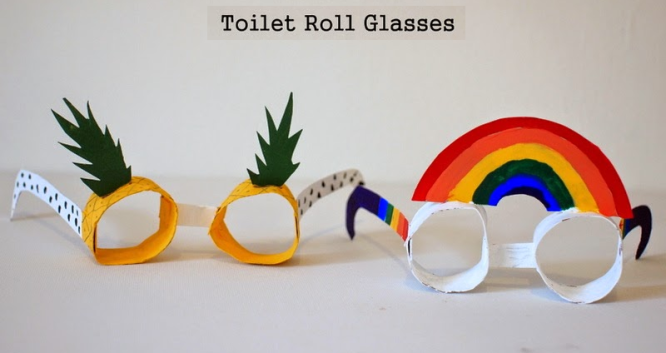
Summer calls for cool hacks and there is no cooler way to chill than to wear these cool sunglasses. Take an old paper roll. Cut the roll radially. Take two slices from the roll, cut radially. Now join the two slices with the help of a thin paper roll strip. Now cut two strips to rest the glasses on your ears. Now paint your very own sunglasses in any way you want to. You can make fruits while painting, or support the pride movement. Do whatever makes you feel chilled out.
#7 Tree
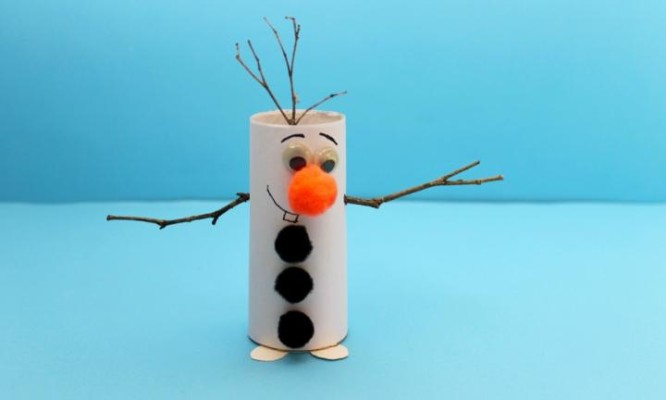
This cute eskimo will give you snow feels in the sweltering heat. This eskimo craft is easy to make. First of all cover the paper roll in white paper. Take some twigs and make arms for the eskimo. Use a twig to make a horn for the eskimo. Add black pom poms as the buttoned down t-shirt for the eskimo. Add a bright orange big pom pom as the nose for the eskimo. Add popsicle feet for the eskimo to walk around. Also stick two hoogly eyes to complete the eskimo. Your kids will love to find such a cool play mate.
#8 Lamp

This is a very unique lamp idea. Take a paper roll and make some straight slits in it in the longitudinal direction all around its surface. Now give it a fold. Paint the roll from the outside as well as from the inside. Now take a loop of hard sheet and join it to the two ends of this lamp. This will complete your paper roll lamp.
#9 Toilet Paper Roll Art & Craft
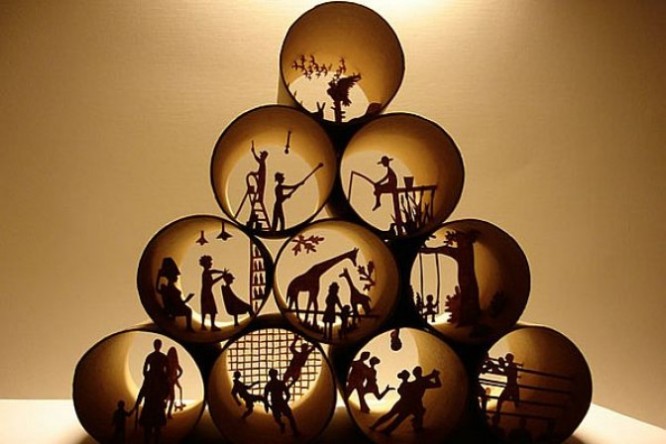
This is a very unique project. Collect many paper rolls. Join these paper rolls together. Cut small figures from magazines or newspapers, trace them on a hard stock sheet. Now stick these hard stock figures inside the paper roll. This will give an illusion effect. When you place a light behind this ensemble it will give off a great effect and will look great in your living room. You can also keep this as a centre piece at a slumber party.
#10 Christmas Toilet Paper Roll Craft

Hola! Merry Christmas! This is a great Christmas idea. Start with covering the base paper roll. For example if you are going to make a santa claus, start by covering the base paper roll with red felt cloth. Give an upper layer to form the jacket for the santa. Add a black belt and white trimming to his clothing. Add a black button in the centre of the jacket. Place a ping pong ball at the top. Make the santa’s beard using cotton. Make his mouchtache using a white sheet. Make Santa’s eyes using a sharpie pen. Make a red hat for the Santa Claus using red felt cloth and white trimming. Add a small white pom pom to complete the look. You can make other characters such as the elves, reindeers, eskimos, etc. You will surely have a blast with all these characters this Christmas.
We hope you loved these adorable toilet paper roll DIYs. We will come up with more such content soon. Do give your valuable feedback in the comments section below. Keep learning and creating with K4Craft!






Superb
Thanks Deepa 🙂