Beat the summer with this cool and fun gardening idea’s. Plastic bottles can sometimes be an awesome material for DIY creativity, here we bring to you Eight Awesome Plastic bottle gardening hacks which you can try. All you need is a corner around the balcony or even a small space near your window for hanging.
No matter how hard we try to avoid these plastic dude’s they always remain unused at our homes. If you love DIY and plants this is a perfect article for you to try on some Green thumb. This requires minimal effort with maximum outcome with a really cool and decorative effect. It is a really eco-friendly idea to use these recycled plastic bottle to introduce some greenery in the Small urban areas around your home. Be it indoor or outdoor these idea’s work perfect for every home to give a creative effect plus save the environment with the plastic disposal hazard.
Self – watering Plant System | Waste plastic bottle Hack
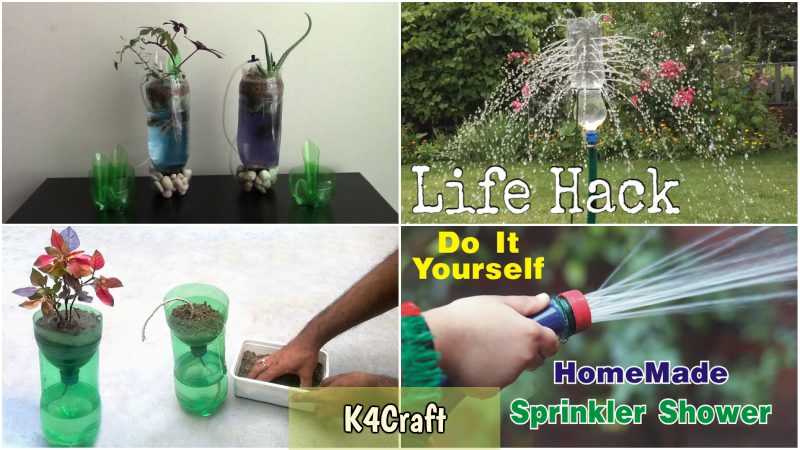
Are you planning for a long vacation or being busy with your schedule in the mean while worried about your green friends getting wither? Here is an amazing life hack, a self-watering system for your plants using a waste plastic bottle. Before getting into the DIY let’s learn about how this works.
A wick is generally used here to join the main plant and water reservoir, this allows a connection between the two and is highly used by the gardeners who are unable to look after their plants for few days. This hack is really beneficial and is sometimes used to provide liquid nutrient to the plant.
Cut down the amount of time you need to water your plants and utilize this self-watering planter which also avoid your plant to get waterlogged or smelly hence avoiding fungi and disease.
Supplies you will need
- Plastic bottles – 2
- Cotton or polyester rope
- A knife
- Scissors
- Crushed or expanded Clay
- Plastic bottle cap
Directions
- Remove the label on the either side of your bottle
- First cut the plastic bottle in to half such that the base part is good enough to hold the water, repeat for the other bottle
- Drill a hole in the bottle cap , Now cut the rope in 20 centimeters of length using scissors and slide this into the bottle cap
- Fix this to the upper half of one bottle cap and fill the water in the bottom half of it
- No place the upper part upside down in the lower part and fill sand in it
- Insert a small tree carefully and you are done!
PS: You can use lettuce, spinach and colorful flower trees
Garden Sprinkler Shower | Plastic bottle cap Life hack
The main purpose of this is to water small plants in your home / garden. With this homemade sprinkler shower you can easily water small plants without causing any damage to the branches and roots and also your children will love watering the plants, it’s so simple to make and easy to install on your plastic pipe.
Read on to know the complete process of how to make cheap garden water sprinkler shower by means of a plastic bottle at home!
Supplies you will need
- Plastic bottle
- Plastic bottle cap
- Saw ( cutting plastic bottle ) / Sharpie
- Needle / Iron Nail ( to make hole in cap )
- Candle
- Hot glue gun
- Glue stick
Directions
- Cut off the upper part of the plastic bottle to get the trim of the plastic bottle
- Now remove off the body part and take the plastic bottle cap
- Drill some holes on the bottle cap for sprinkling water, for this step you need to light up a
- candle and heat a needle, Make holes on the plastic bottle cap while the needle is still hot
Take your plastic pipe, after cleaning up the surface gently put hot glue around and attach the plastic bottle cap trim using the hot glue gun
Now place the holed bottle cap on the pipe head and you are done!
Swoosh! Swoosh! Your kids will love to water plants daily now.
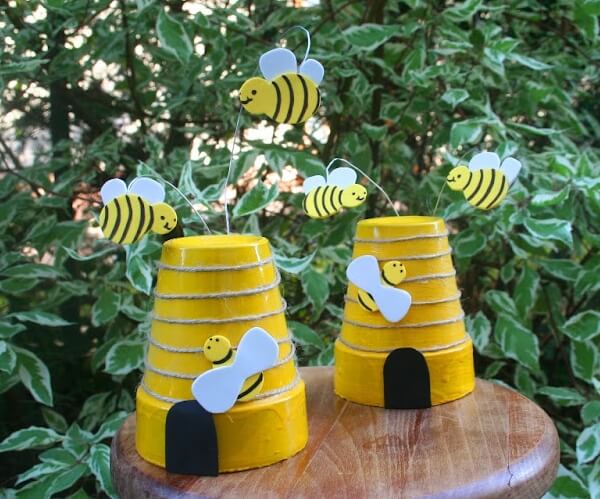
Creative Honey bee Craft Decoration | funny Décor from recycled waste material
You probably want to see your garden with all the colorful butterflies flying around. Well not butterflies but we probably can make a Funny honey bee bottle craft to decorate your garden. It is just spectacular and cool to look at.
Let us create this DIY – Funny Honey bee décor craft using recycles plastic bottle. Read on to know more.
Supplies you will need
- Bottle of yogurt
- Acrylic paint
- Brushes for paint
- Water bottles ( for the wings )
- Black marker
- Toothpicks
- Velcro
- Beads
- Knife
- Scissors
Directions
- Clean up the yogurt bottles and remove the upper cover from all sides
- Paint it all yellow and wait till dry
- Now mark strips of black all over the bottle
- Print out or draw the template of wings, place it on the plastic bottle and add some strips on it
- Make mustache out of toothpicks and beads and color them with black paint. Attach this to the head of the bee
- Cut out small circles of Velcro and stick them to the bee’s body and it’s wings
- Let’s give your honeybee a face! Draw some funny patterns using a black marker
There you go! Our honey bees look pretty good out there in the Sun 🙂
Garden irrigation system | Life hack with plastic bottles
Get smarter with your watering work in the backyard. Sprinklers are costly and also requires some high amount of care. Instead build your own water sprinkler with the help of a recycled waste plastic bottle at home. Make your own garden irrigation system using this life hack and enjoy the view of water spluttering on your plants.
Supplies you will need
- Plastic bottle
- Drilling machine
- Clamp
- Brass fitting
Directions
- Clean up the coke bottle and remove the side sticker
With the help of the drilling machine make holes along vertical all over the plastic bottle - Now adjust the brass fitting over the cap section and insert this into the water pipe
- With the help of a clamp allow the sprinkler to stand, this will help your sprinkler to give support
Tada! Your own DIY garden sprinkler is ready to use
Home décor Plant ideas | plastic bottle hack
In this we are going to learn about plastic bottle craft. Let us build a tree tub, plant pot or a wall hanging vase. You can use this for any purpose of decoration. Read on to know more
Supplies you will need
- Plastic bottle
- Acrylic paints ( Blue, red )
- Paint brush
- Glue
- Yarn (various colors)
Directions
- Take a clean plastic bottle and rip off the label and clean the surface
- Cut it into half, we are going to use the top and bottom part for making two different vase
- Now take one part and paint it all blue with the help of a paint brush
- Apply a round circle of glue and wind the yarn to make flowers
- Similarly make some leaves and colorful pattern ( the creativity is all in your mind )
- Repeat the same steps with other side of the bottle
- Fill it with soil and plant and finally make 2 holes on either side for grip to hang
- Hang it near your balcony or in the corner of an empty hall
Garden planter out of waste bottle | fun gardening
To make this garden planter the directions and supplies are provided below
Supplies you will need
- Waste plastic bottle
- Scissors
- Marker
- Acrylic paints
- Paint brush
- Needle
- Candle
- Rope (plastic or jute)
Directions
- Clean and remove the label from the water bottle and wash it thoroughly both from inside and out
- With the help of a marker, mark the shape of square from the neck to the base for the soil to insert
- Now heat the needle up and make holes from the neck and around the base for giving a balance for the planter to hang
- Color it using acrylic paint and brush and draw some polka yellow dots for a brighter look (
Note: don’t go to the next step till this paint dries which will take max of 1 complete day )
Insert the rope through the holes and fill the inside with soil and seeds.
Moose planter | recycled craft for kids using waste plastic bottle
Supplies you will need
- Plastic bottle
- Paints
- Paint brushes
- Ping pong balls
- Goodly eyes
- Scissors
- Marker
- Hot glue
- Cardboard
Directions
- Cut the plastic bottle square from the middle and attach this with the help of screw on the cardboard
- With the help of glue gun attach the ping pong balls and goodly eyed on the head of the moose
- Cut out the shape of ears from an another plastic bottle and attach on the head of the moose
- Paint the nose with all black and fill the sand inside
- Plant the tree directly with the pots ( radiator plant, prayer plant, croton ) any other of your choice
Aquaponics planter | DIY plastic bottle hack
Plastic bottle aquariums are in the trend now. Let’s see how to make one.
Supplies you will need
- Plastic bottle
- Saw
- Knife
- Sandpaper
- Scissors
Directions
- Remove the sticker from the bottle, we can see 5 mounds on the bottom side
- Slice off the mounds with a saw to make small holes on it
- Take the help of scissors to remove the excess parts
- With the help of sand paper clean off the surface
- Cut the bottle in to half
- You are done! Place it on the top of Aquaponics or as a regular planter.
Read More
- DIY: Elastic Journal Penholder Making Tutorial
- Kasavu sarees of Kerala, Each Woman of Kerala have at least one!
- DIY : Easy Flower Making Step by Step Tutorial
- Simple Diwali Card Making Ideas to Celebrate Diwali
- DIY: Learn to Make Beautiful Candle Holder from Plastic bottle


