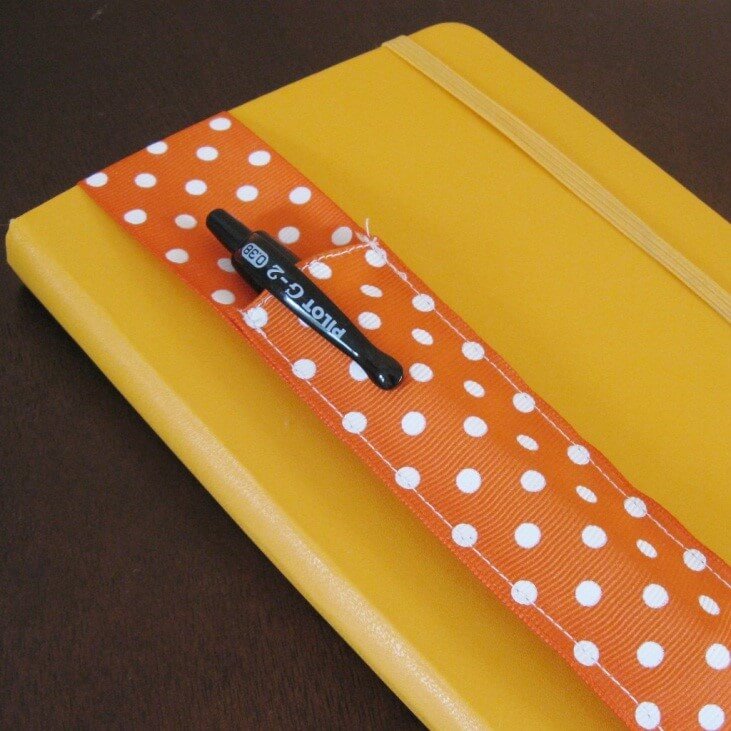
This tutorial is dedicated to all the creative heads over there. This is for those people who always carry a sketchbook for spot sketching or for those who love writing whatever the see and feel. For they know how important is to find a pen of their requirement at that perfect moment. This penholder is very useful that they can always attach it with their journal or sketchbook which they always carry with themselves. To make this you just need to spare 15 to 20 minutes of your valuable time.
Things You May Need
So, let’s see what all you need to make this craft:
- A fabric with small designs or patterns on it. You can choose a material of your choice, it’s better to choose cotton, as you can find amazing designs and it’s easy to manage while stitching.
- Thin fabric of same dimension for interfacing (optional). If you are going to use a thicker fabric then you don’t need to use interfacing.
- Elastic with 30cm* 1 inch dimension
- Scissors
- A measuring tape
- Sewing machine
Steps
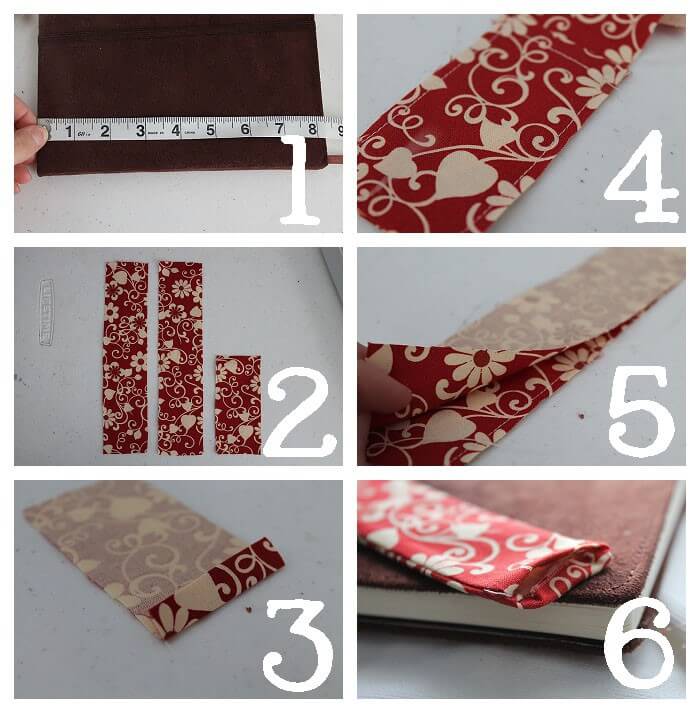
- First, measure your notebook or sketchbook or your journal using a measuring tape.
- According to the journal’s measurement cut out two strips of the fabric with 2 inches width. The length of the strip should be slightly more than your journal’s length. Now, cut out another strip with same width but half the length of the first two strips. For example, if the length of your first two strips is 10 inches, then the third strip must be of length 5 inches.
- You can choose a thinner fabric with the same size of your main fabric for interfacing if and only if your fabric is very thin to hold your pens or pencils inside them. In that case you can stitch and attach this interfacing material under your fabric to give it an additional support. Please skip this step if you don’t want to use interface.
- Now, fold all the four sides of your smallest strip over a ¼ inch and press it down with a hot iron. This is to make pocket for you pen holder. Top stitch over the folded edges.
- Keep them on the top of one of the longest strip that you have already cut. Sew two sides attaching them together as shown in the picture. Don’t sew the top and bottom edges. (Place the pocket piece over the lengthiest strip such that you should leave sufficient and equal space on all three sides for further stitching)
- Keep the other longest piece on the final piece. Here both the pretty sides should come together as shown in the picture. Now sew both sides. Again, don’t sew the top and bottom edges.
- As the pretty sides of your fabric are hidden inside, you can pull them out. Tuck both the shortest edges inside itself over a ¼ inch and press it with a hot iron.
- It’s time to use elastic for making your penholder now. Insert the ends of elastic to each side and sew with the edges together. Repeat the same on the other side.
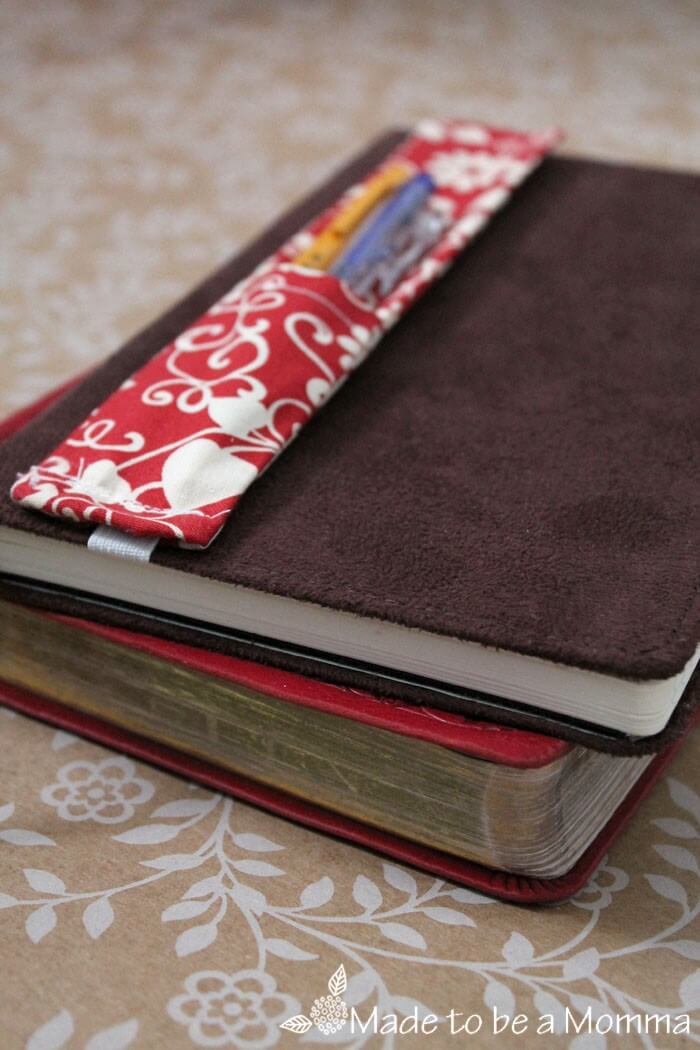
Your elastic journal pen holder is ready to use now.
Tip 1: choose fabric designs or patterns that are smaller because you are making a small piece of craft.
Tip 2: try to avoid using interfacing by not choosing a very thin fabric.
For a better look, press it with hot iron. You can even make a lid for your pocket with the same fabric if you feel your pen is sliding away from the pocket.
Keep creating with K4craft!