When I moved into a new apartment last week, I had a bunch of keys that were hung on a single ring. It was very difficult for me to figure out the key and its corresponding slot. As I’m a hardcore craft lover, it didn’t take another second to search for creative keychain tutorial. Every day I made one keychain for each key. And it gets rid of my daily confusion. I made key fobs using fabric. Initially I thought it would be little difficult as I had to use clamps and prongs. But when I started making the key fobs it was more of fun. It is very easy to make and I recommend it to everyone to try making this at least for once.
Let’s check out what are the materials needed for making this amazing Key Fobs:
- Colorful piece of any fabric
- A metal hardware just like one shown in pictures
- Cutting plier (to tighten the clamps)
- Stitching machine
Instructions
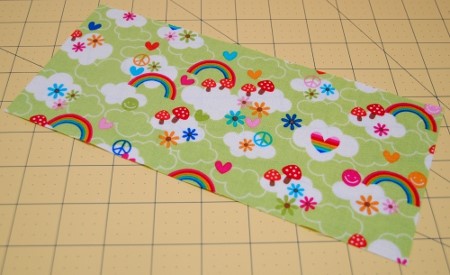
- Cut the piece of fabric in the dimension of 10 inch * 5 inch. You can cut the fabric in any size you want to, depending upon how you are using it. If you want to slide it around your wrist you can increase its length measurement while cutting.
- You can iron the fabric if it is necessary. But while pressing it with hot iron you can also take thin fabric for interfacing. You can use interface if your fabric is too thin and to make it strong. Skip this step if you don’t like using interfacing.
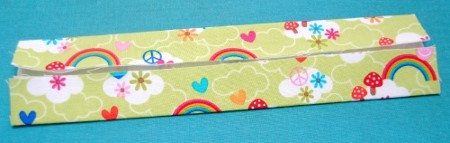
- Fold the fabric in half so that wrong sides should come up together (long sides should be parallel to each other as shown in the picture).
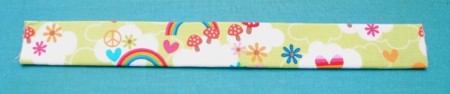
- Now again fold the fabric strip in half from the middle and press it gently with the hot iron.
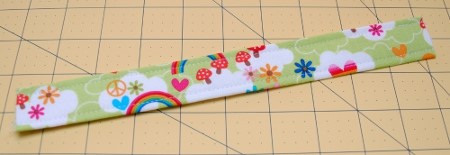
- Top stich the both the longer sides leaving a small space of ¼ inch at both the edges.
- Fold the stitched fabric strip in such a way that both the unstitched short edges come together.
- Now it is time to use our metal tools. Take the cutting plier and wrap its teeth with any thin fabric. This is to make sure that the plier should not leave its teeth mark over the hardware while tightening. If you have extra material left out after interfacing, use them.
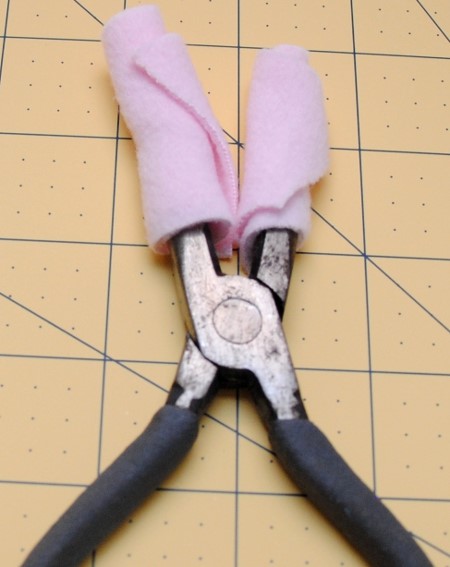
- Slide the unstitched edges into the mouth of hardware.
- Press the hardware tightly with the cutting plier to close its mouth.
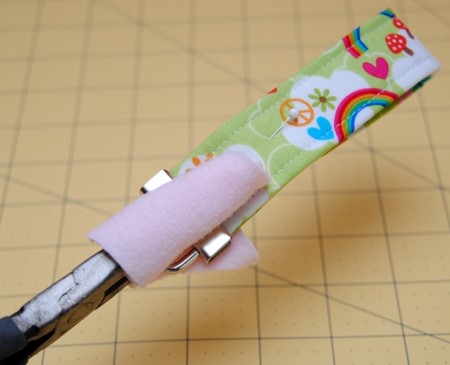
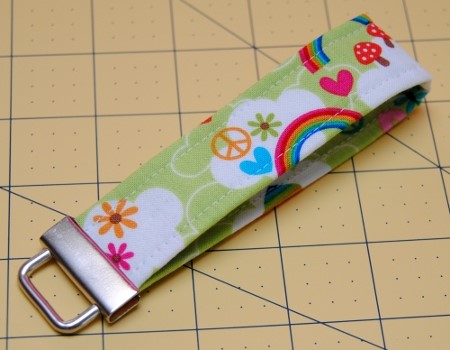
- Attach a key ring at the knob of the hardware.
That’s it folks!!
You can use this for yourself or can even present it as a gift to your beloved ones.
For the hardware, it is available online or can buy from any tools and hardware shops nearby your habitat.
Tips
Tip1: Choose fabric designs or patterns that are smaller because you are making a small piece of craft.
Tip 2: You can also attach very thin strip of lace at the edges and can top stitch to make it more attractive.
Thanks for visiting our website.
Keep creating with K4craft.
(Image source: fishsticksdesigns.com)