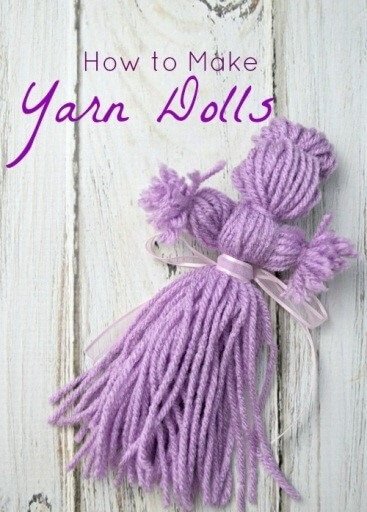
Remember those times when we used to play with the toys made by ourselves. I swear that was the best time when we all used our talent and creativity to the fullest just to play with those self-made toys. But today’s generation might have not known all those tricks we did during our good old days; like to make dolls with toffee wrappers, torn clothes, cotton balls and so forth.
Let these coming holidays give them opportunity to experience the same fun we had during our childhood. This tutorial will help the kids to make dolls out of yarn. Yarn dolls are very easy to create and fun as well. But be there as a helping hand for them while holding and cutting the thread. They can make dolls of different sizes and colors. They can even create their favorite cartoon characters out of this yarn thread.
To make yarn dolls you need:
- Yarn
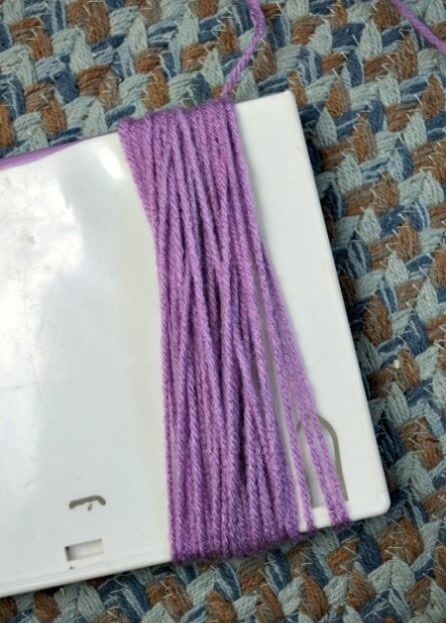
- A book about 7 to 8 inches width. You can also use any card board piece instead of a book.
- Scissors
Let’s Start
- Start by wrapping the yarn on the book like around 50 times. Keep track of the tail of your yarn because you need them to tie with the other end at last.
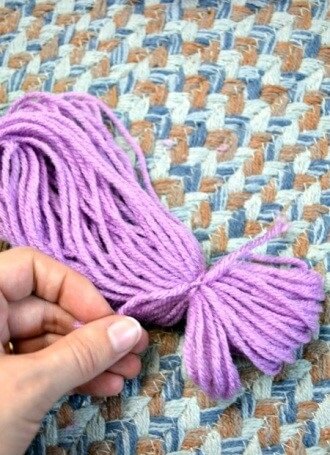
- So once you finished wrapping, as mentioned in the above step, make a knot at the top with the ends.
- Now, slowly pull your yarn from the book. Do not take your hands off the loop while doing this.
- Hold the loop, you made, in the choke position. This makes the head of your yarn doll.
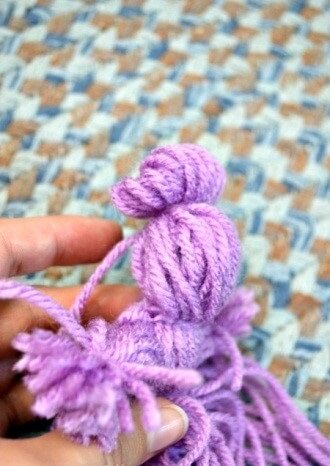
- Take both the ends of the yarn and tie them around its neck as tight as you can. That way you get its head portion.
- Now it’s time to make other body parts. Therefore, cut down the loop ends at the bottom of your loop.
- Start making its arms first by splitting 2 sections from the bulk. It should not exceed more than 1/6th of the bulk from each side of the doll.
- Cut three small strings from the same remaining yarn to make other body parts.
- For the arms, now take 1 string and tie them around at the end of the arms to make hands as shown in the picture.
- Repeat the same for the other hand also.
- Right under the arms take the third string and tie them across tightly to make the waist line. This will also help to hold the doll in place. If you are making a girl you can leave the bottom part free as it will look like her dress whereas, if you are making a boy doll, you have to spilt them into two equal halves and tie them at the end to make legs. This way it will look like his pants.
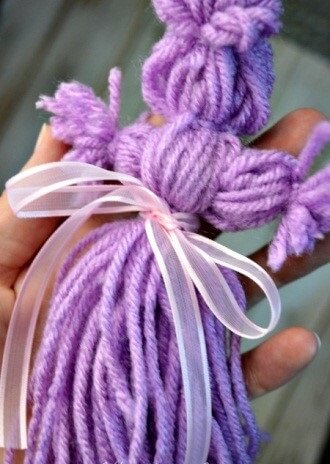
- You can also make a bun at the top of her head by again gathering a small part of the loop above the head. Tie them tightly. Now it looks like a girl in gown with a hair bun at the top as in the picture. You can trim extra length of yarn if you find any threads hanging somewhere.
- For a better look, take a small ribbon, and tie them across the waist line where you already tied before.
Yarn doll is ready!!
This is the simplest way of making yarn doll. You can work on it additionally to make it more attractive.
- You can also braid your doll’s arms.
- You can take another color of yarn, make very small loop. Then cut the loop edges and place them over a string of yarn. Later tie them around the waist to make the gown colorful.
- You can also stick paper piece to make its face. Paste some googly eyes also if you have any at your home. Otherwise draw on them using markers.
- Make many dolls out of different colors of yarn and you can also hang them all on any wooden stick to decorate you room.
Make them in different styles and sizes. This is definitely going to be fun for you and your kids as well.
Image source: www.littlehouseliving.com
Thanks for visiting our website. Keep creating with K4craft.