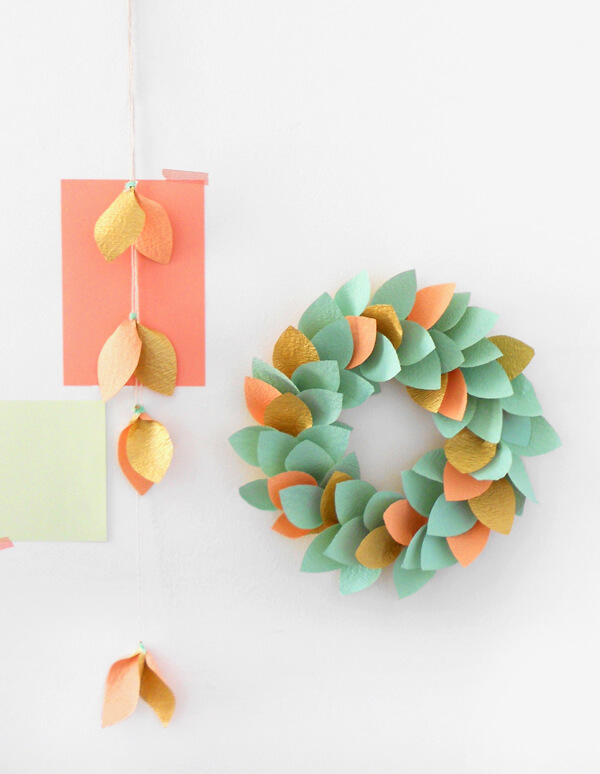
Christmas is approaching quickly and the moment we know it will already be at our door steps that’s why it’s time to get your craft on! This year I am thinking of crafting a paper wreath with pastels and gold. The wreath is easy to make as the raw material can easily be found in your houses or craft stash or you could simply buy them at your nearest store. So while searching for the perfect raw material I stumbled upon a beautiful Japanese paper and the color was exotic so was the wreath and after that I made a garland with the left over leaves.
Materials
- Wrapping paper you will need a couple of them or depending on how many colors you would like in your wreath and if you don’t want to use wrapping paper, you could use old magazines, newspaper, comics or scrap paper not only will it save money but it will also help you to remove your recycled materials and now a days with “Swach bharat “revolution ongoing recycle material is the best option.
- For my wreath I am using a double sided white sheet but it’s not compulsory.
- 1 large and one smaller plate, salad bowls or similar to trace around.
- Lightweight cardboard -A cereal box or the side of a lightweight box It will be hidden so it doesn’t have to be pretty. The size you’ll need will depend on the size of your bowls.
- Scissors
- Stapler
- Sticky tape
- Fevicol to hang the wreath

Method
Firstly you will need a plate or bowl, a large bowl of 34cm and a smaller one of 21cm. The sizes of leaves are needed to be adjusted in case you don’t have the exact sizes of circles, after finishing the wreath it will be approximately around 42cm, which is a great size to hang on my door.
Place a large bowl upside down on the cardboard and trace around it. Then put the small bowl upside down for the inner diameter of the wreath and trace it again.
After tracing both the circles now cut the outer circle carefully using a scissor (if you are less than 13 years old than adult supervision is necessary while handling scissors), after cutting the outer circle now cut the inner small circle you don’t have to precise as on later stage it will be hidden after cutting the inner circle you will get a donut shaped cardboard.

Now let’s get started with the leaves, size for a single leaf is about 12.5 cm long cut it out to use it as template. I used about 64 leaves (the number may vary on depending on the size of the wreath but according to our wreath size earlier 64 is enough).
Roll the bottom of the paper leaves one by one so that they overlap each other and repeat the process until you have cover the donut circularly now the paper should be overlap in such a manner that neither the donut nor the staples are visible from outside, don’t rush the process otherwise the wreath will not look good.
Continue stapling the leaves in place as you work your way around the circle. I found it useful to stop often and hold the wreath at arm’s length so I could see the overall shape that was being formed. Make sure the tips of your leaves follow the curve of the wreath base.

When reaching at the end you will see that the leaves will come to a complete overlap at the end and then you will see that the stapled portion of the leaves are pushed inside while the curled part of the leave will fan outside.


The wreath is very light and can be easily hung using Fevicol 4 to 5 drops will be enough or you can also use sticky tape.
Leave a Reply