Hi Friends!!!!
Happy to post my lovely quilled fairy !!!!
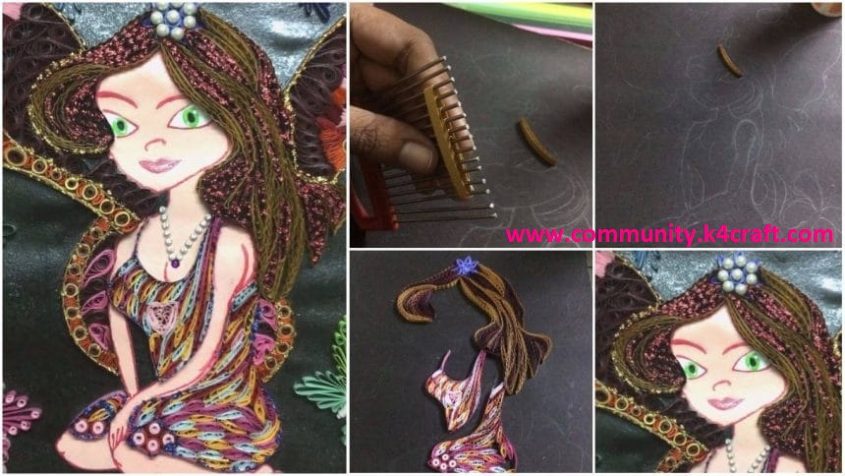
 Step 1: Sketching Image
Required Material:
- A Thick Black sheet
- Quilling paper strips (5mm,7mm,3mm).
- Quilling needle &Comb.
- Glue, Glitter, pencil.
- Pearls, Buttons, Gold Ribbon etc..and some stones.
- Acrylic colors (portrait pink, green, maroon, white).
- Gloss Varnish.
Let us begun, In a black sheet u can transfer or sketch the image of fairy ..U can make any image or use printouts for better representation.
Step 2: Filling Up Dress and Hair

Use 5mm strips to fill up fairly and 3mm for butterflies.I used maroon and gold color for hair and a flower in lilac color.
For designing hair, I used paper crimper for that waveform pattern.Sectioning gives u great look instead filling with the same color.And I chose white, pink, yellow, red colors and made small tear drops for dress portion.Multicolor would be pretty attractive I hope.
Step 3: Designing Wings


Wings
U can either make wings separately and attach else make an outline and fill up.I choose the later, with tear drops and zinc-zac paper folds filled up the area of wings and inserted tight coils which form a boundary.
Step 4: Butterflies

To make butterflies I used quilling comb and inserted tight coils for wings to look apart ..And finally, placed some buttons in the center.
Step 5: Glitters &pearls


Then I applied glitters to margins of wings and dress of fairy to enrich the details.Colored with portrait pink the features of fairy.I decorated the Flower on top with pearls and stones for the chain.
Then I coated it twice with varnish for a glossy look and to preserve my work.And use a gold satin ribbon to make borders for sheets u can frame it either.Now hang it in your living room and get a visual treat which means a lot to your effort.
courtesy: Saranya90
Comments
18 responses to “How to make quilling paper fairy wall hanging”